Part 1
The Basics
Navigating the Software
One of the biggest hurdles for new cashiers is learning where to find everything. Hopefully this introductory guide to Kroger's 2023 register software does just that.
Navigating the Main Page
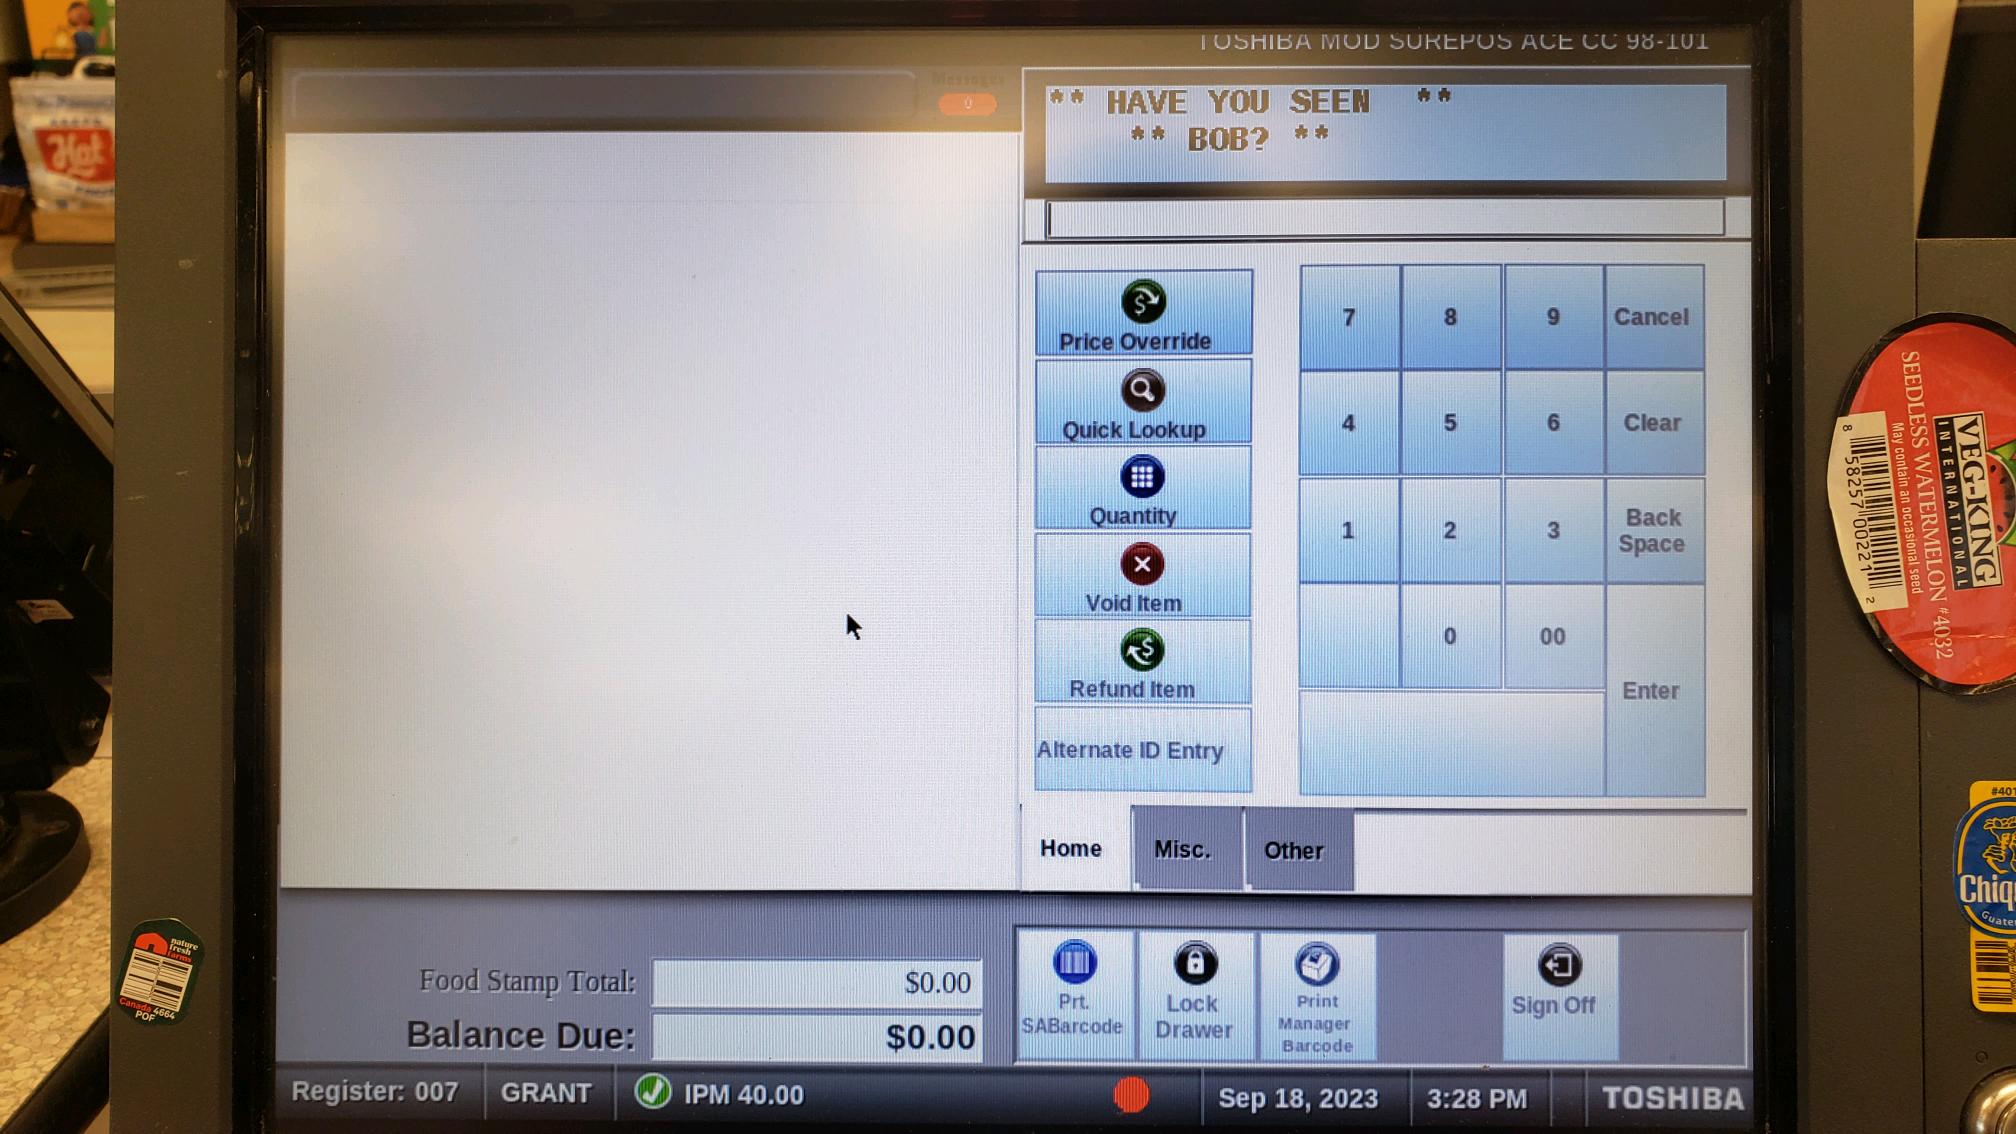
Here we are at the main page. Get used to it since you'll be seeing it quite a lot.
On the left side of the page all the items, coupons, and sales are displayed.
On the right, we have all of the user controls. From the top we have:
- Price Override
- Quick Lookup
- Quantity
- Void item
- Refund item
- Alternate ID Entry
Price Override
Using price override you can change the final price or the price per pound of an item. First press the "Price Override" button to the left of the keypad, then type in the price. Type in the new per pound price for items like weighted produce or meat-dept products, otherwise type in the final cost.
Next, scan the item. It will then prompt you to enter a reason for the override:
- Make It Right - If your not sure what to use, just use this.
- Digital Coupon - If you need to manually put in a digital coupon discount use this option
- Raincheck - Use only if the customer has a Raincheck. Once the order is complete, open the drawer from the Misc page and put it with the checks and stamps.
Note: this can also be done from the gear icon of a previously scanned item.
Quick Lookup - Finding Produce
Quick Lookup is a tool that allows us to search for produce by text and by category. It also includes other items like stamps in the Other Items category. First we'll look at the text-search.
Text Search
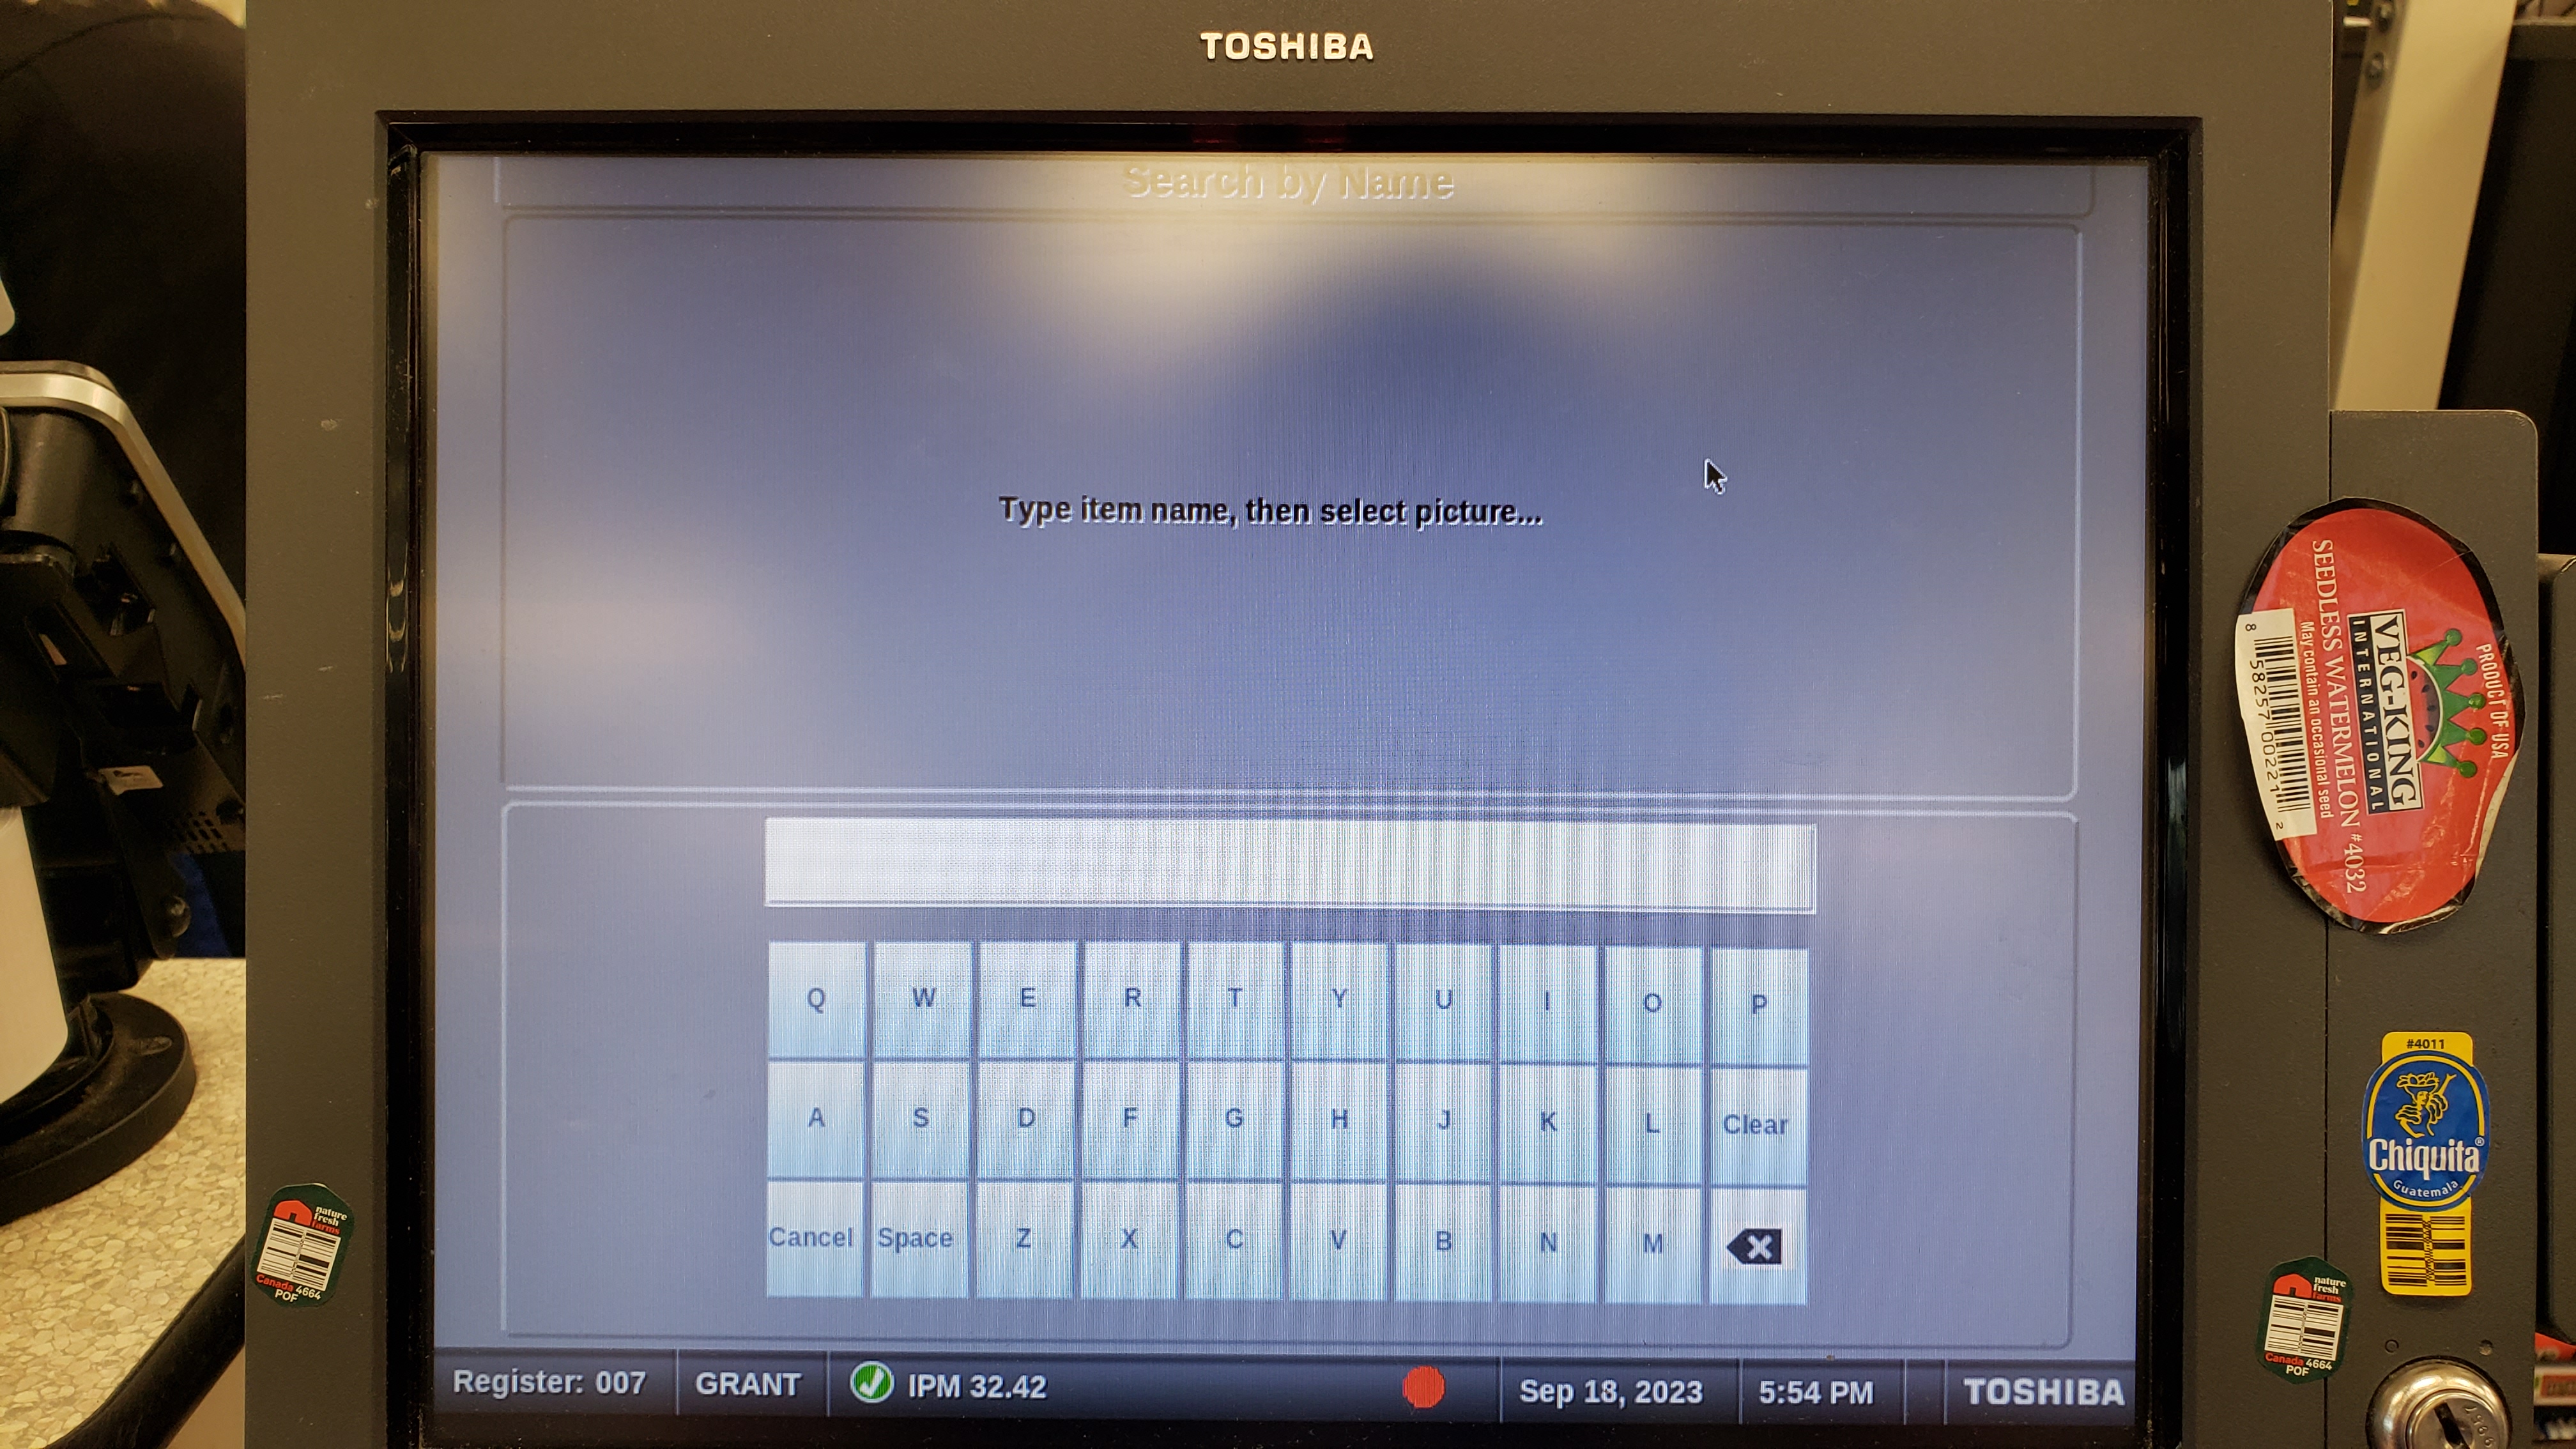
Text search allows for users to search the produce database by the name of the produce. Once a few characters are entered, it will start displaying items, which can be selected with a press.
Category Search
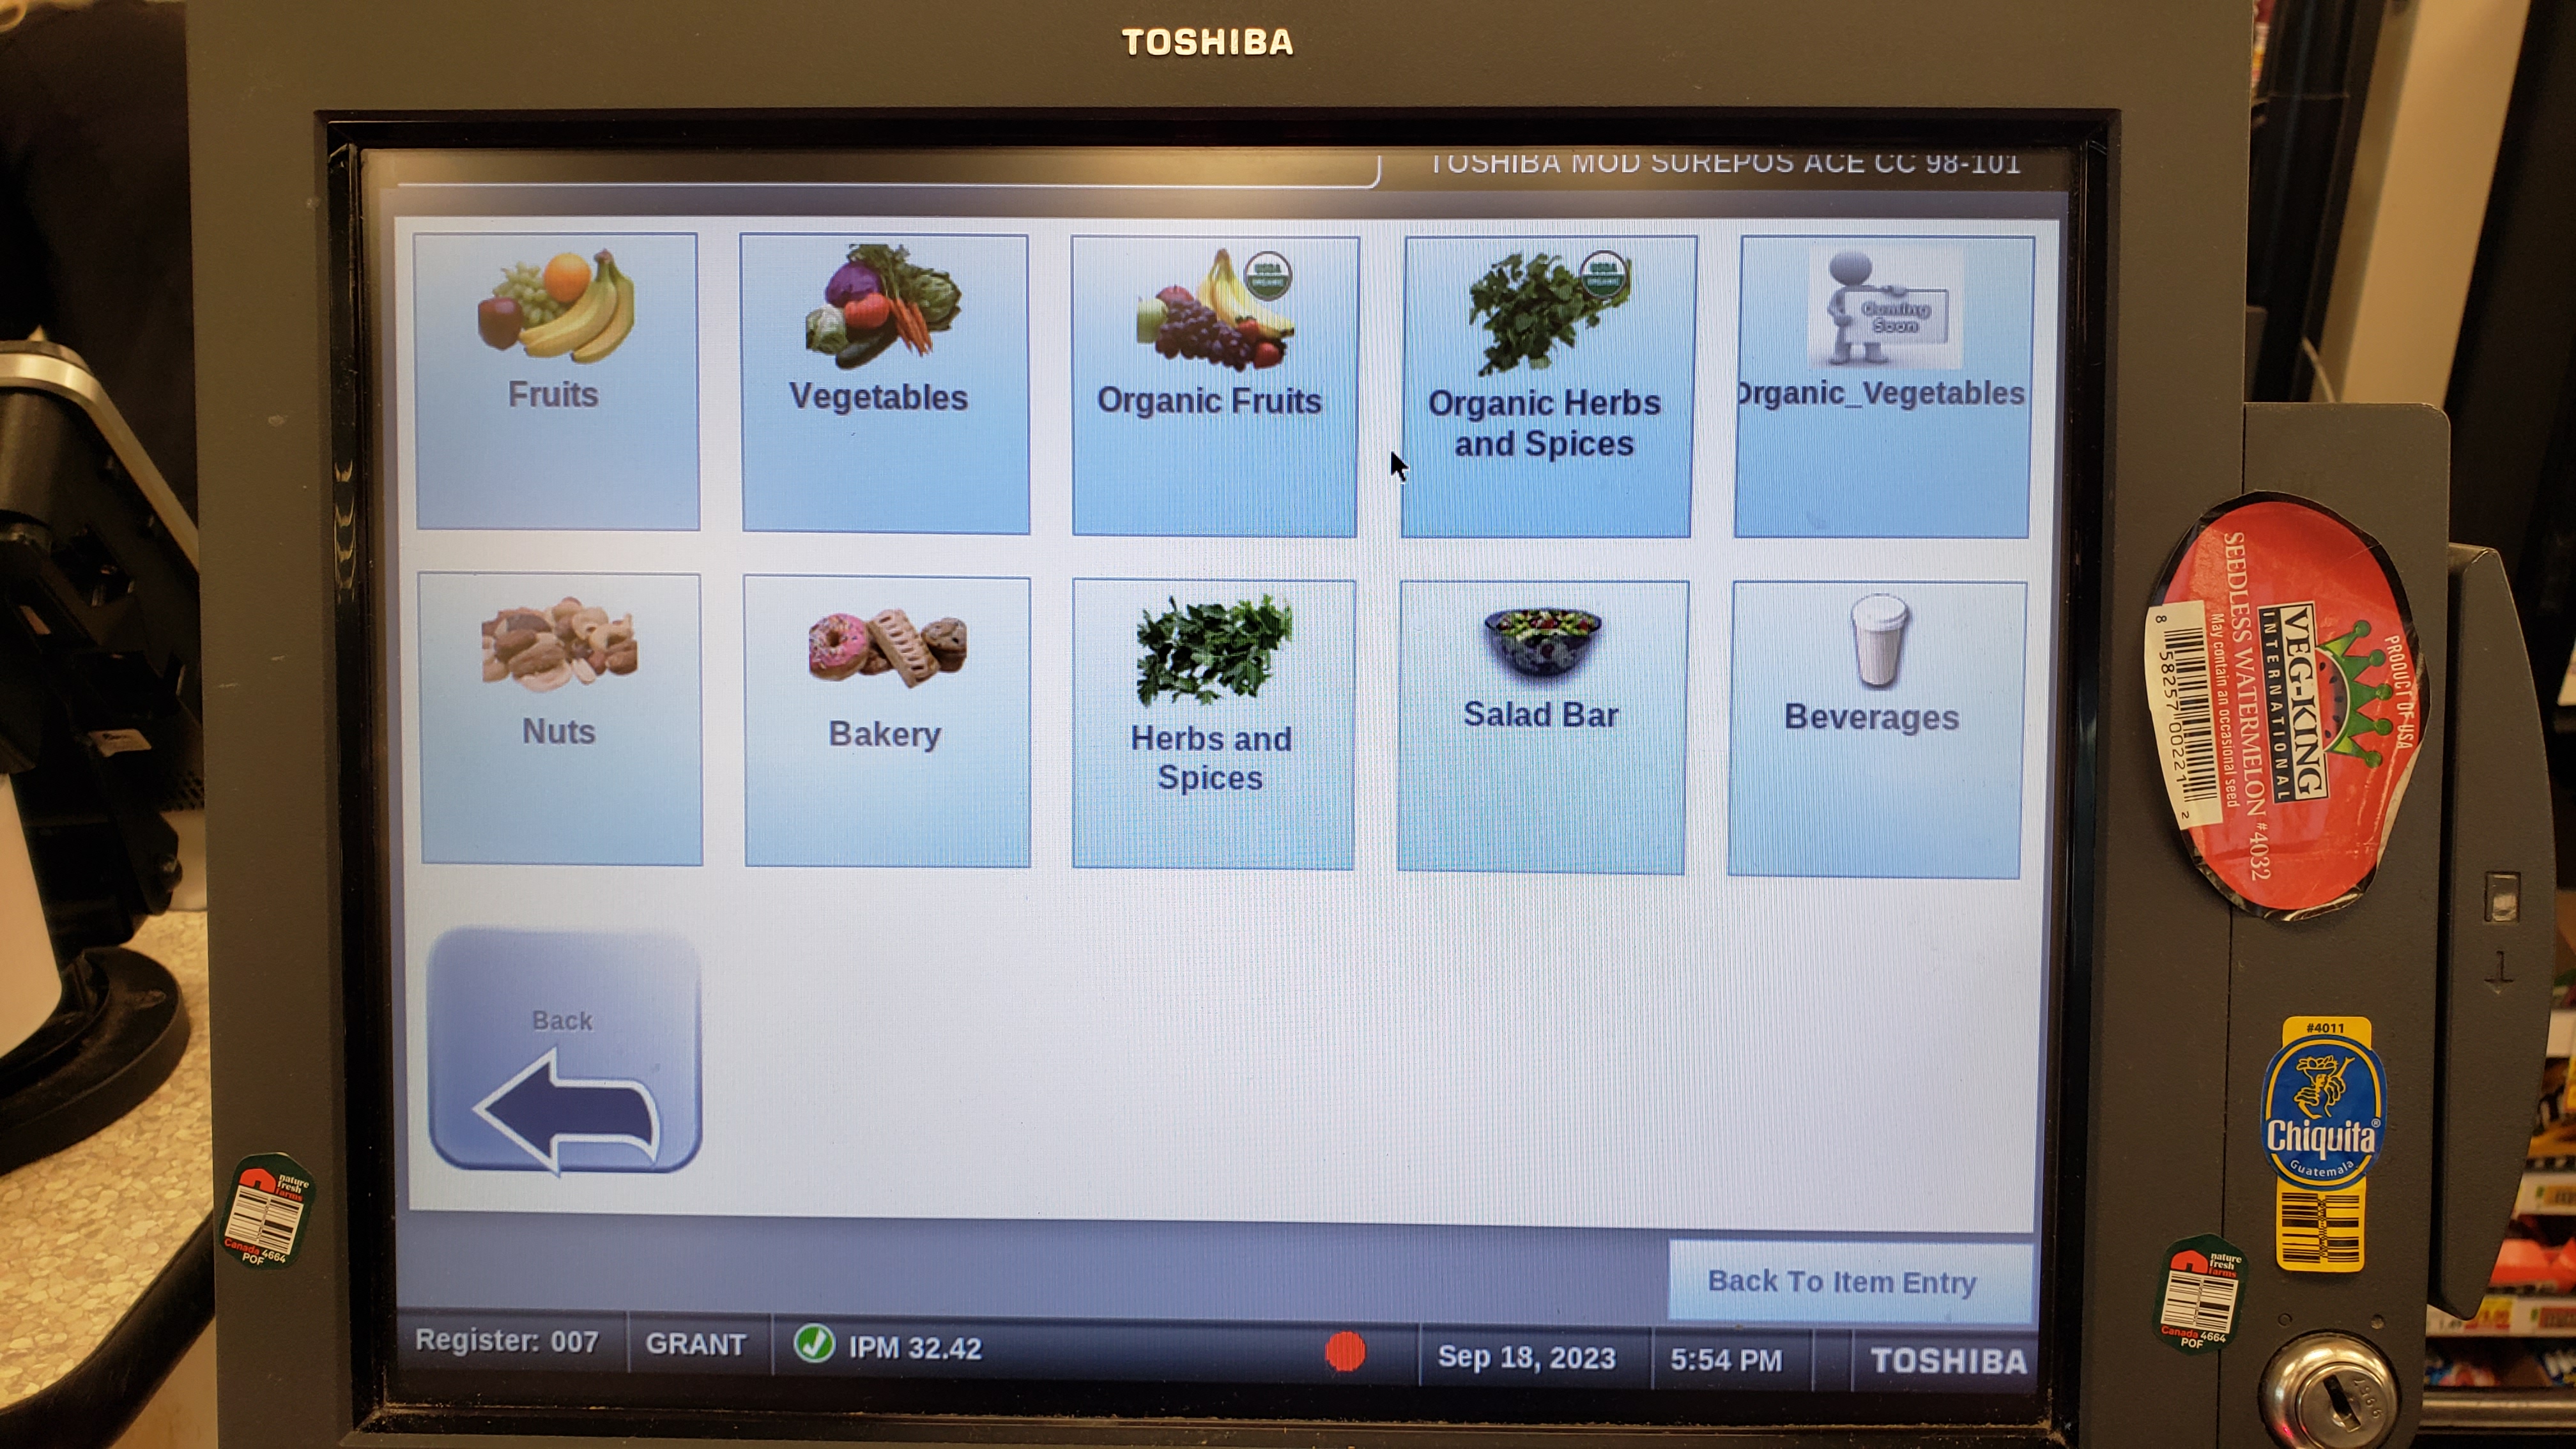
The Category Search function is another way to find produce as well as bakery items. This method is somewhat slower than the text search. However, for whatever reason, there are items in category search that aren't in text search (for example Yellow Squash). Further, this is the only way to access bakery codes.
Quantity
Using the quantity key, you can quickly input 12 or more items. First hit the quantity key, enter the quantity, then scan the item. On top of convenience, it will also significantly boost your IPM.
Voiding Items
Using the void key, you can void an item you've already scanned, though you will need its barcode again. Simply, press the void key then scan the item, this will void the item along with any of its discounts.
Refunding Items
Always ask a manager before using this. In general it is better to let them do it at the front desk.
Using the refund key you can refund an item by adding a negative balance. If the customer wants cash, choose cash, and give it to them similar to giving cashback. If the customer wants it loaded onto an EFT card, run an EFT payment just as you normally would.
Alternate ID Entry
Using this function you can manually enter in a phone-number (alt-id) attached to a customer's plus card.
Alternate ID Entry
The customer can also do this themselves from the pin pad using the alt-id button on the touchscreen, so long as they have not yet put in an EFT card. If they have paid, they can either cancel the payment or have you input it on your end.
Navigating the Main Page 2
At the bottom of the home page you'll notice several other important keys:
- Prt. SABarcode - Prints out a Self-Checkout barcode after prompting for your credentials
- Lock Drawer - Locking the drawer is extremely useful. It keeps the register secure if you are otherwise disposed. Further, it pauses the IPM measurement, resulting in huge gains if used properly. It can be done at any point in the order, though items will not scan.
- Print Manager Barcode - Prints out a manager override. Do not use your managers' credentials without their consent; they will not be happy.
- Sign Off - Signs you off the register
- Total - Appears to the right of sign off. Once an order is started, you are given the option to total it, which brings you to the payment options, pauses the IPM counter, and adds any applicable digital coupons.
Navigating the Misc Page
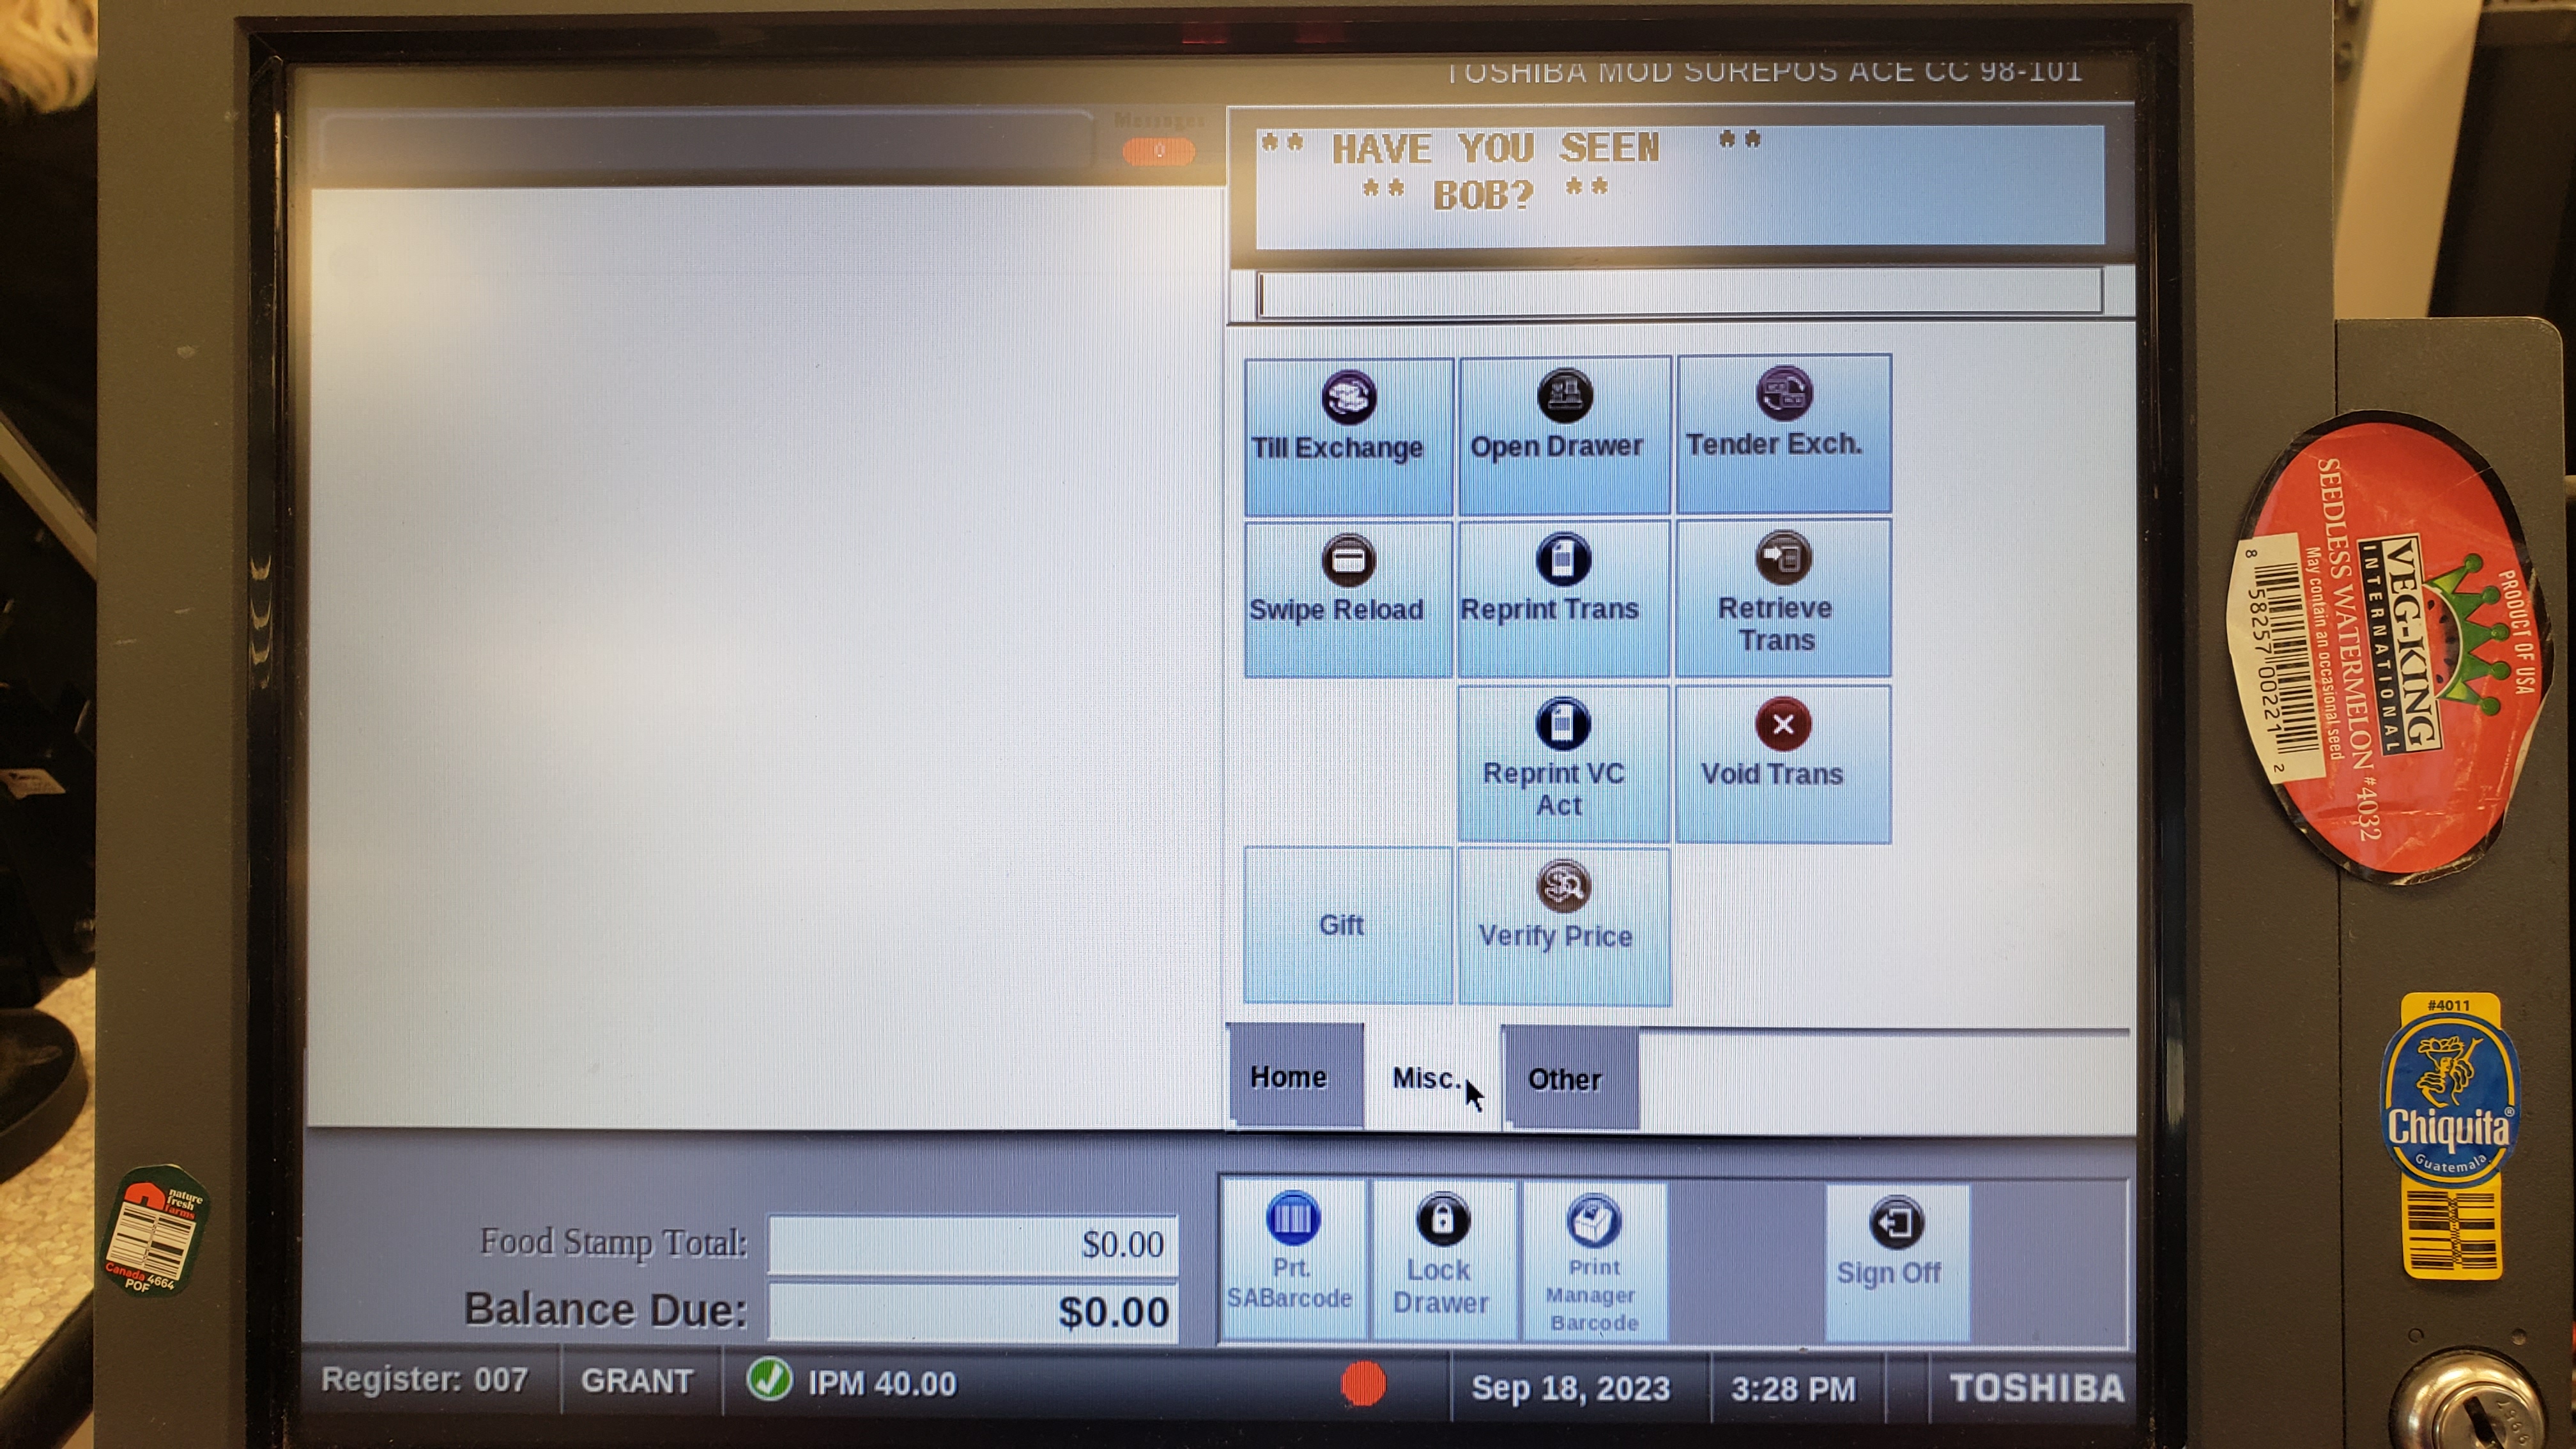
The keen will notice that there are in fact two other pages, that can be accessed from below the keypad.
The misc page has a LOT of stuff, but thankfully we don't typically need all of it. Here are the necessaries:
- Open Drawer - Opens the register's cash draw. Watch your sides. Cannot be done mid-order without a manager-override.
- Reprint Trans - Reprints the receipt of the last transaction. It will have a notice on it that it is a reprint. Good for when printer issues ruin an initial receipt.
- Retrieve Trans - Used when transfering an order between registers to receive an order.
- Void Trans - Voids an entire transaction and ends it. Useful if you accidentally scan something before an instacart barcode is scanned, or an order is abandoned. May require a manager-override depending on size.
- Verify Price - Gives the base price of an item. Usually scanning an item to check the price is better since it accounts for sales and digital coupons and Verify Price doesn't.
Navigating the Other Page
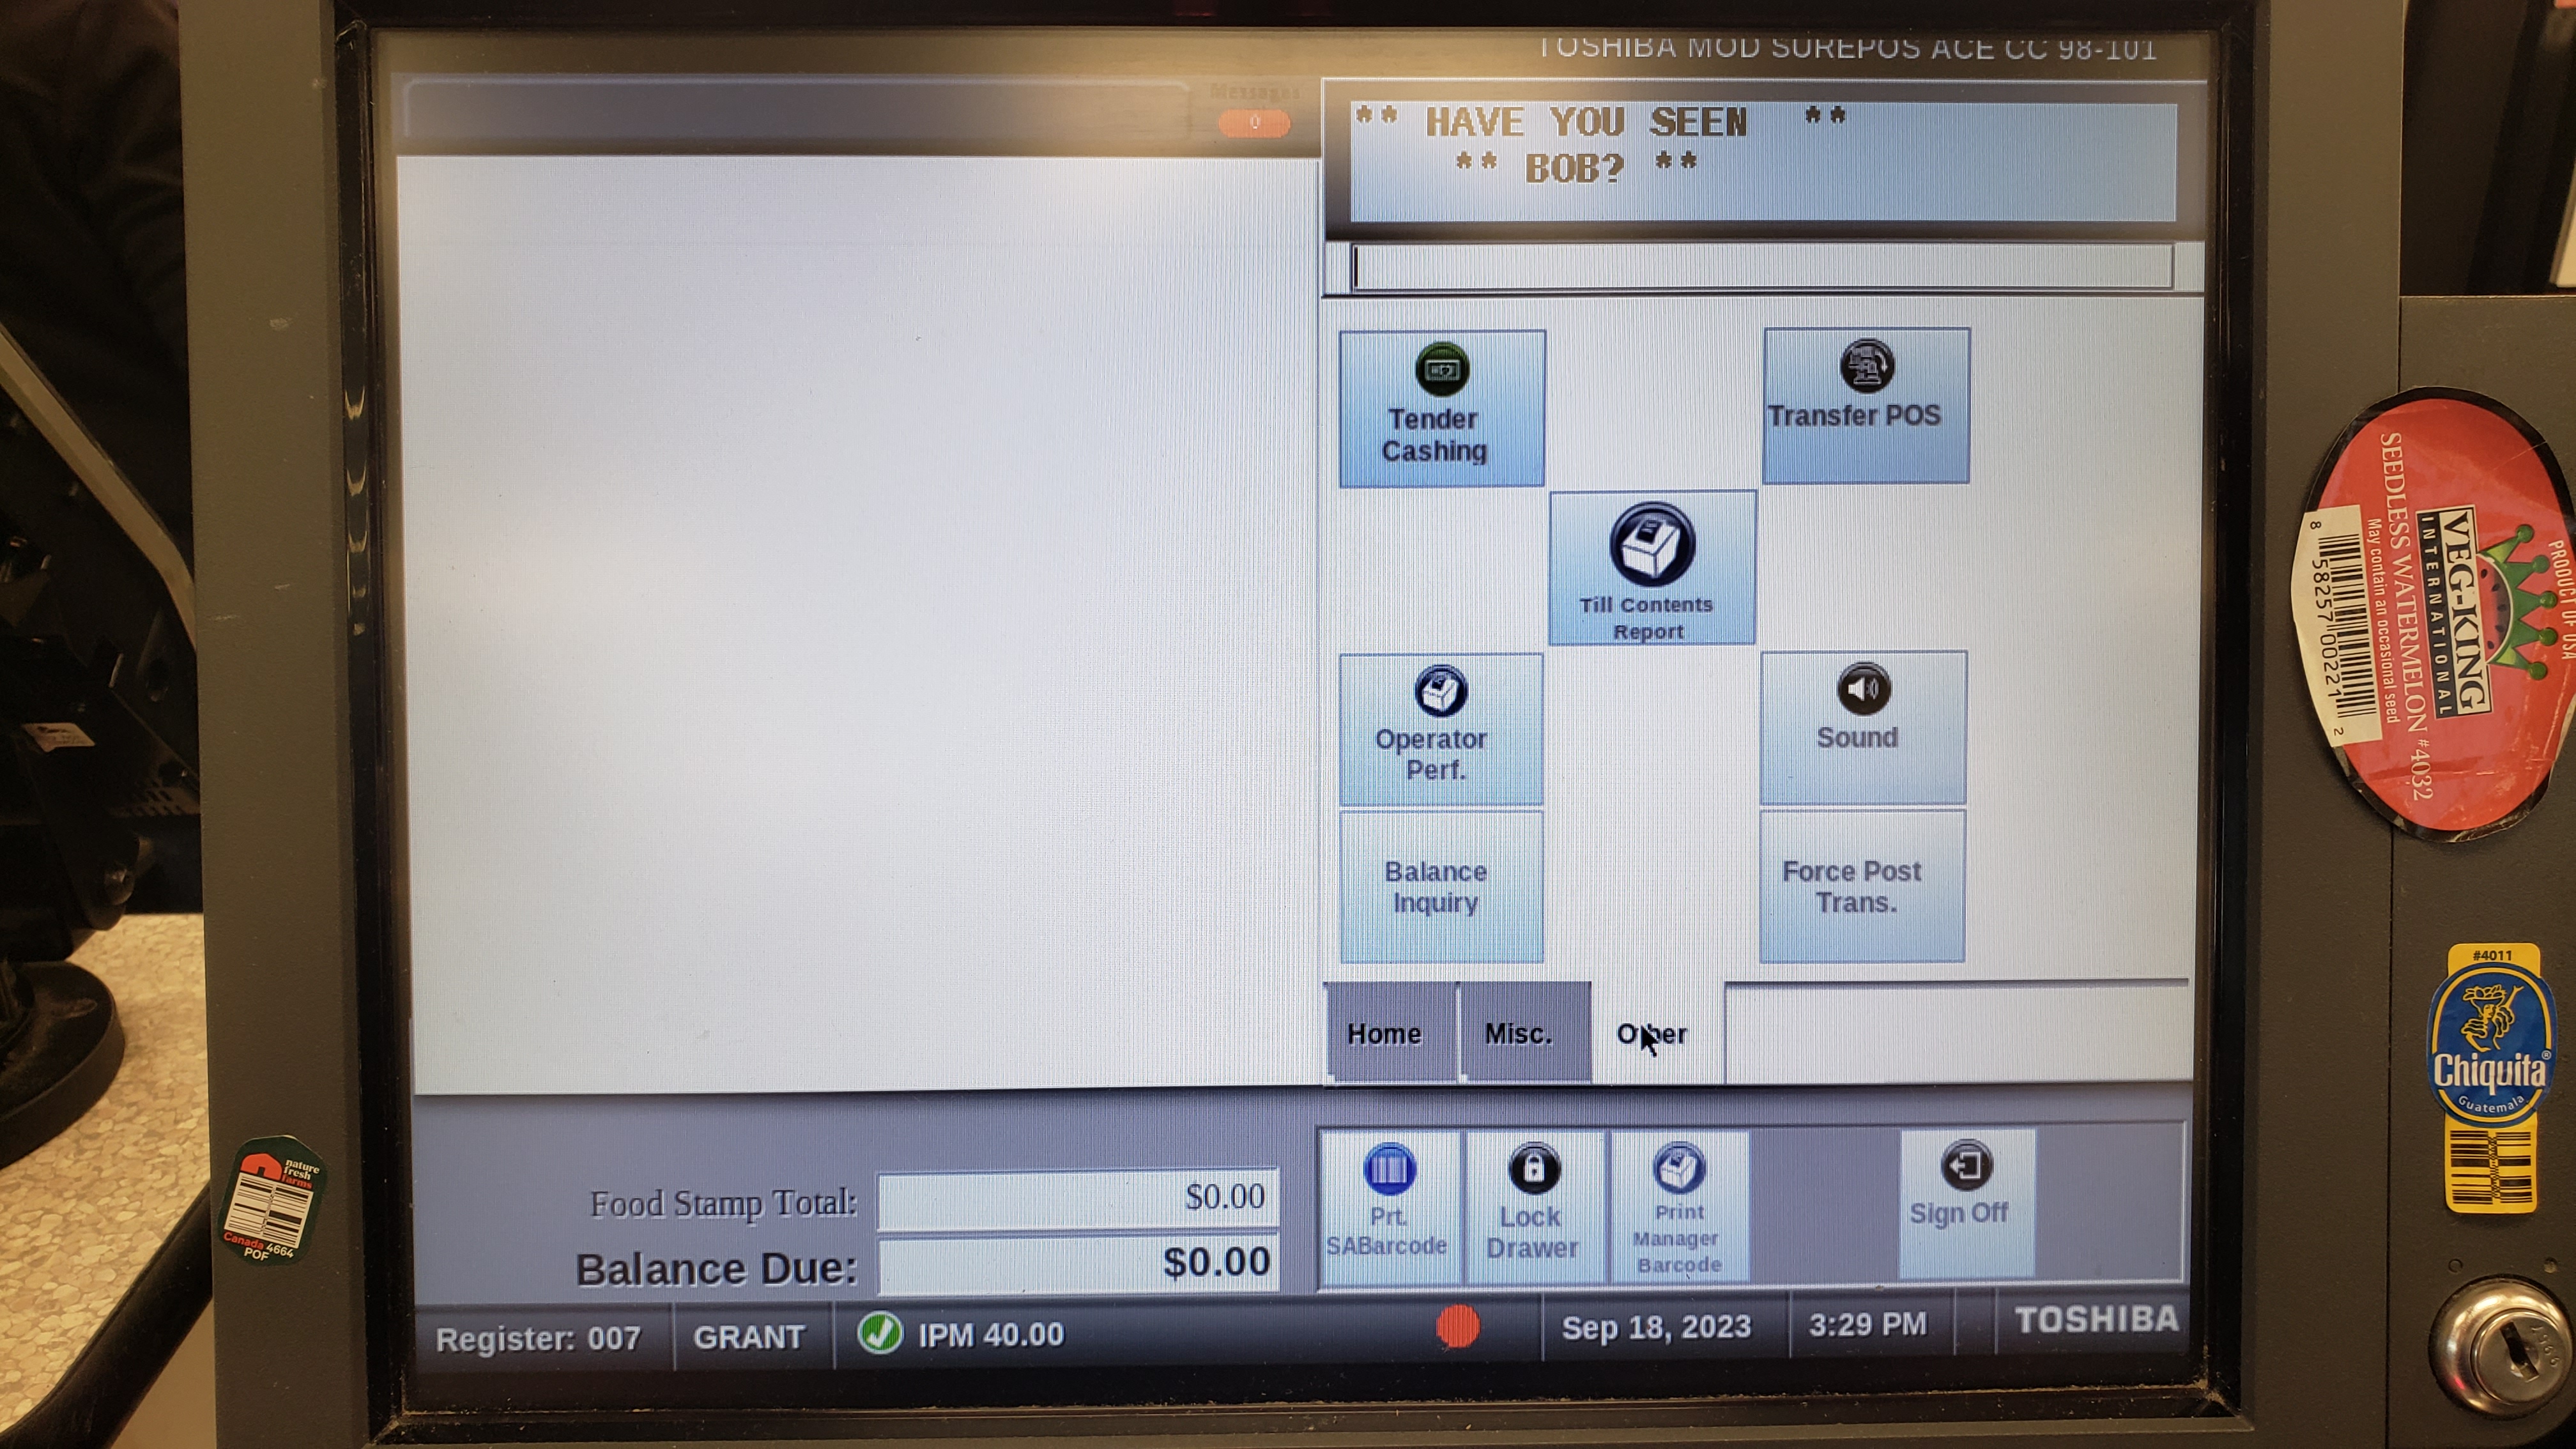
This page has less on it, and only a few things your typical cashier needs to know.
- Tender Cashing - Used to convert between different types of payment. Useful if you accidentally hit cash when the customer wanted credit or vice versa. Consult a manager before using.
- Sound - Adjusts the sounds coming from the monitor UI (basically just button presses). To control item scanning sounds use the buttons on the scale.
Navigating the Payment Menu - Tender
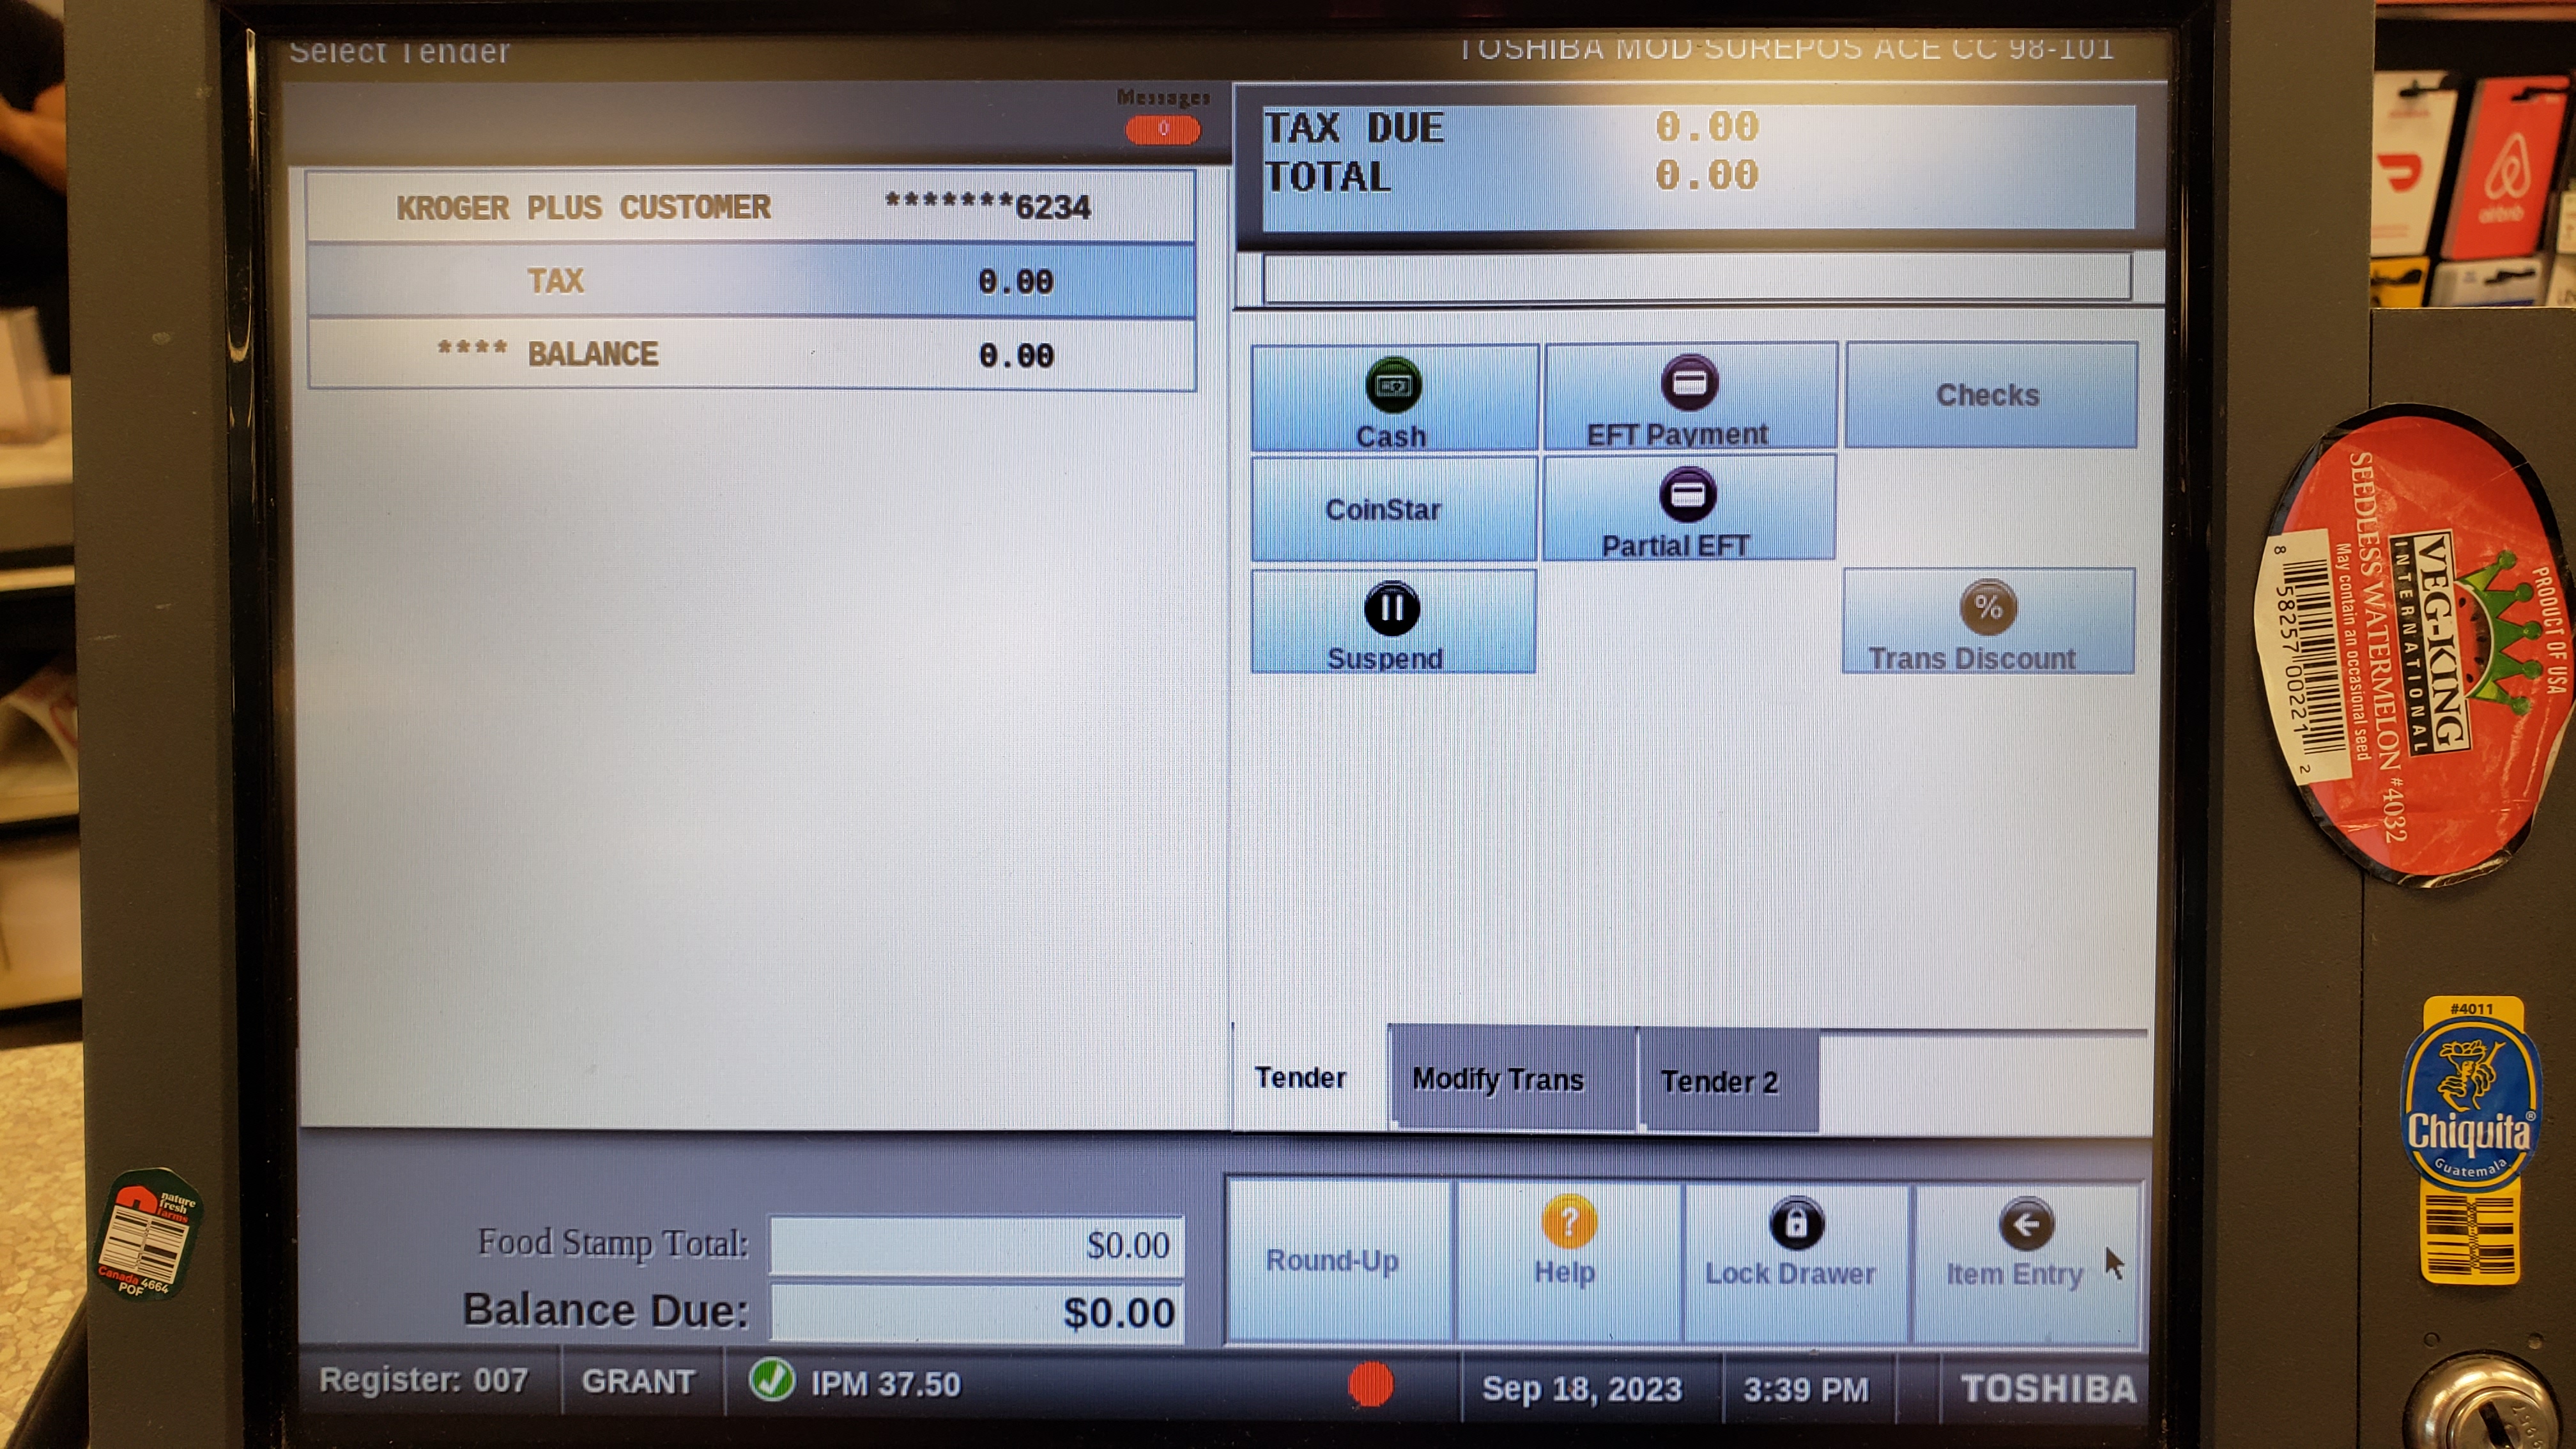
Once something is scanned and the order is started. By pressing the total key in the bottom right, you can access the payment menu. The tender page has a lot of useful stuff to go over.
Cash Payment

Selecting the cash icon will give you some options. It will give you a bunch of common numbers close to the exact amount, the exact amount itself, and a custom amount.
If the customer needs change the cash drawer will open automatically, and the change required will display.
Before we move on, let's take a look at the layout of the cash drawer and some best practices for using it.
The Cash Drawer
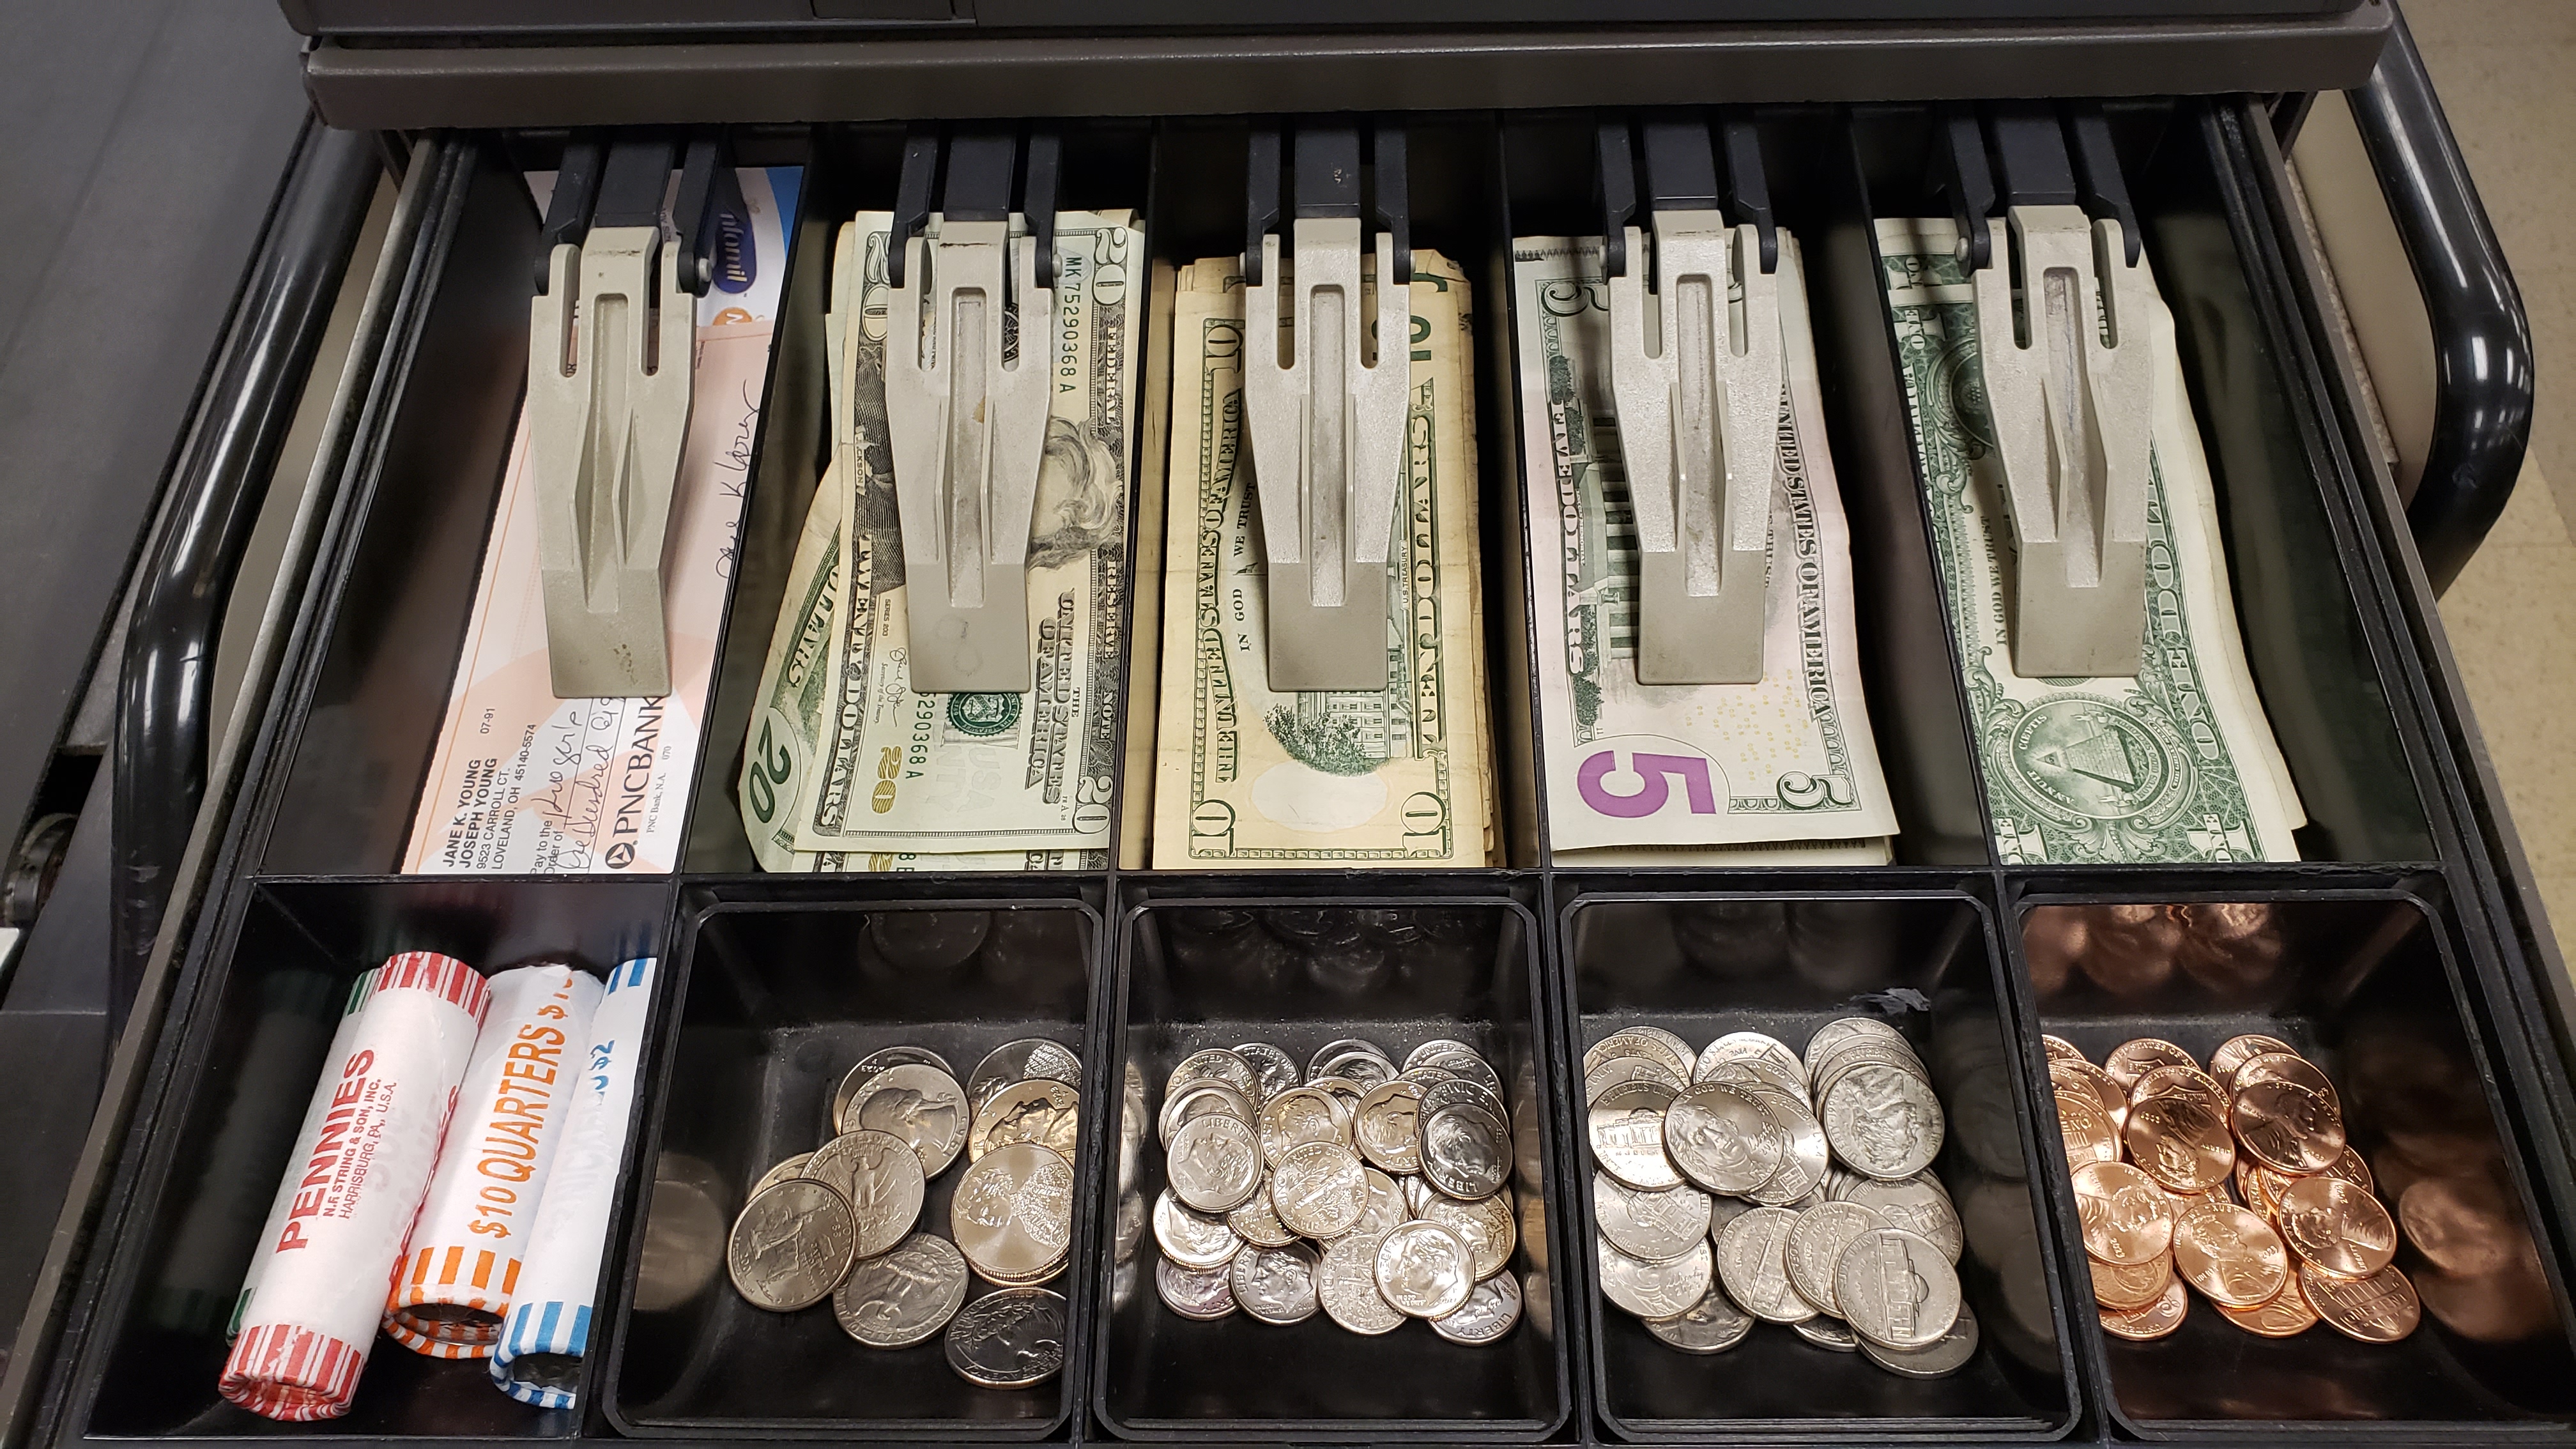
On the far left we put our Checks, Coinstar slips, and stamp books. Next we have dollar bills arranged by value from $20 to $1. Larger bills are placed beneath the liftable tray holding everything else. Below the cash, we have our coins. To make it easier on closers, only open new rolls of coins when absolutely necessary.
Accidentally closed the cash drawer before giving the customer cash-back? Just open the drawer from the Misc Page.
Check Payment
To run a check select the normal check option. Next input the amount the customer wants. If you have chosen an amount over the exact amount it will prompt you to confirm this.
To fill out the check you have two options: have the customer fill out the entirety of the check, or have the customer only place their signature and print the check using the printer
Once the amount is selected it will ask if you want to print the check.
Next insert the check into the printer with the side with the wacky numbers and signature on the right side.
Once its done doing its thing, remove the check and discard the little check payment slip that follows the receipt.
Place the check with the stamps in the far left of the cash drawer.
EFT Payment (Credit and Debit)
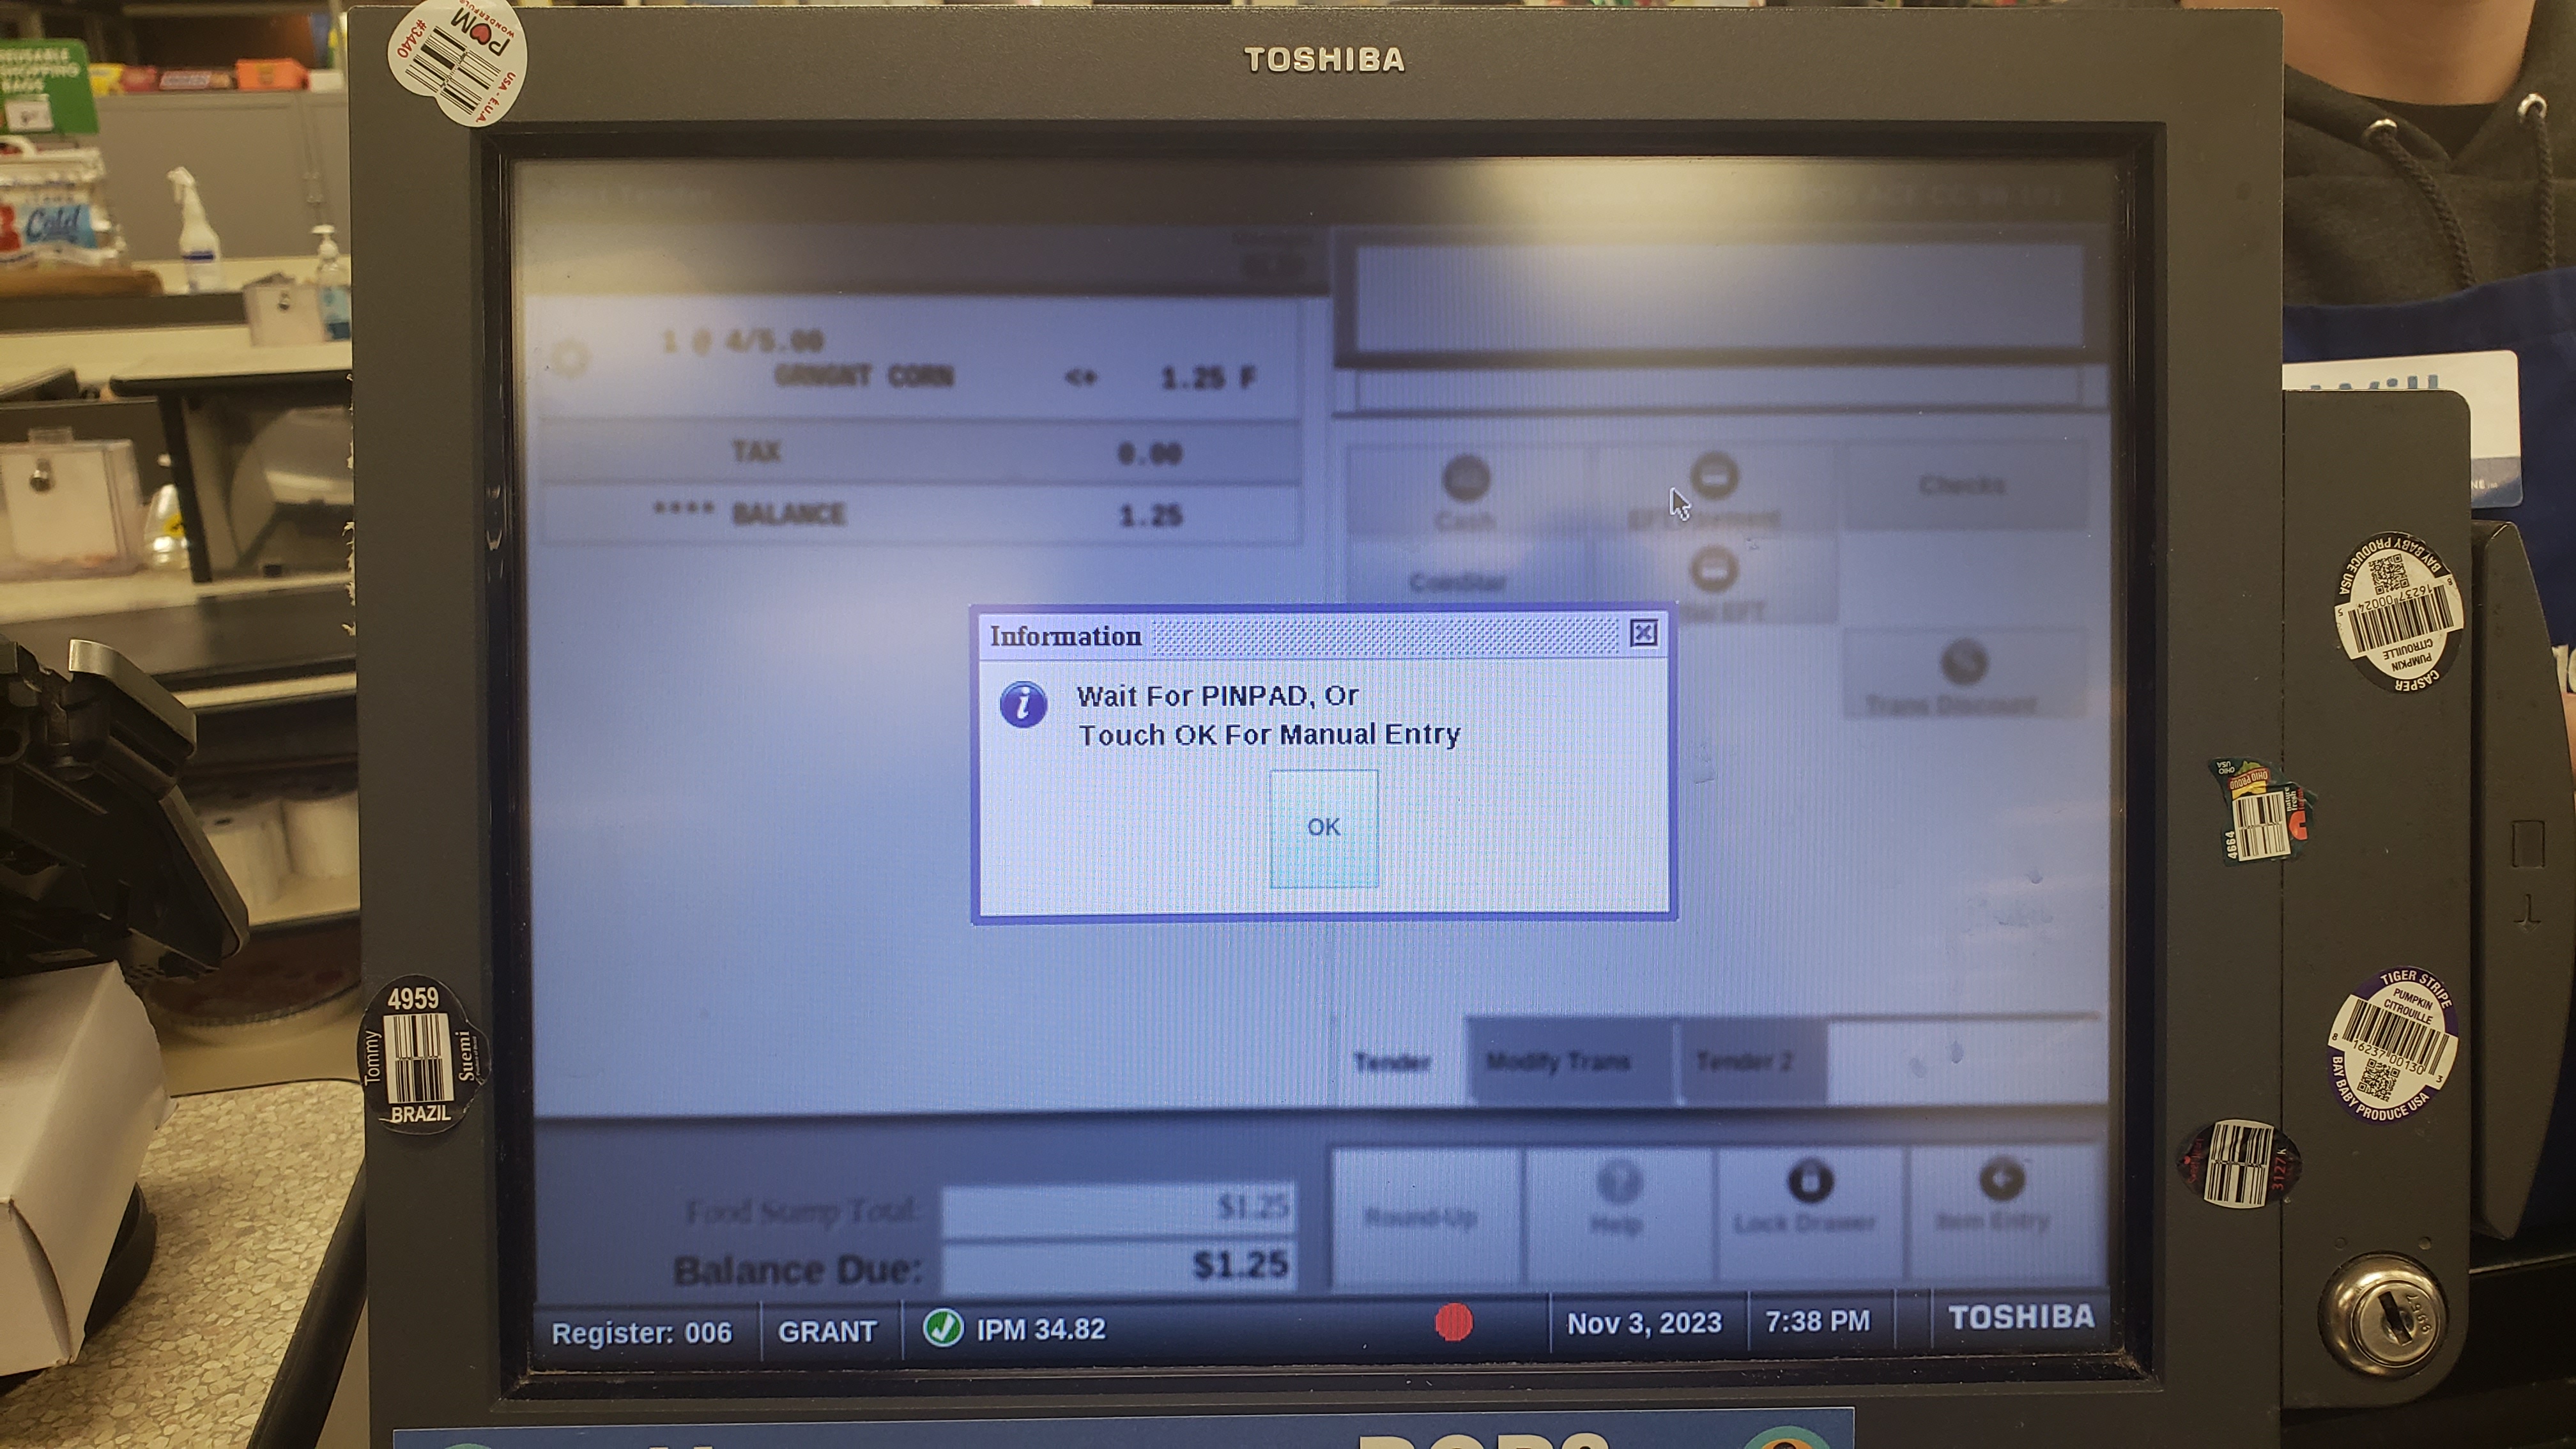
Using the EFT payment option, you can run EFT cards like gift cards, credit cards, or debit cards, etc.
When clicked, it will create a popup over the screen. If you hit ok, it will allow you to enter the card number manually by typing or scanning a barcode. Though it may be tempting to hit the ok, don't. Leave it up until the customer finishes paying, and it will close automatically. It can be canceled by hitting "ok" then hitting cancel on the keypad.
Alternatively use the Partial EFT button to run an EFT card for an inputed amount.
Coinstar Payment
To pay with a Coinstar slip, first click the coinstar option in the tender menu.
Next enter the amount (this must be the exact amount of the Coinstar slip).
Finally, insert it into the check reader as you would with a check, and place it in the cash drawer with the checks and stamps when the order is complete. Provide change if necessary.
Suspending Transactions
In contrast to the payment options we've just discussed, the Suspend function suspends a transaction including all the items, kroger card, and instacart barcodes. To suspend the transaction, scan a Manager Override. A receipt with a large barcode at the bottom will print.
This can be a good alternative to transfering an order for when the register itself is still fully functional.
Tax Exempt Orders with Trans Discount
Many organizations and services like Shipt may require a tax exemption on their orders, which is where the Trans Discount function comes in.
The Modify Trans Page
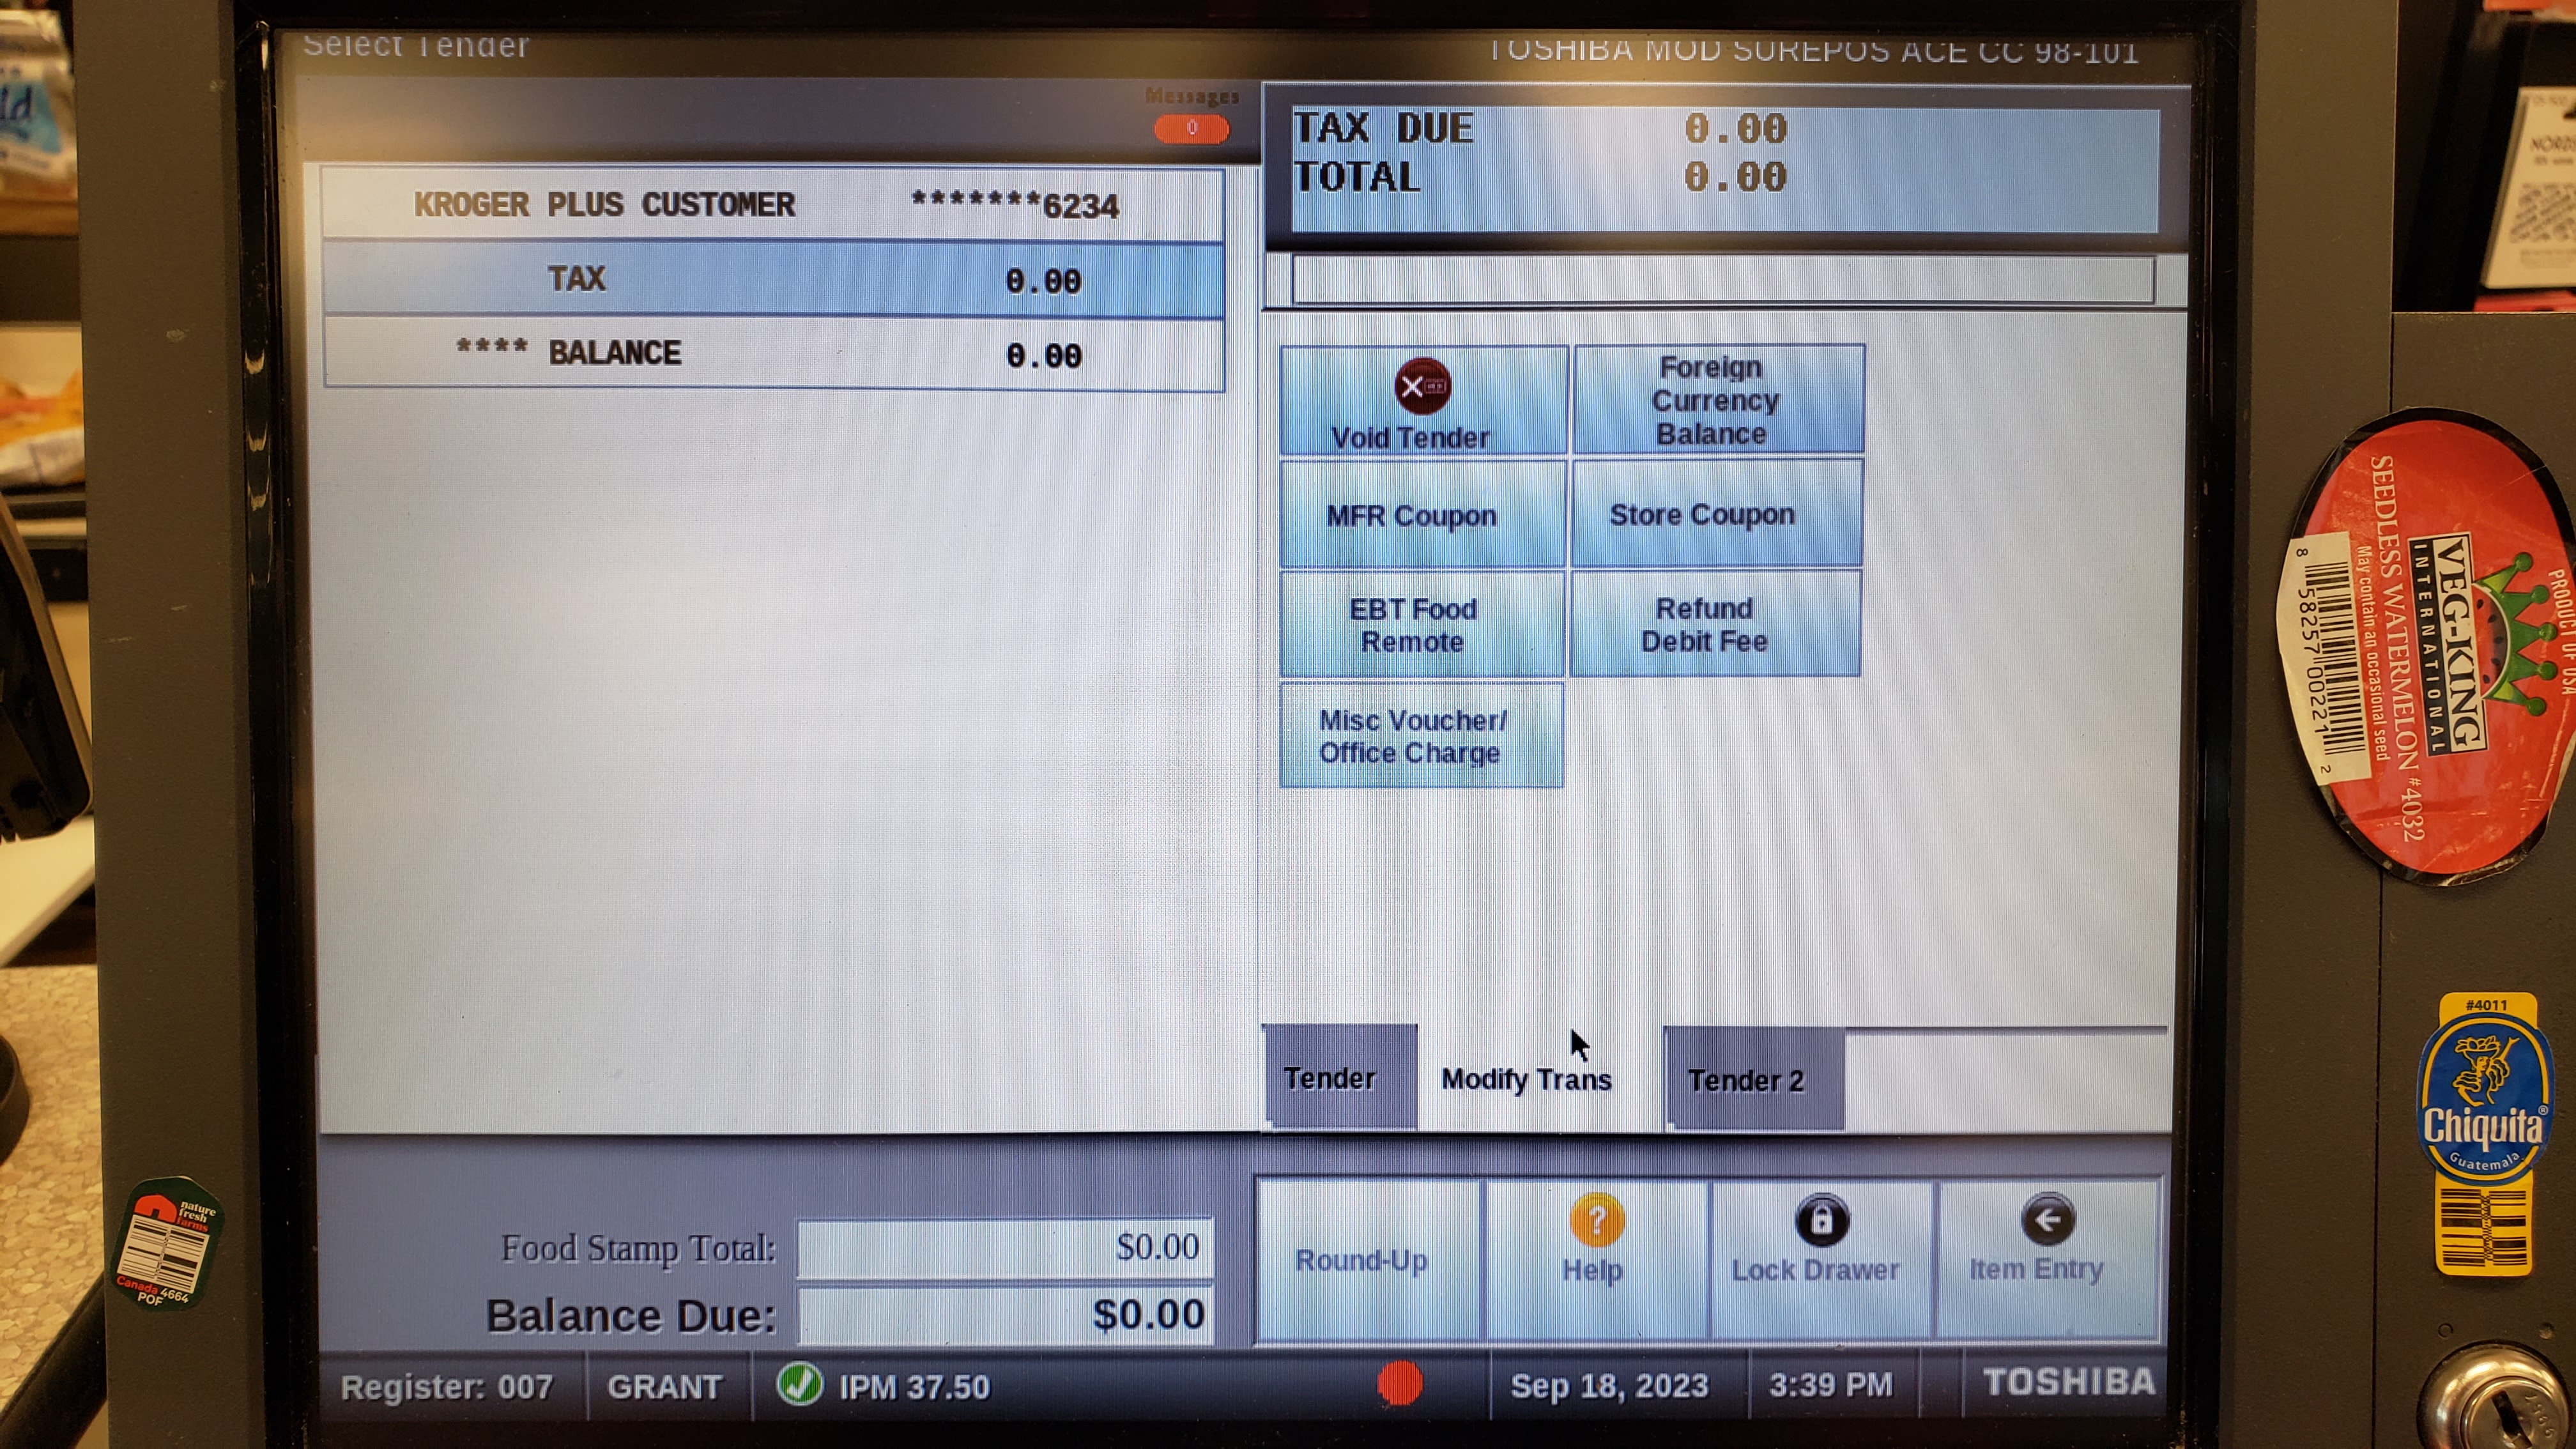
The Modify Trans page offers a couple new useful tools:
- MFR Coupon and Store Coupon - Manually input coupon discount values for when customer coupons aren't working properly
- Void Tender - Void a payment that has been added to the transaction but not processed. This can be done for any payment type.
Void Tender
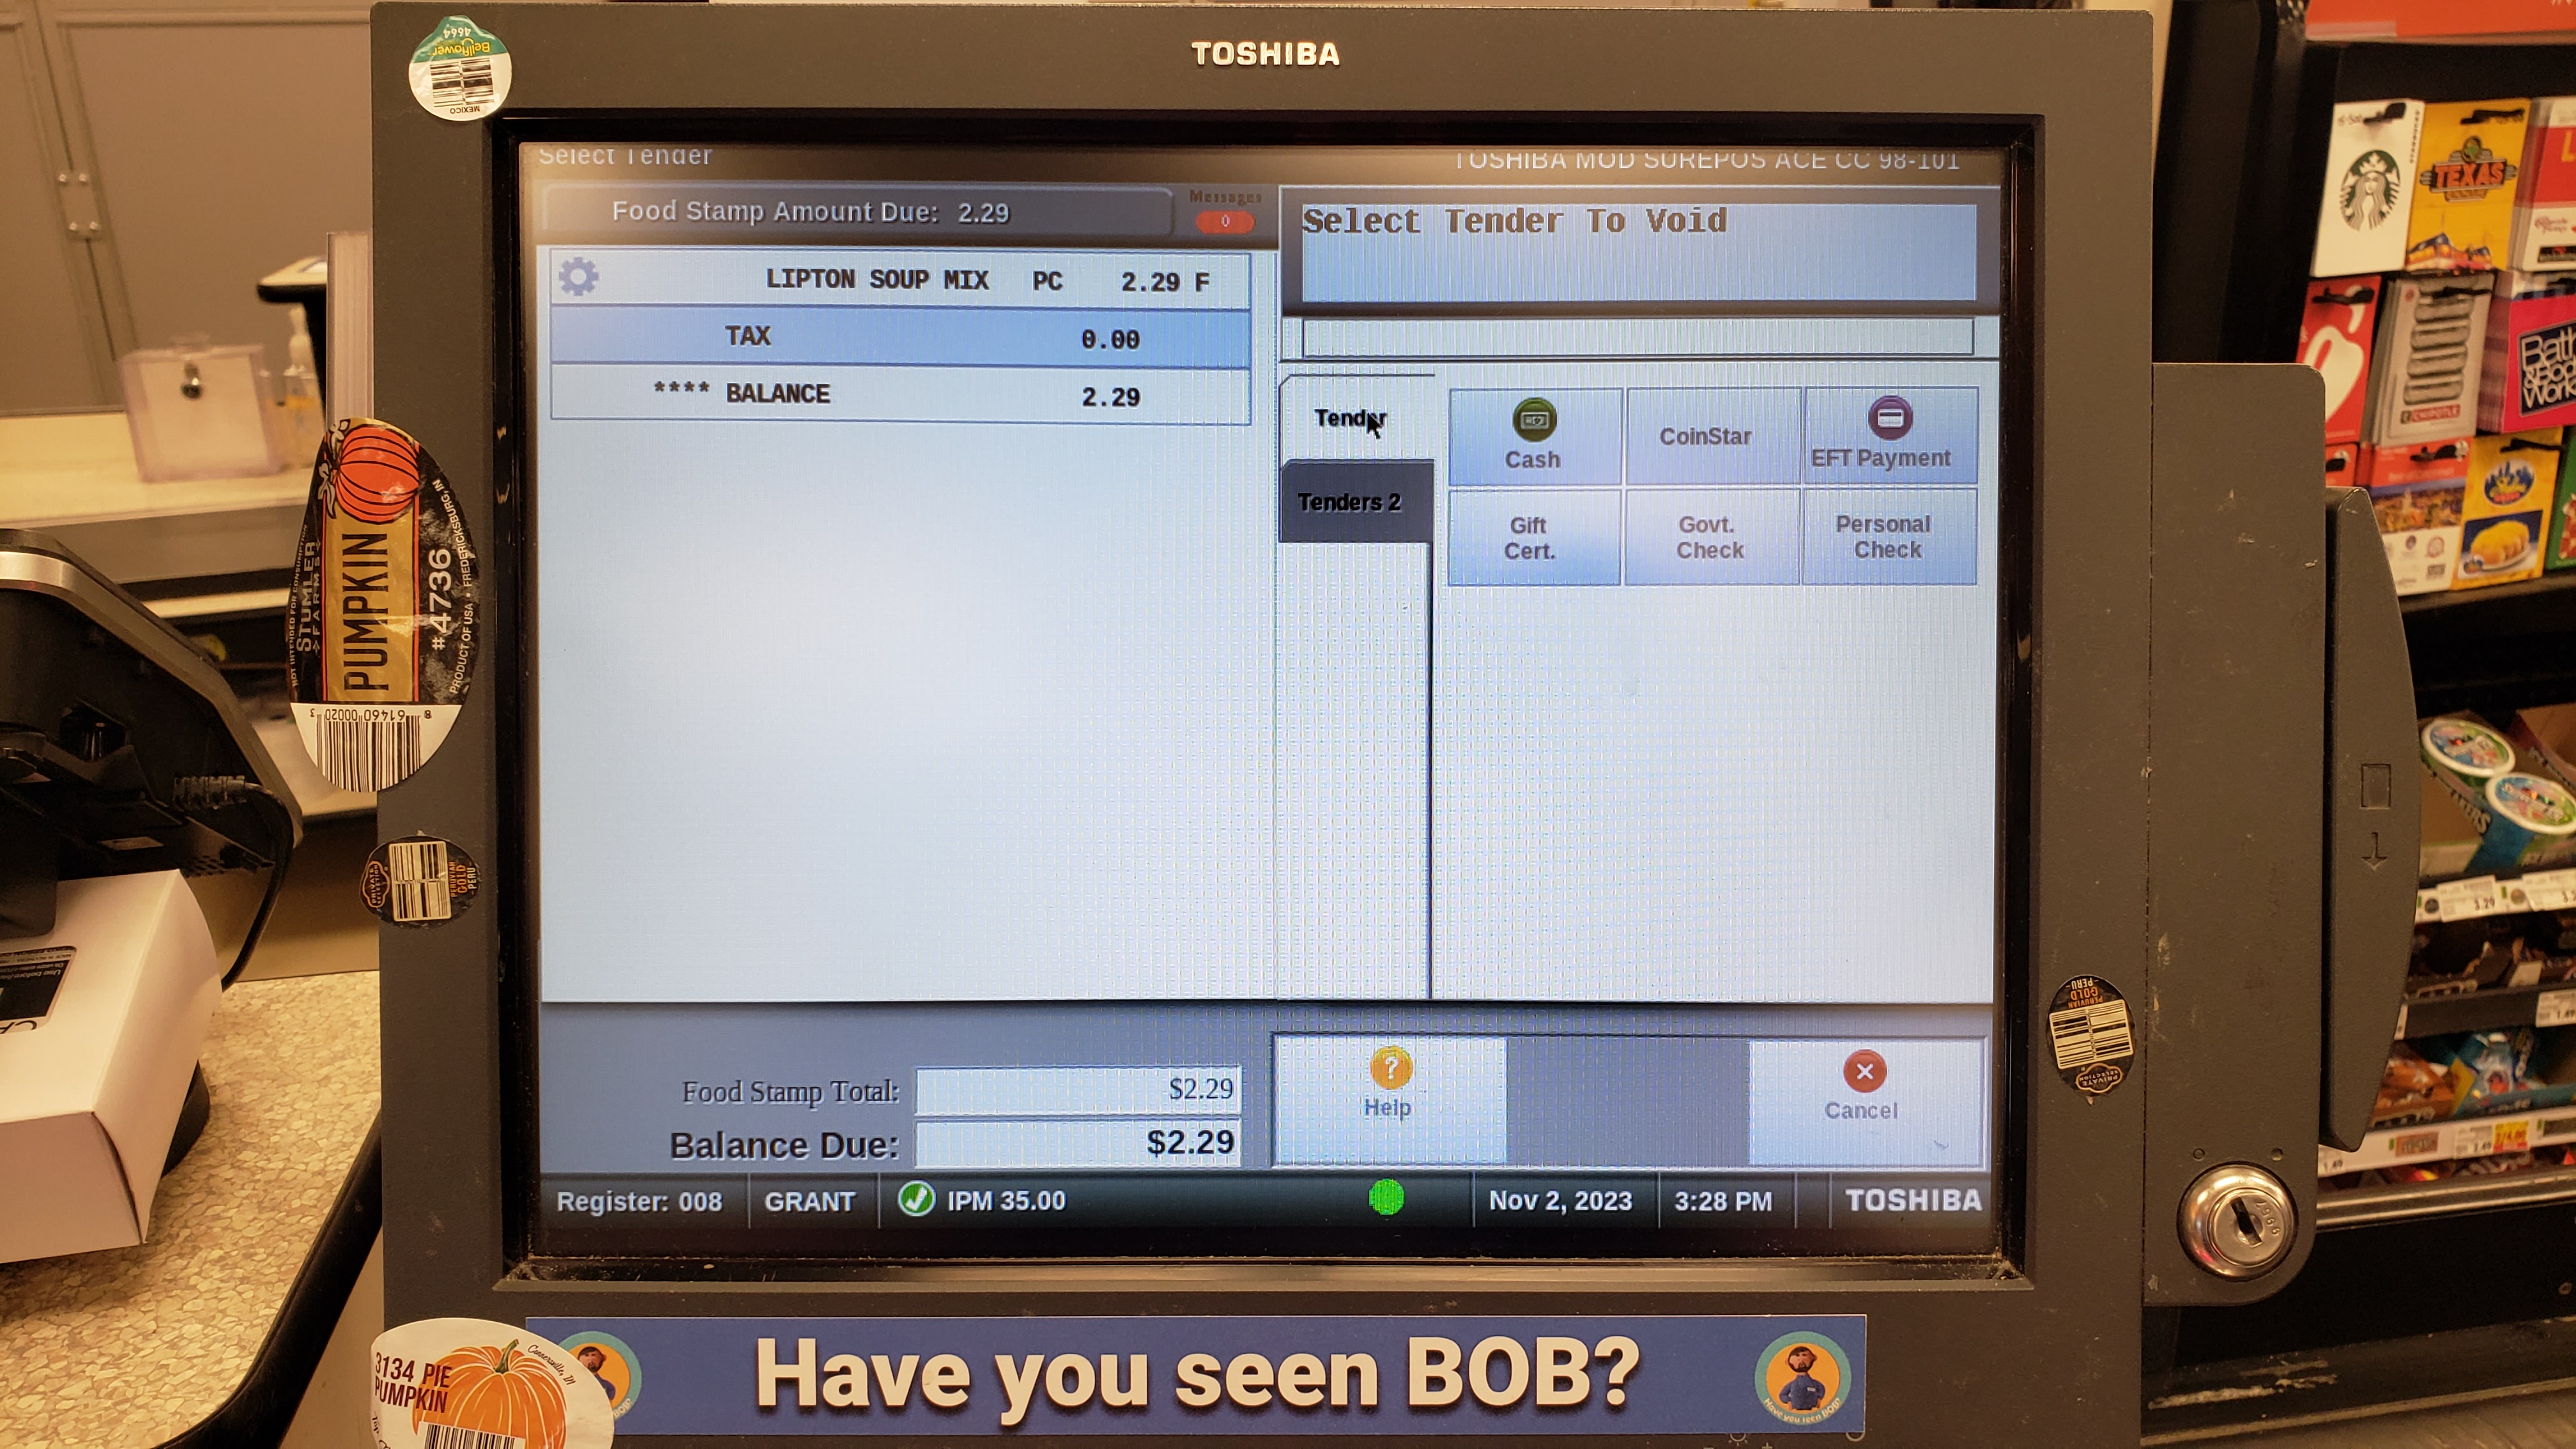
The Tender 2 Page: Online Pay
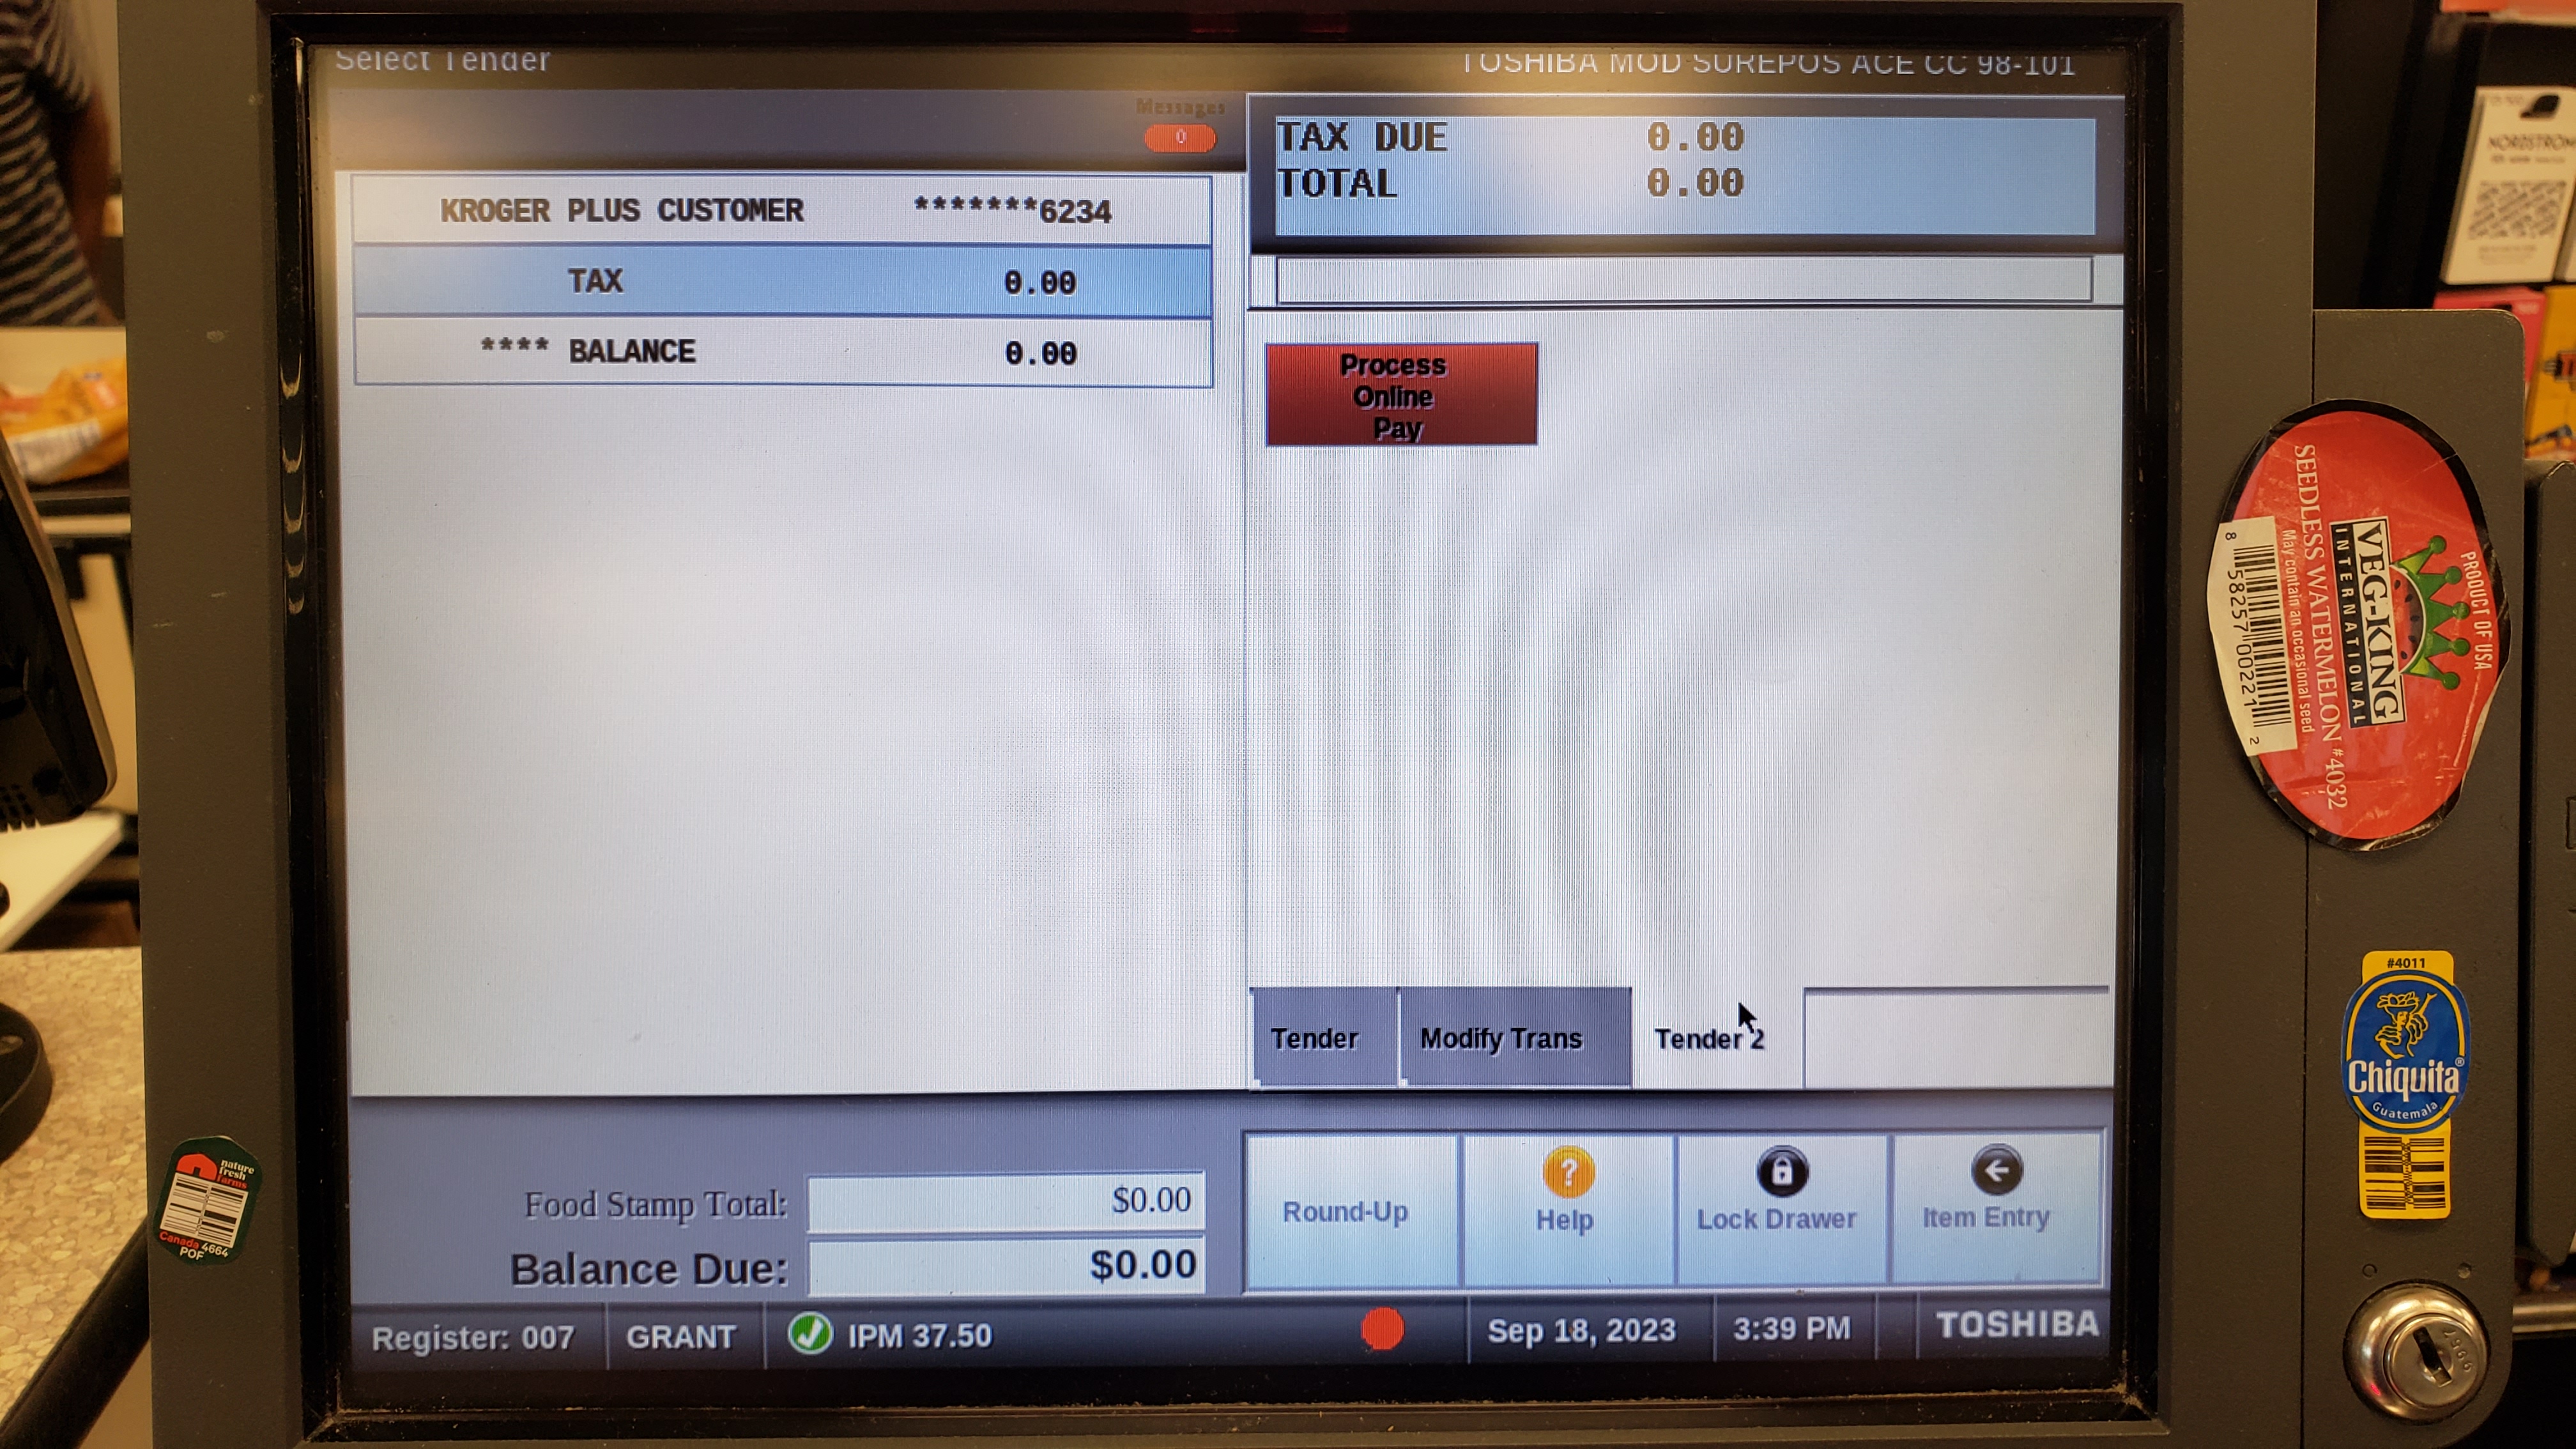
On the final page there is only one option: Online Pay. Instacart shoppers have two ways to pay, through an EFT card, or through Online Pay. To process an Online Pay order simply hit the button. However, make entirely sure the order is ready to be completed since there is no going back. If the order is EFT and you accidentally choose Online Pay, or vice versa, it will just decline and there will be no harm done.
Understanding the Hardware
Second only to the software, the register harware has a lot of quirks that cashiers need to be aware of.
The Display
There are a couple things to note about the register monitor:
- It can be tilted to various angles.
- On the bottom-right side of the register there are two buttons that control the screen's brightness.
- On the far right there is a slot for swiping EFT cards (it is recommended to just use the pin-pad for swiping but it is worth mentioning).
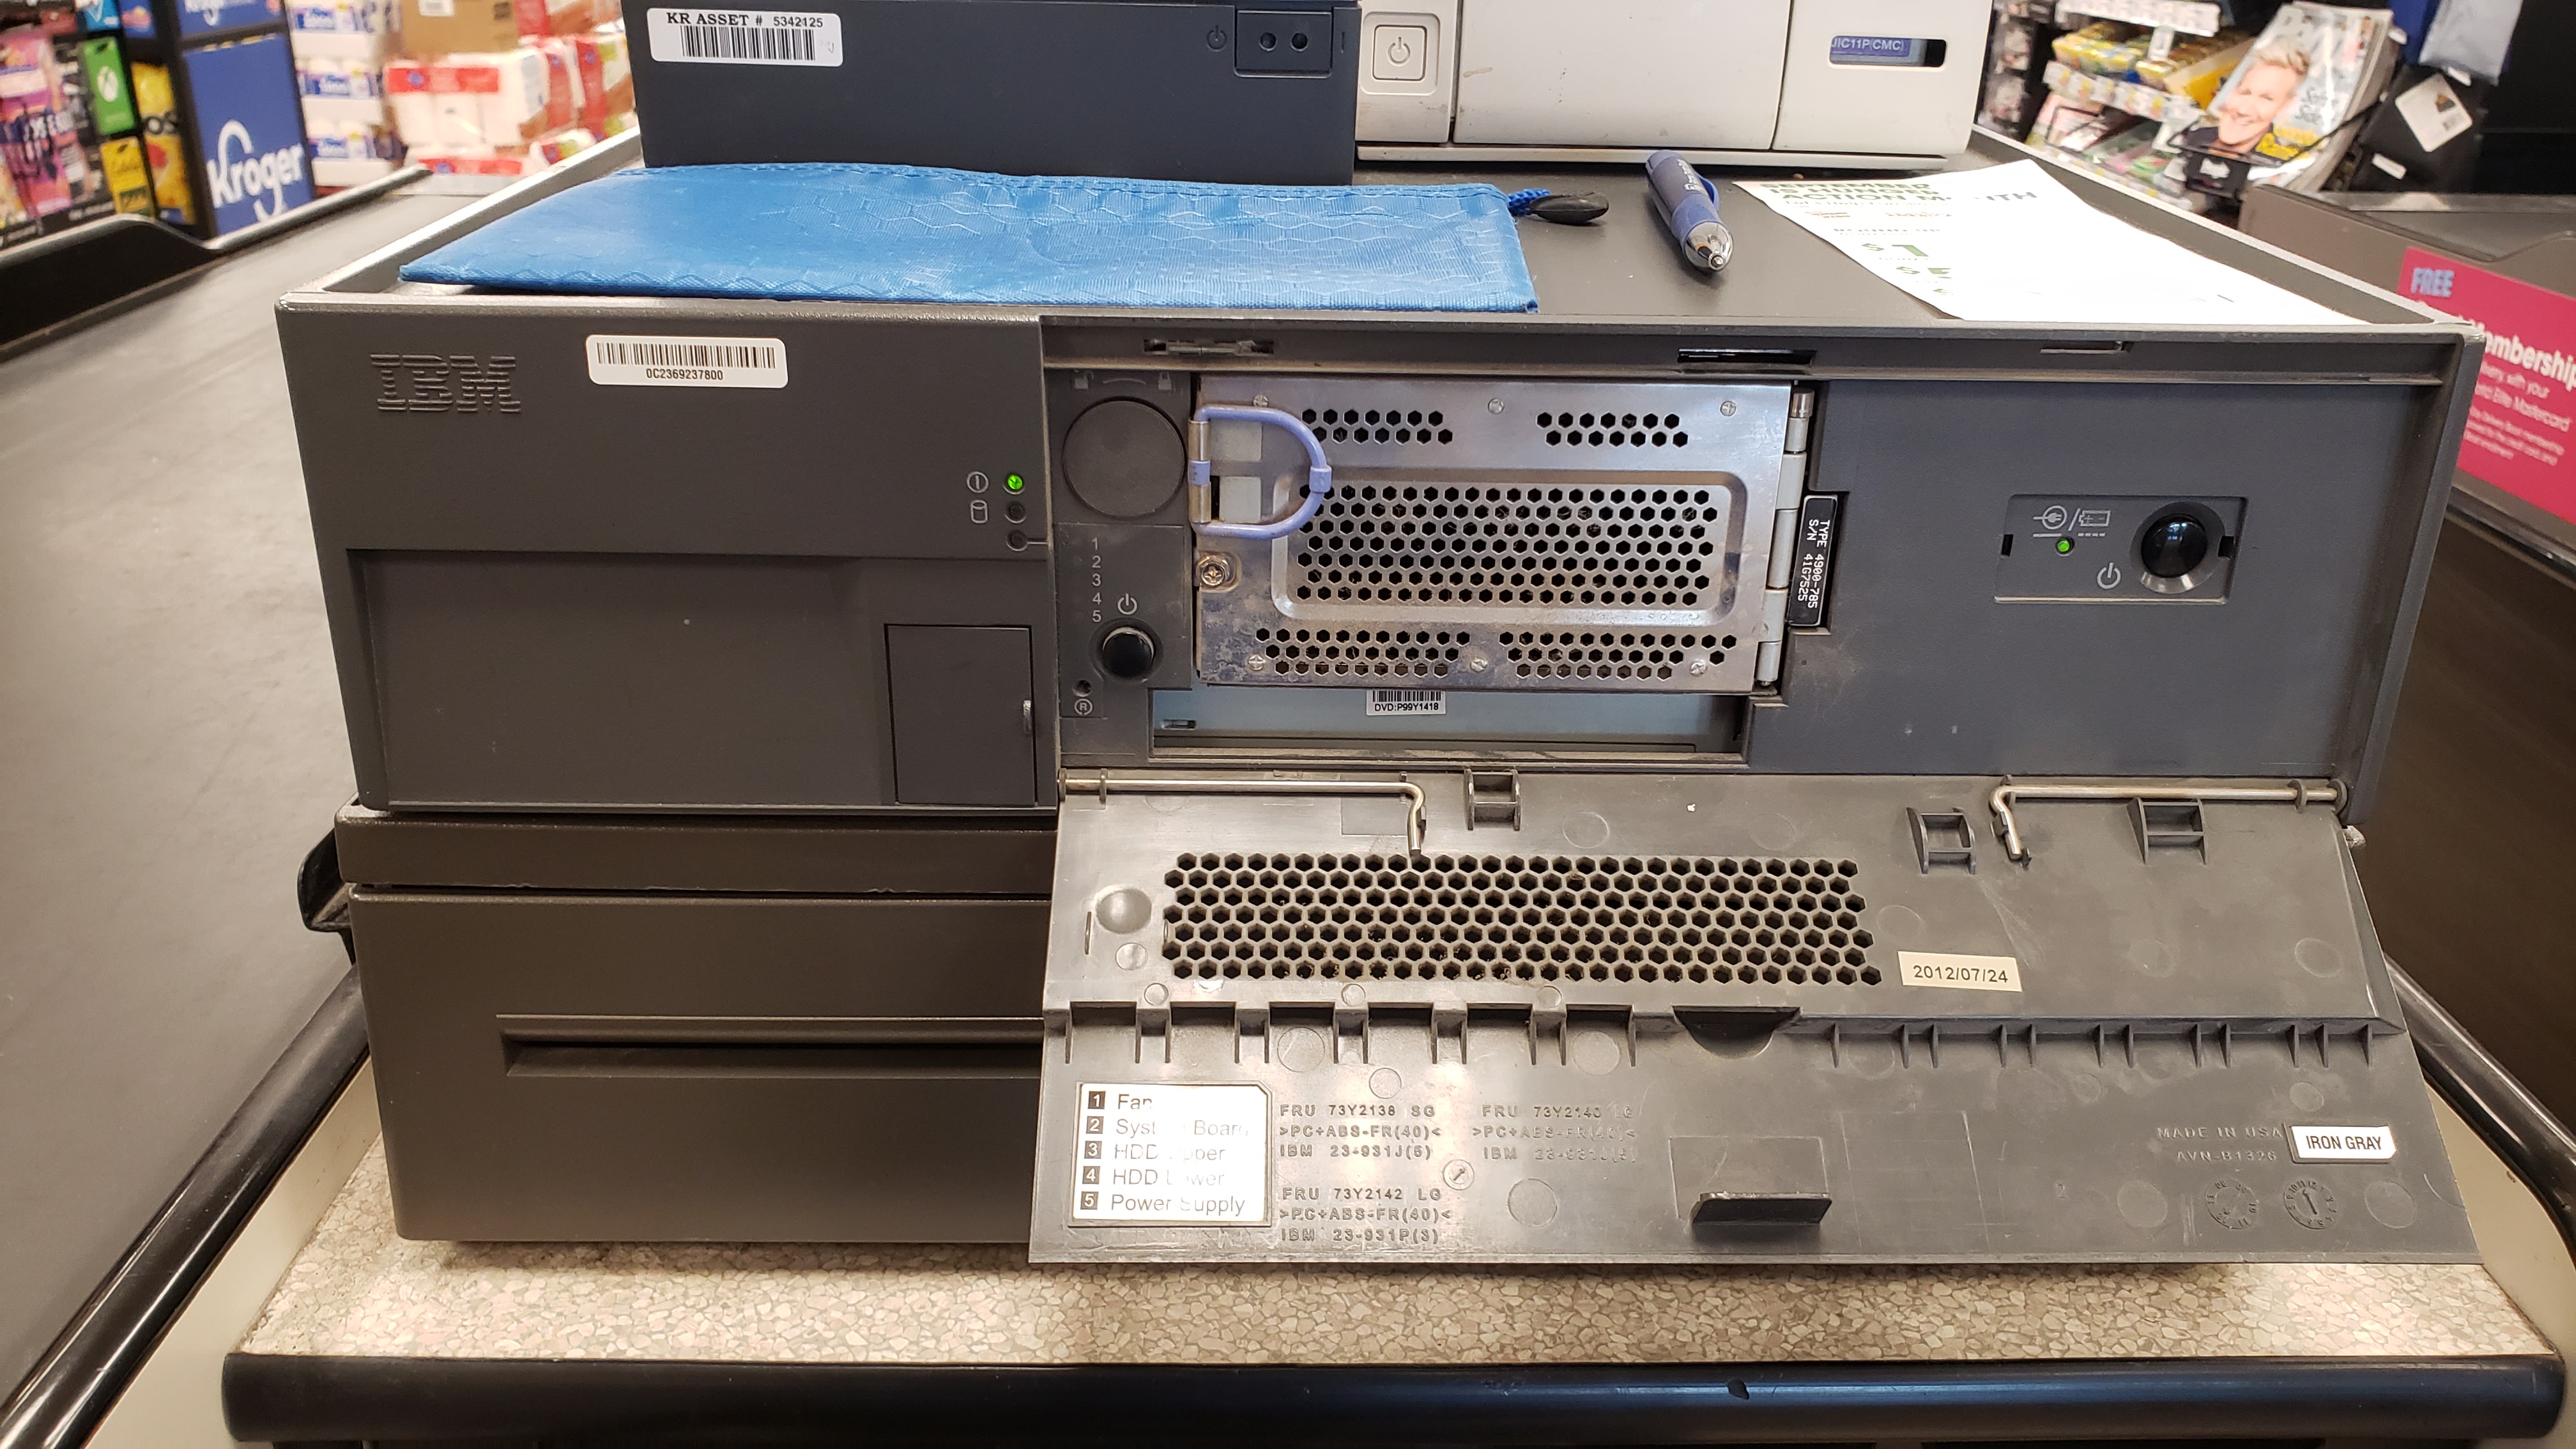
The Computer
The register's main computer has a large flap in front that can be opened to reveal two power buttons. Ignore the one on the right. The one on the left can be used to reboot the register
The Main Scanner
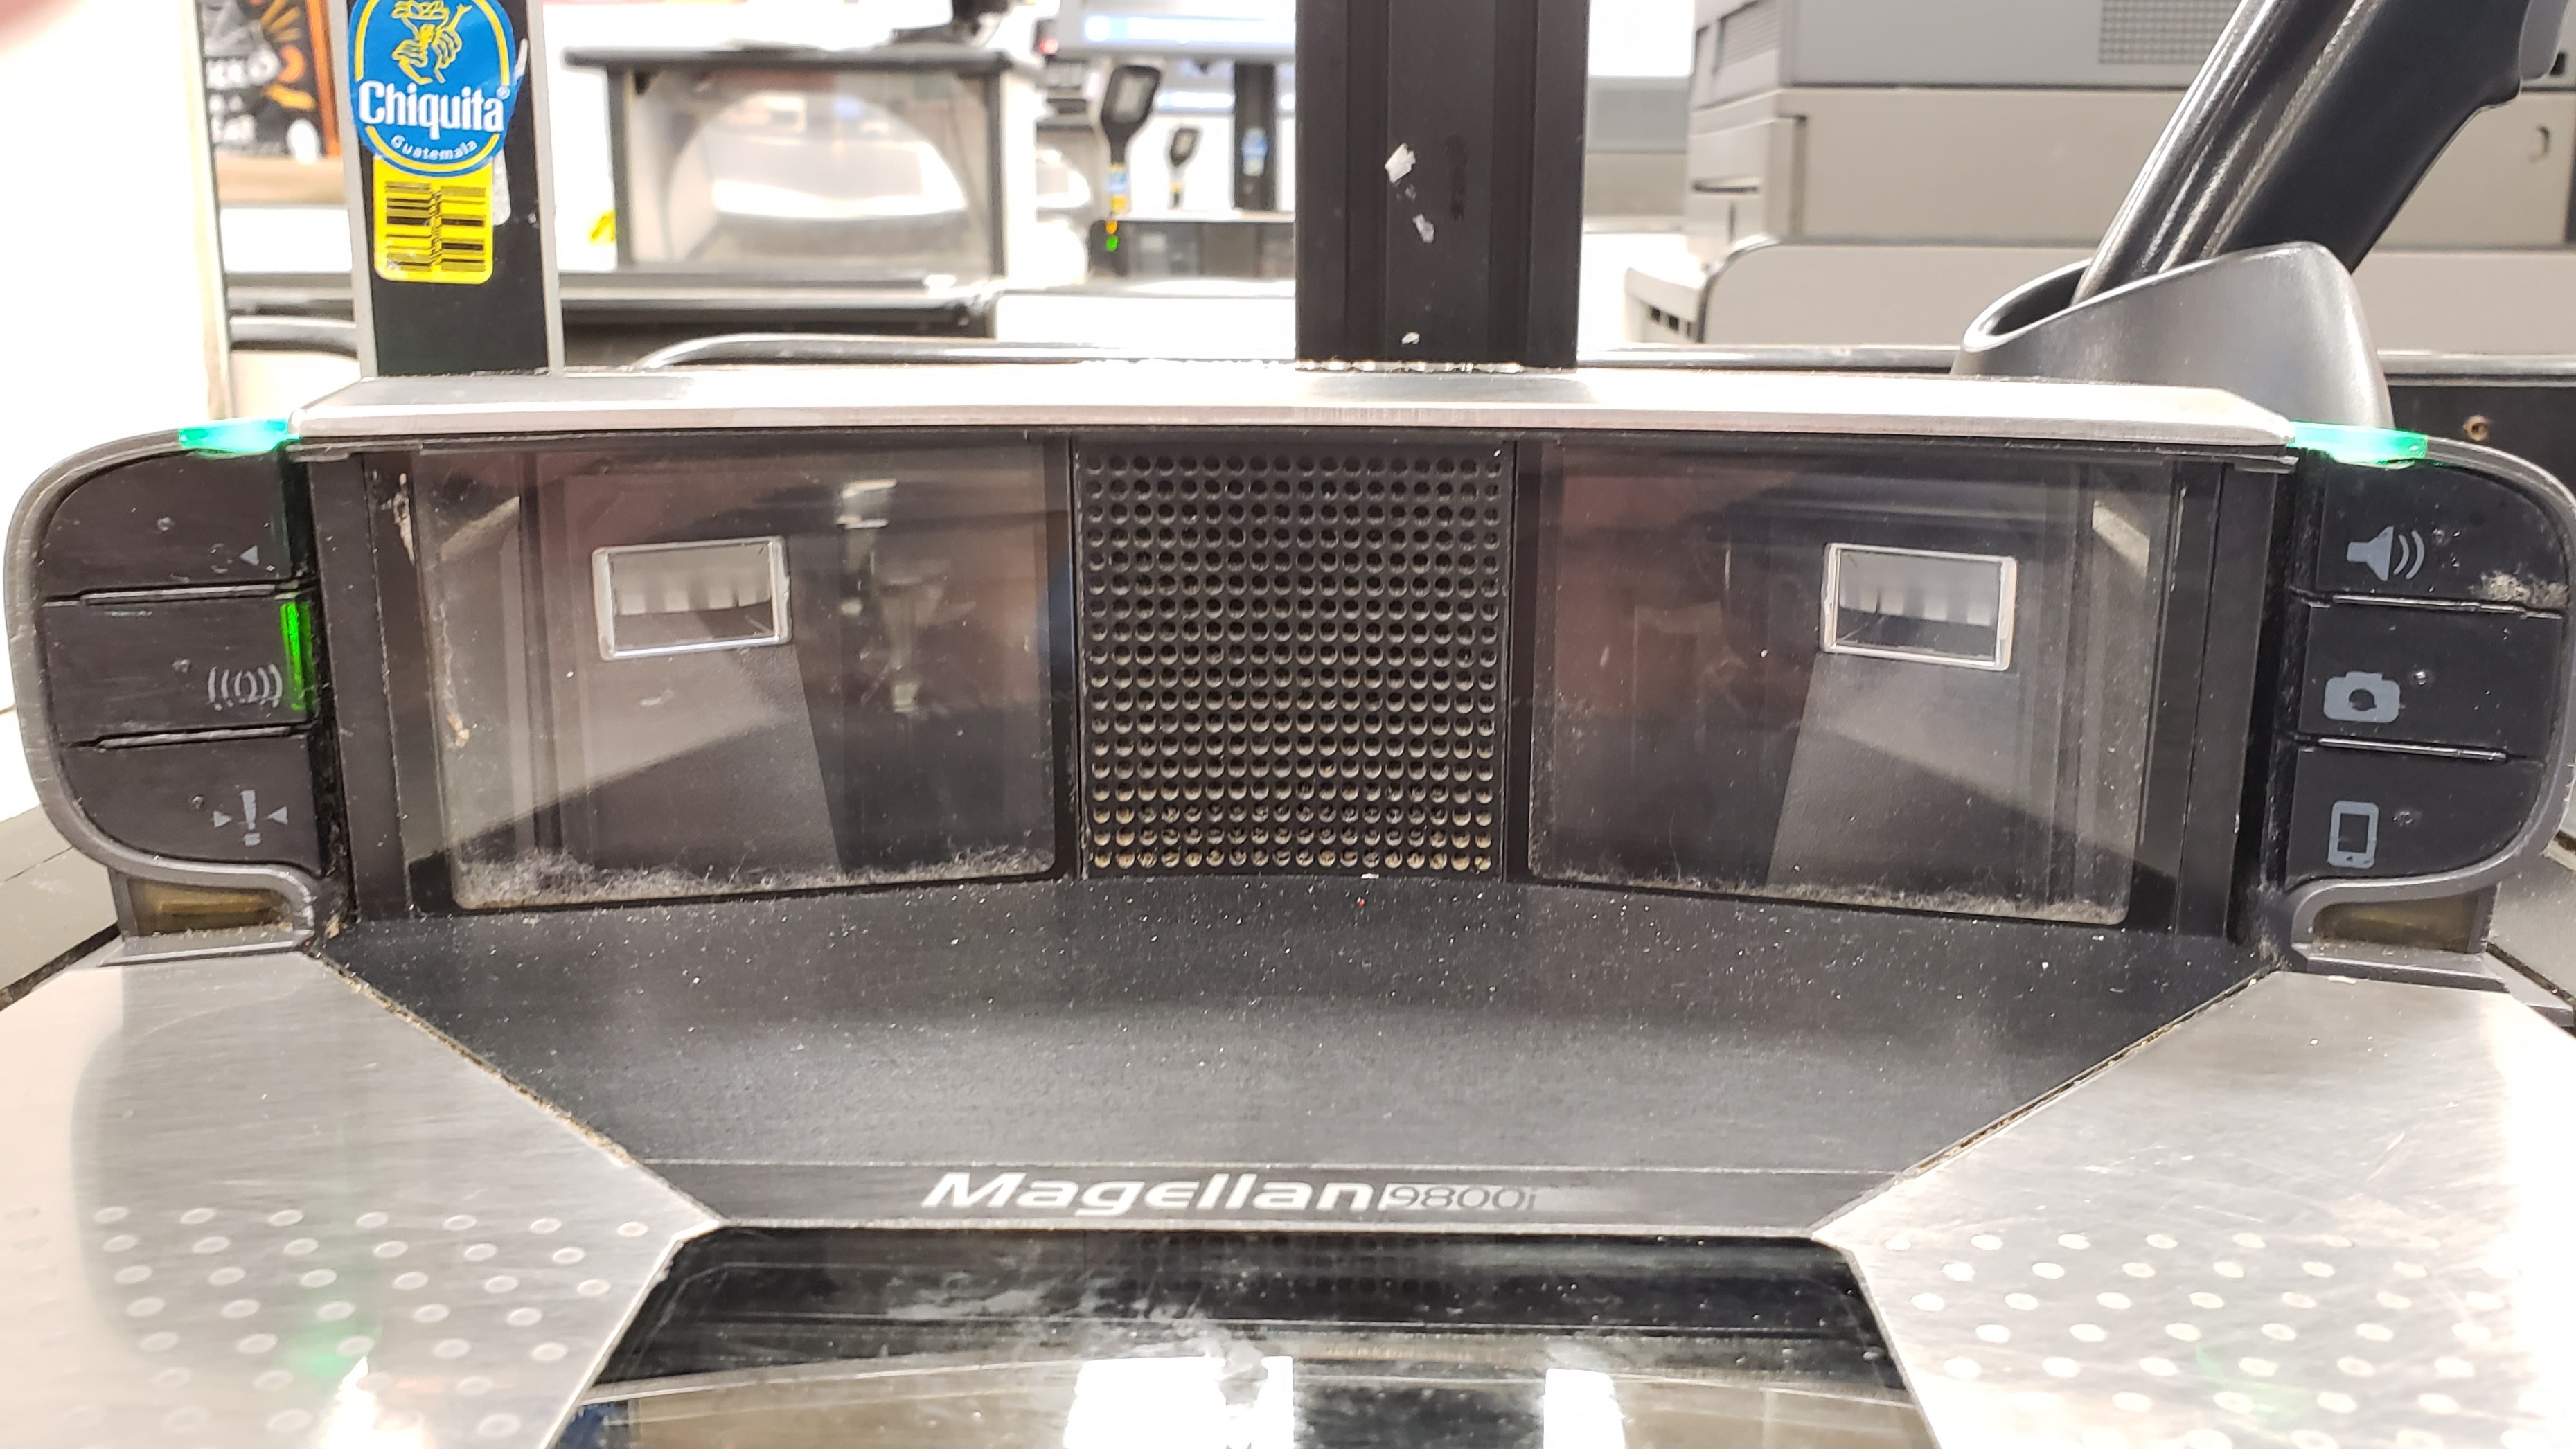
The main scanner has a lot of buttons thankfully only 2 of them do anything meaningful. The top left button refreshes the weight sensor (or at least it's supposed to) and the top right changed the loudness of the scanner. WARNING: IT CAN GET VERY LOUD
The Printers
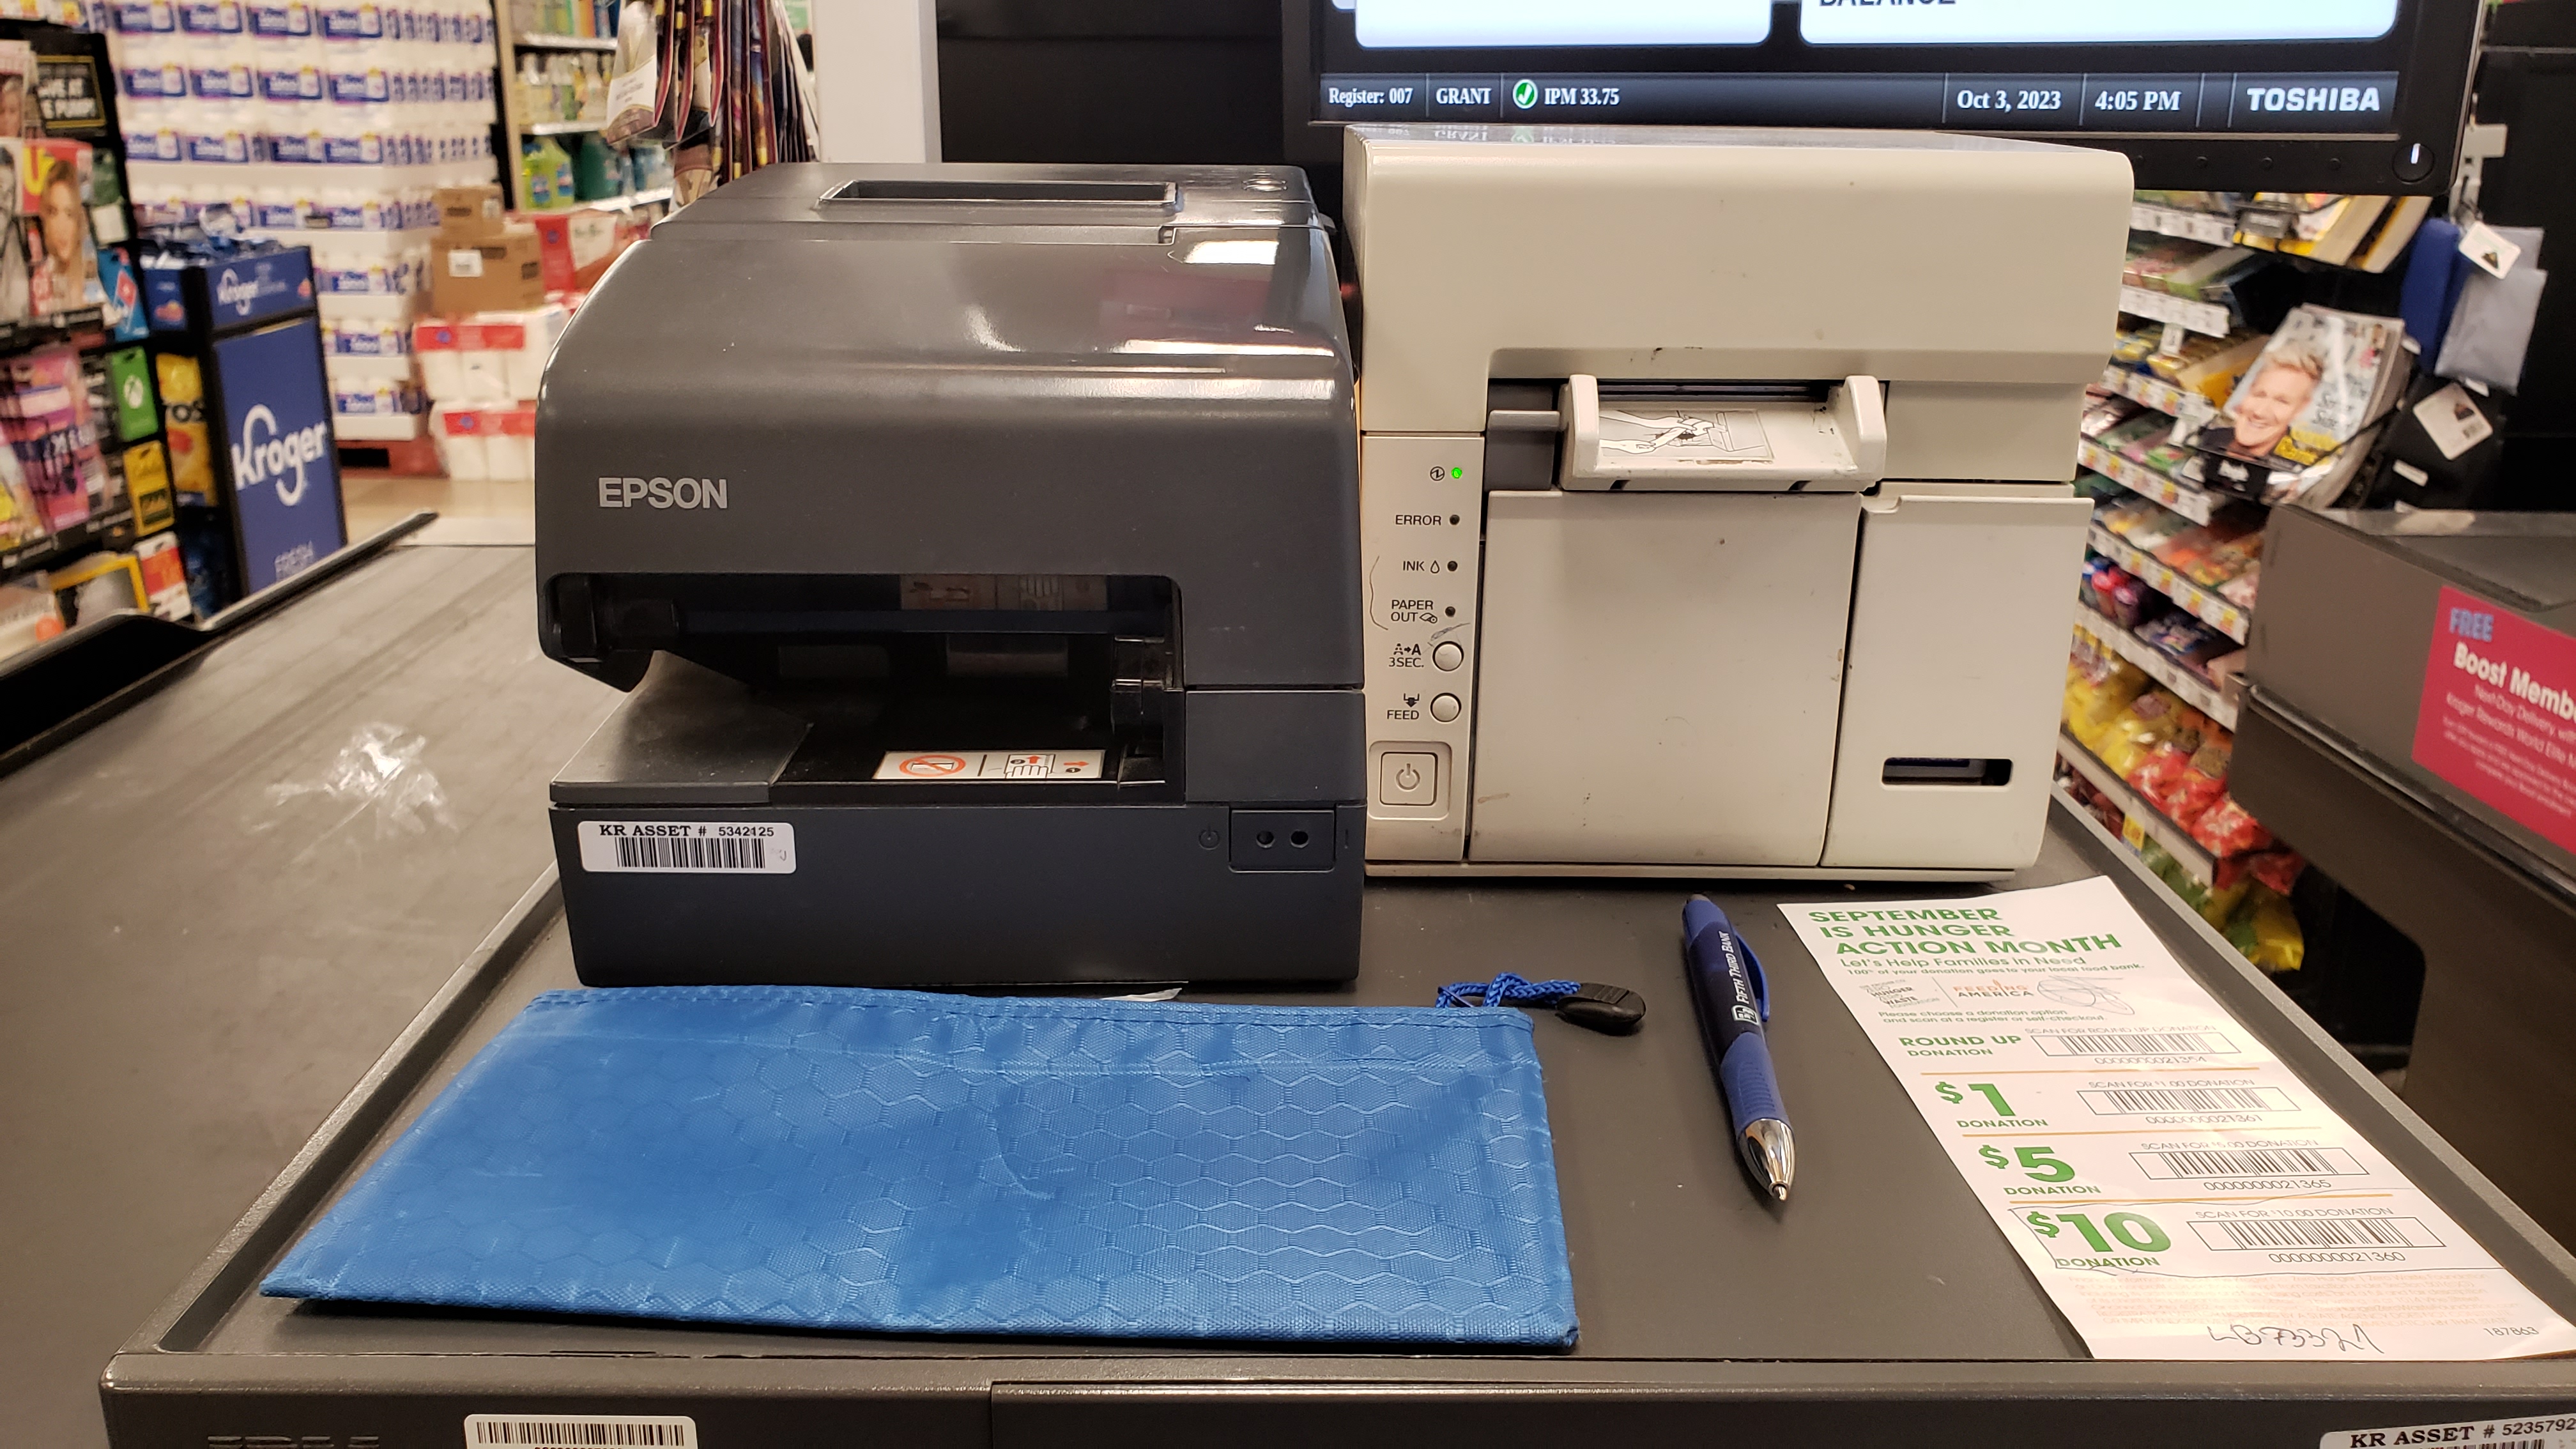
On their throne atop everything lie the coupon and receipt printers. These can be real problems at times so let's look at them individually.
The Coupon Printer
The coupon printer has several status lights on the front that can clue you into what's wrong. On the right side there is a compartment for the ink cartridges. In the middle is the compartment for the coupon tape (catalina as some call it). If there is coupon tape in the machine and it is indicating otherwise try turning it off and back on either by unplugging it from behind or by using the power button on the bottom right.
The Receipt Printer
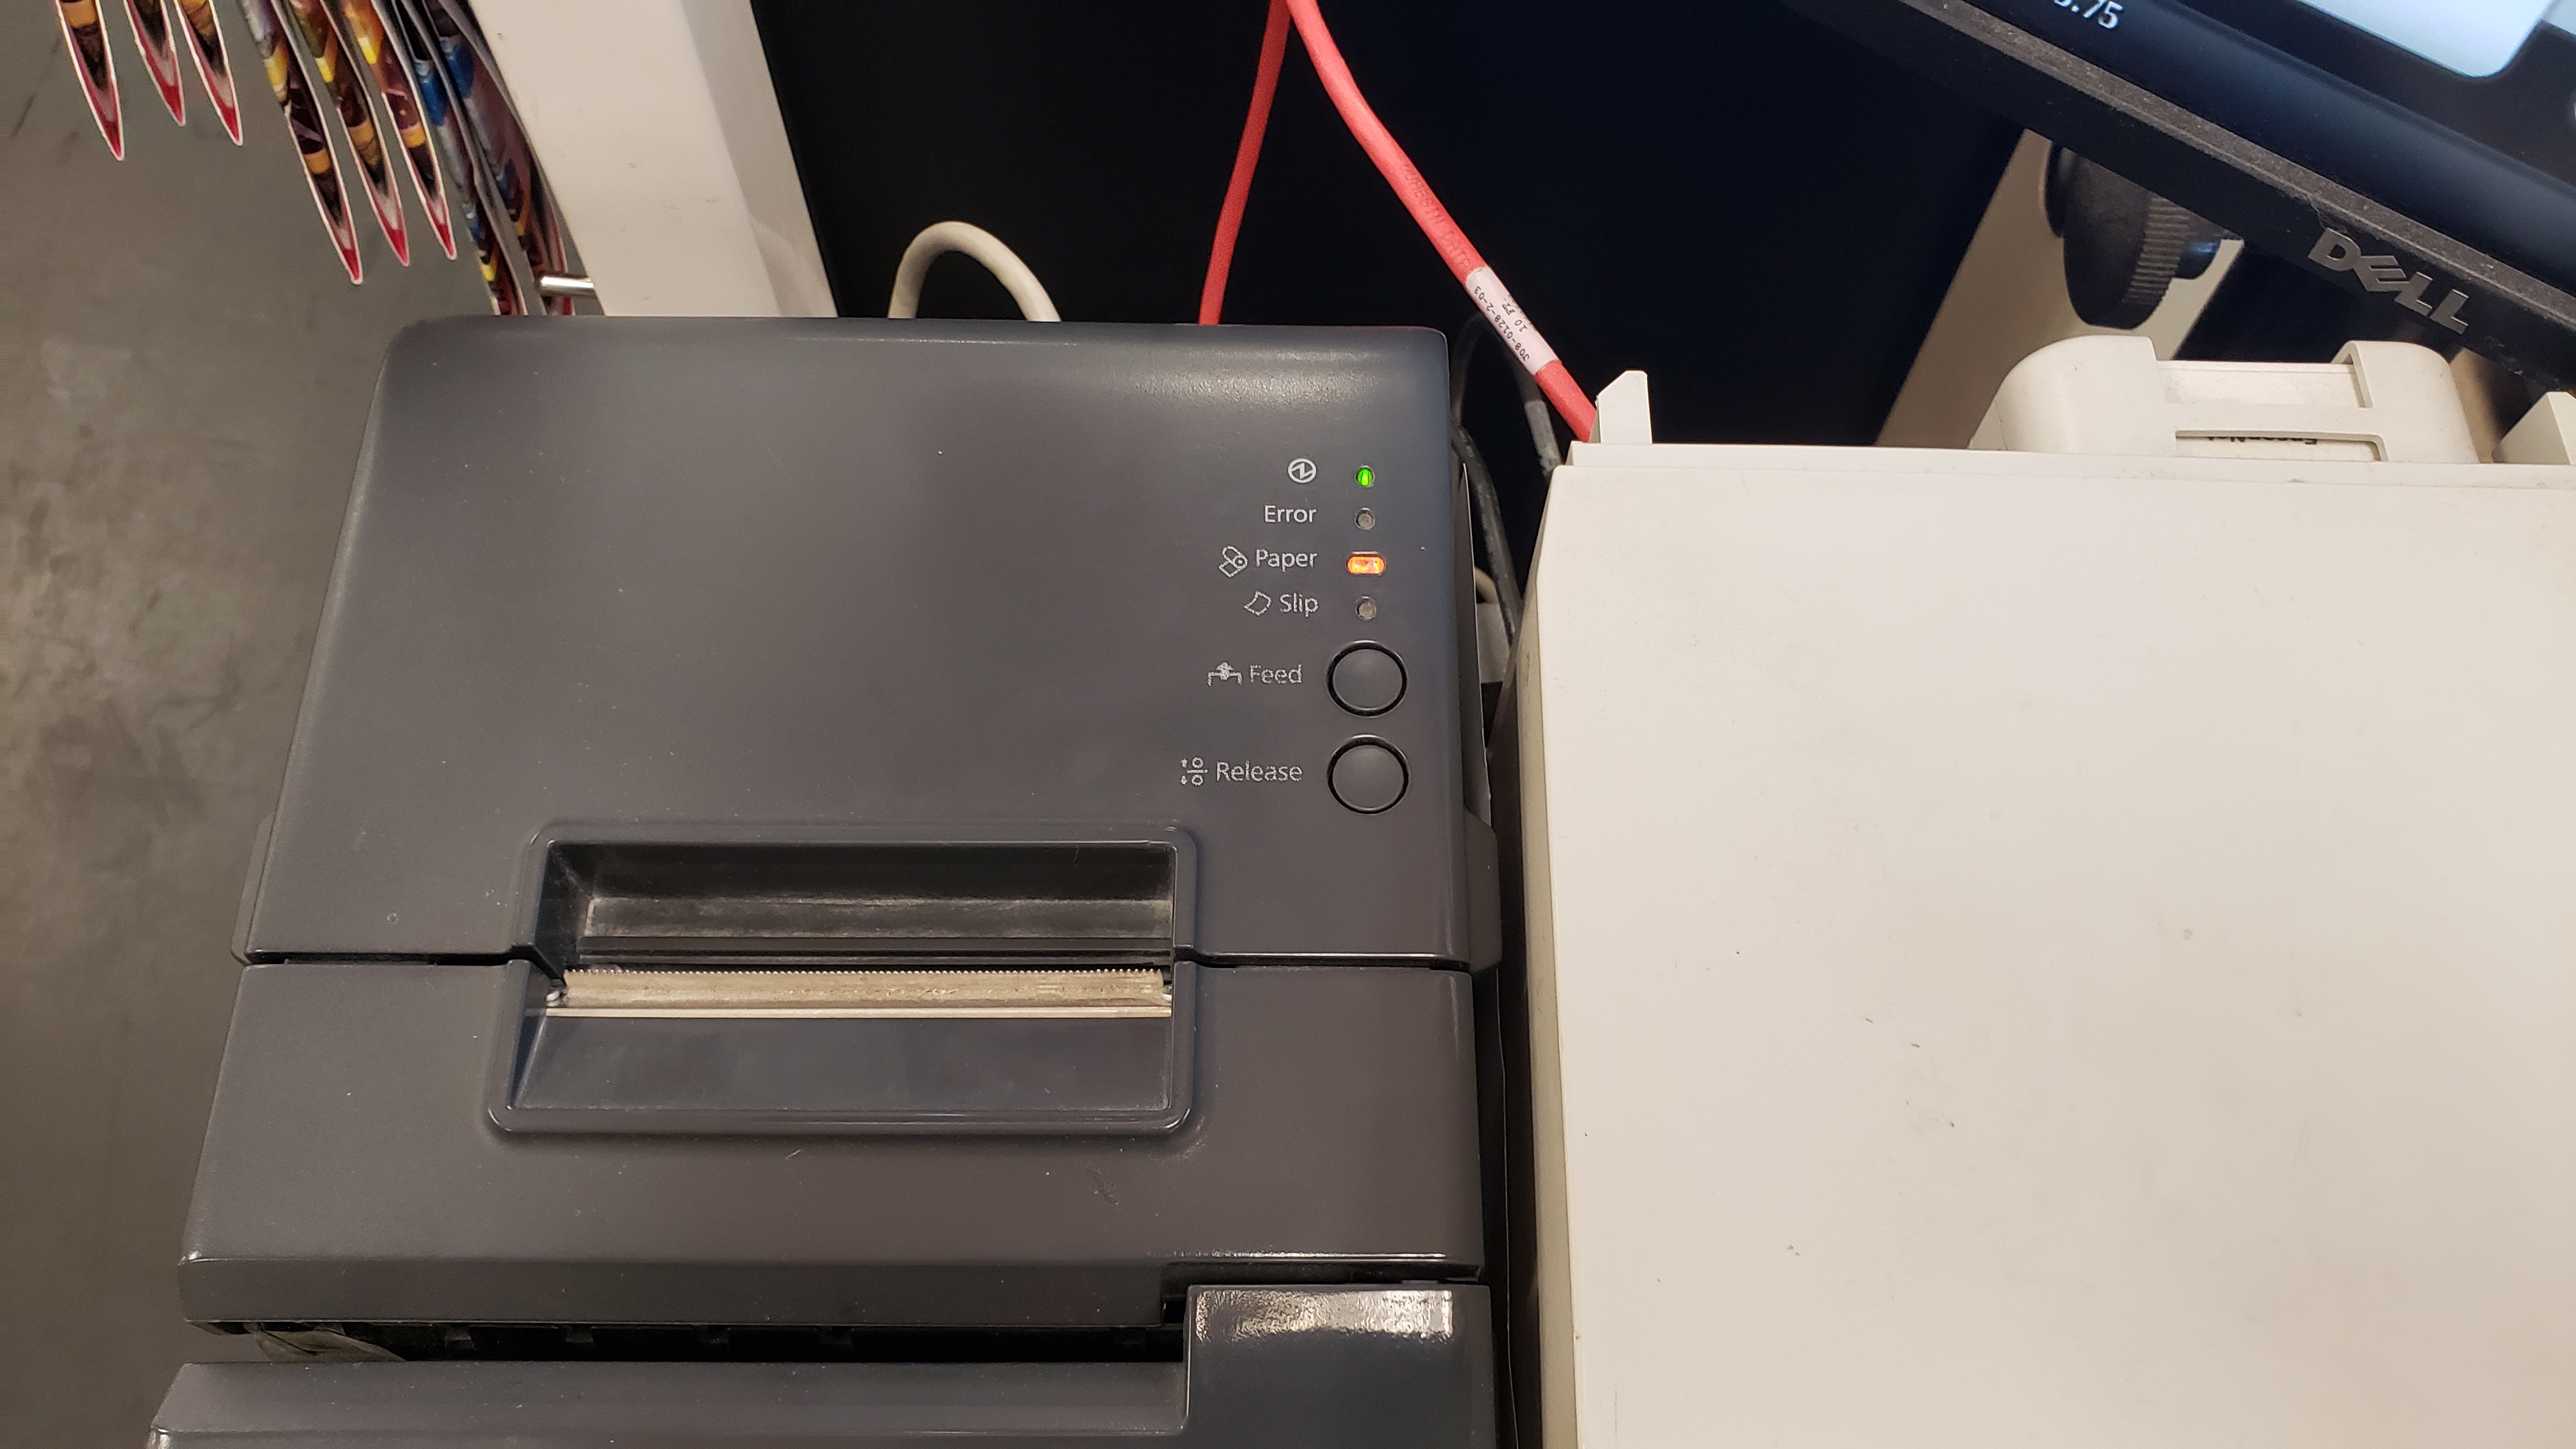
Similar to the coupon printer, the receipt printer has several status lights on top. The power switch on the front is protected by a flap that must be skillfully taken off. Alternatively, use a paper clip to push the switch through the holes in the flap. There is a compartment on top for the ink ribbon as well as the receipt tape.
The Item Belt
The main belt that the customers place their items on is motion activated. You can see in the video where the sensor is on the right side, and you can also see the identical sensors on the opposite side that look like little black dots. When the sensor becomes blocked by an item, it stops the belt, and will only start again when the blockage is clear. It does not have a stop button, but without sensing motion for like 30ish seconds it will automatically shut down. In rare circumstances, if there is too much weight on the belt, it will just stop moving altogether.
The bagger belt is much simpler to operate, with a simple switch by where the bagger stands and another to the left of your bagging stand.
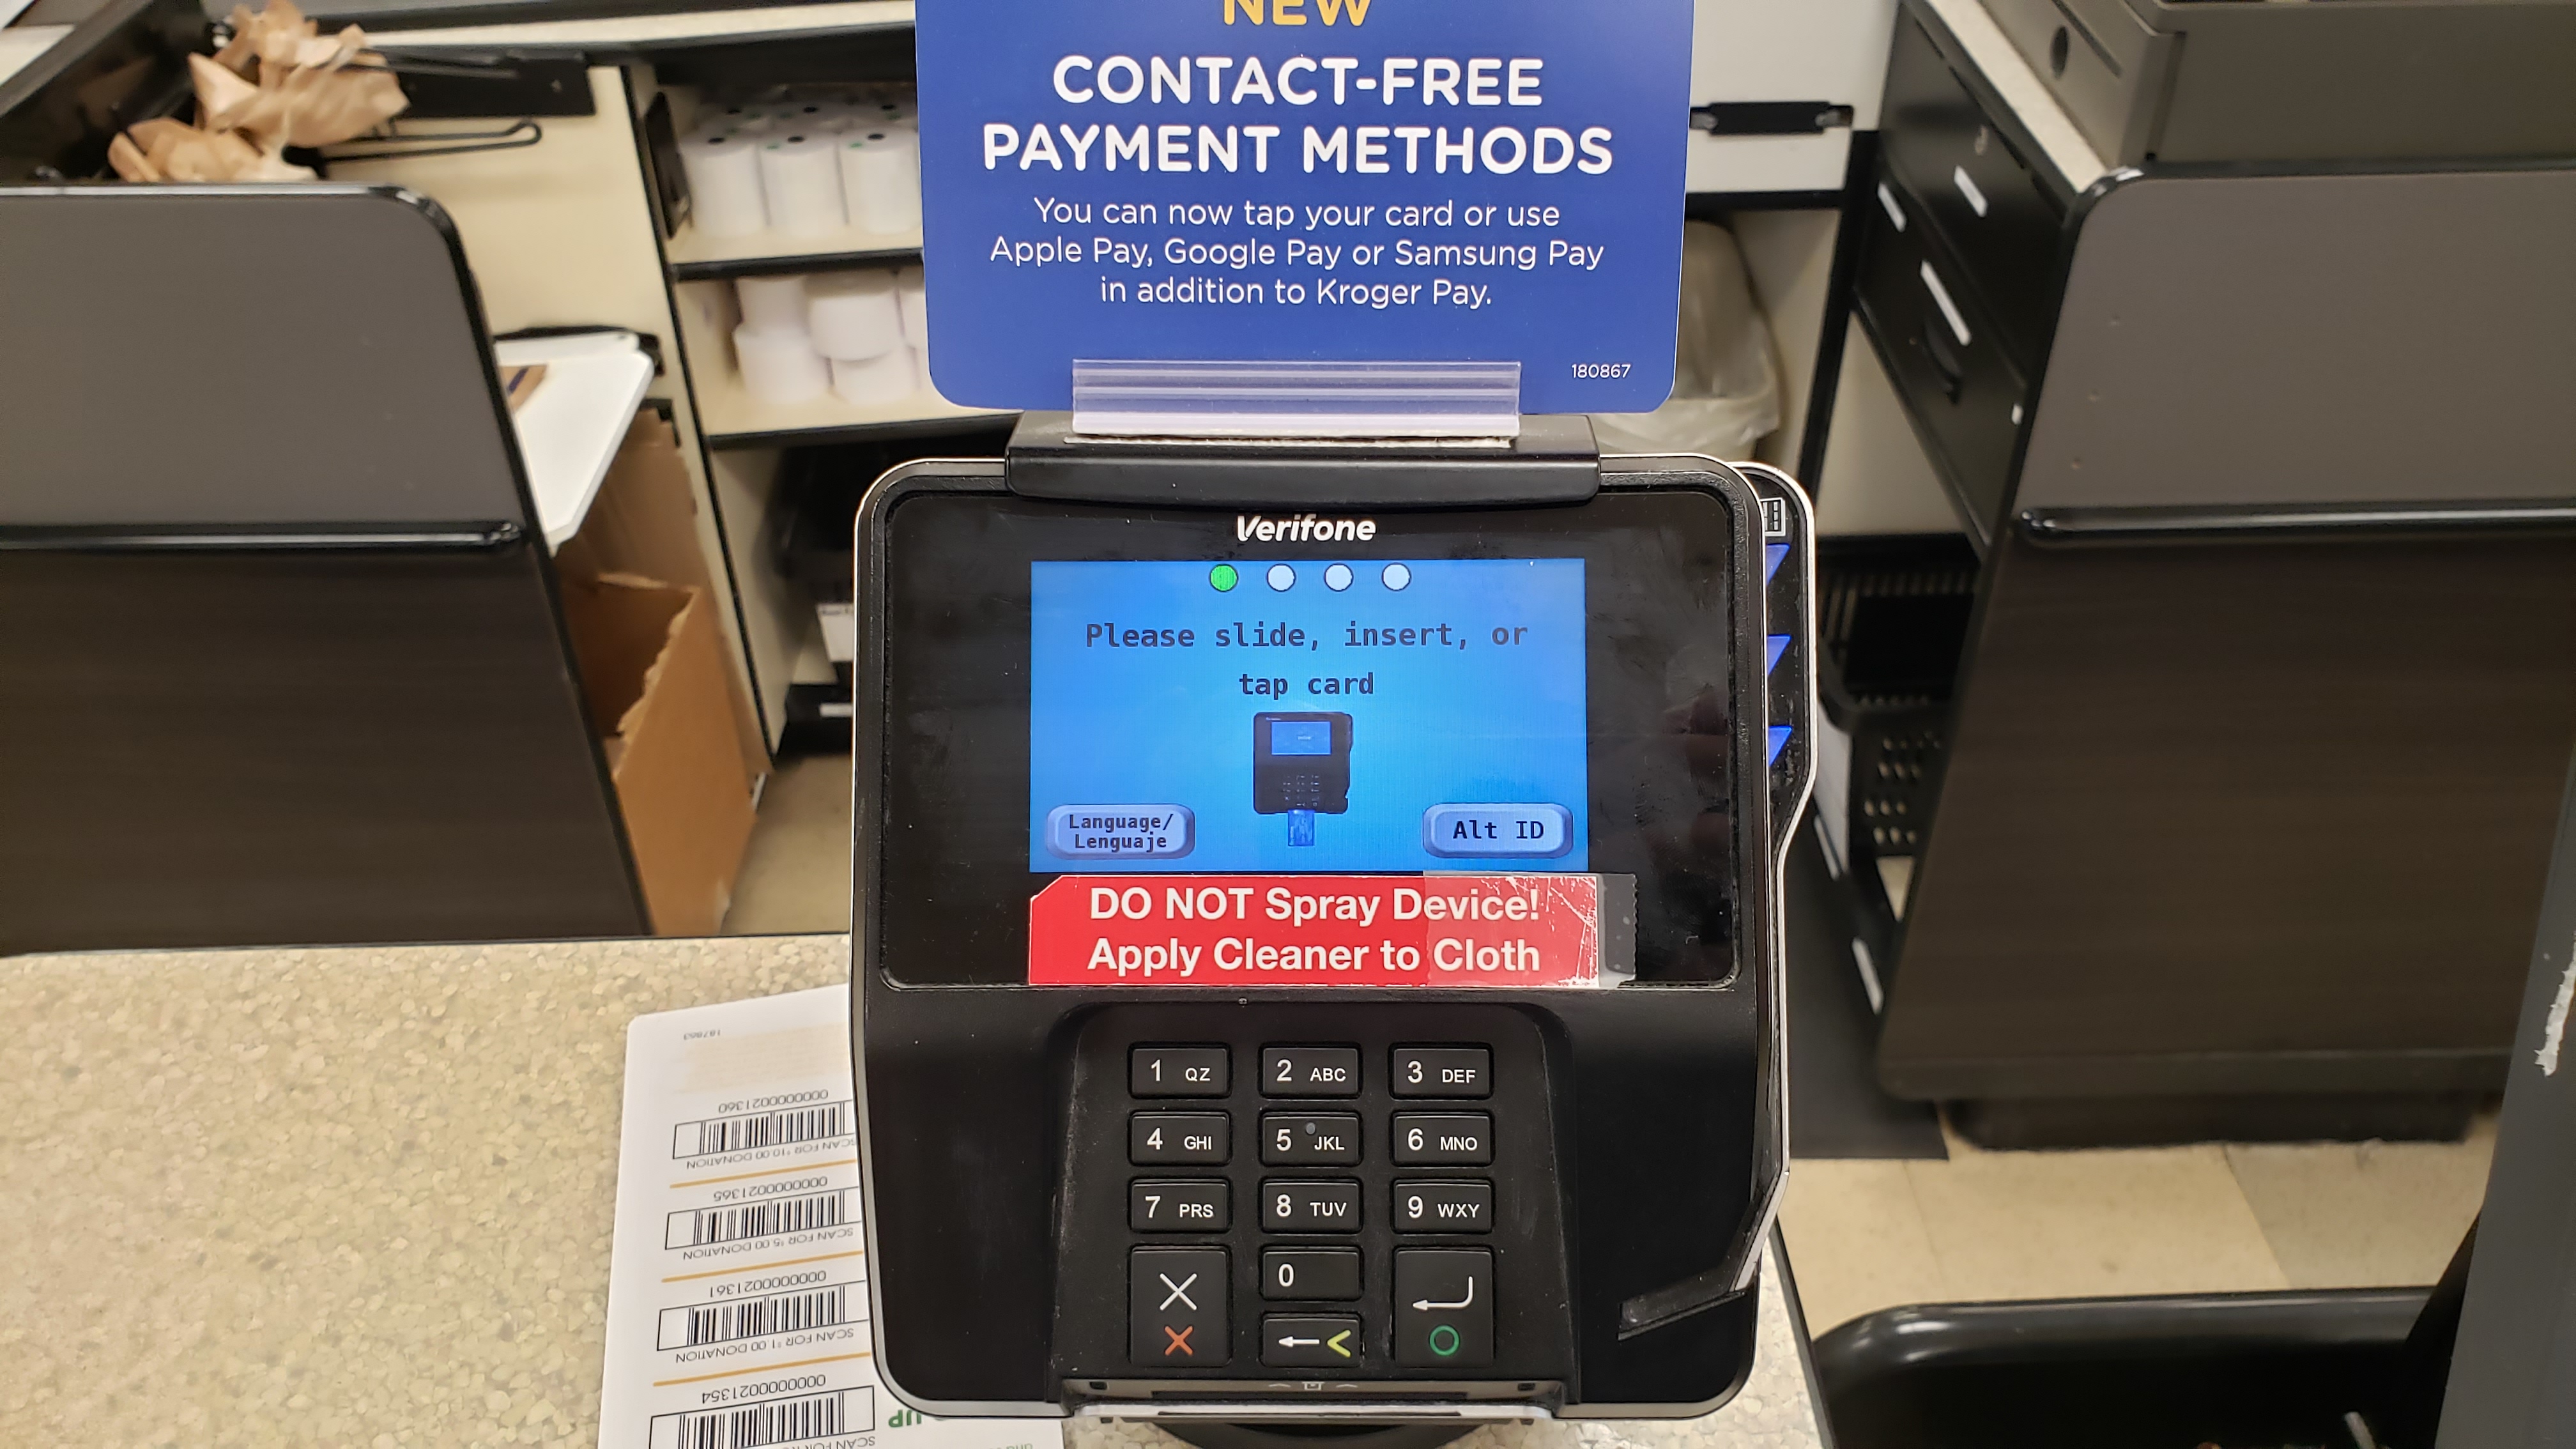
The Pin Pad
On the touchscreen there are two buttons one to let the customer enter an Alternate ID and another to change the language to Spanish.
An Example Order
Let's take a look at a typical order. Firstly, greet the customer. I like a nice flowery "Hellooooo" followed by a poite "How are you doing today sir/ma'am?" Once they've put grocery to belt, then the real fun starts.
Universally, the fastest way to scan a barcode on a unfamiliar normal item is to first check the bottom and then to rotate it around quickly. The scanner's range is quite impressive and might find the barcode even before you do. With experience, you'll remember the location of most of the barcodes by muscle memory.
The register for better and for worse sticks to doing one thing at a time, so the audio cue when an item scans is a reliable way to monitor scanning. If you hear several beeps, then you need to void the duplicate item/items.
When items are coming slowly, to maintain a high IPM, you can total the order between items or better yet lock the drawer, as it is more secure and ironically faster.
The hardest part though of scanning items is the produce.
Scanning Produce
When scanning produce, Kroger wants you to scan the barcode on the item whenever possible. This can be difficult do to the not at all uniform texture and shape of produce so here are some tips:
- If the produce is in a plastic bag, either remove it from the bag, or place the tag right up on the bag's surface and try to eliminate wrinkles in the bag.
- The handscanner is often your best choice. Slowly pan the scanner further and closer to the barcode if it refuses to scan, and hopefully it will pick it up.
- If it doesn't scan however, you can punch in the 4-5 digit code found on nearly every produce barcode.
- If it just completely doesn't have a sticker, use the Category Search or Text Search options from the Quick Lookup menu.
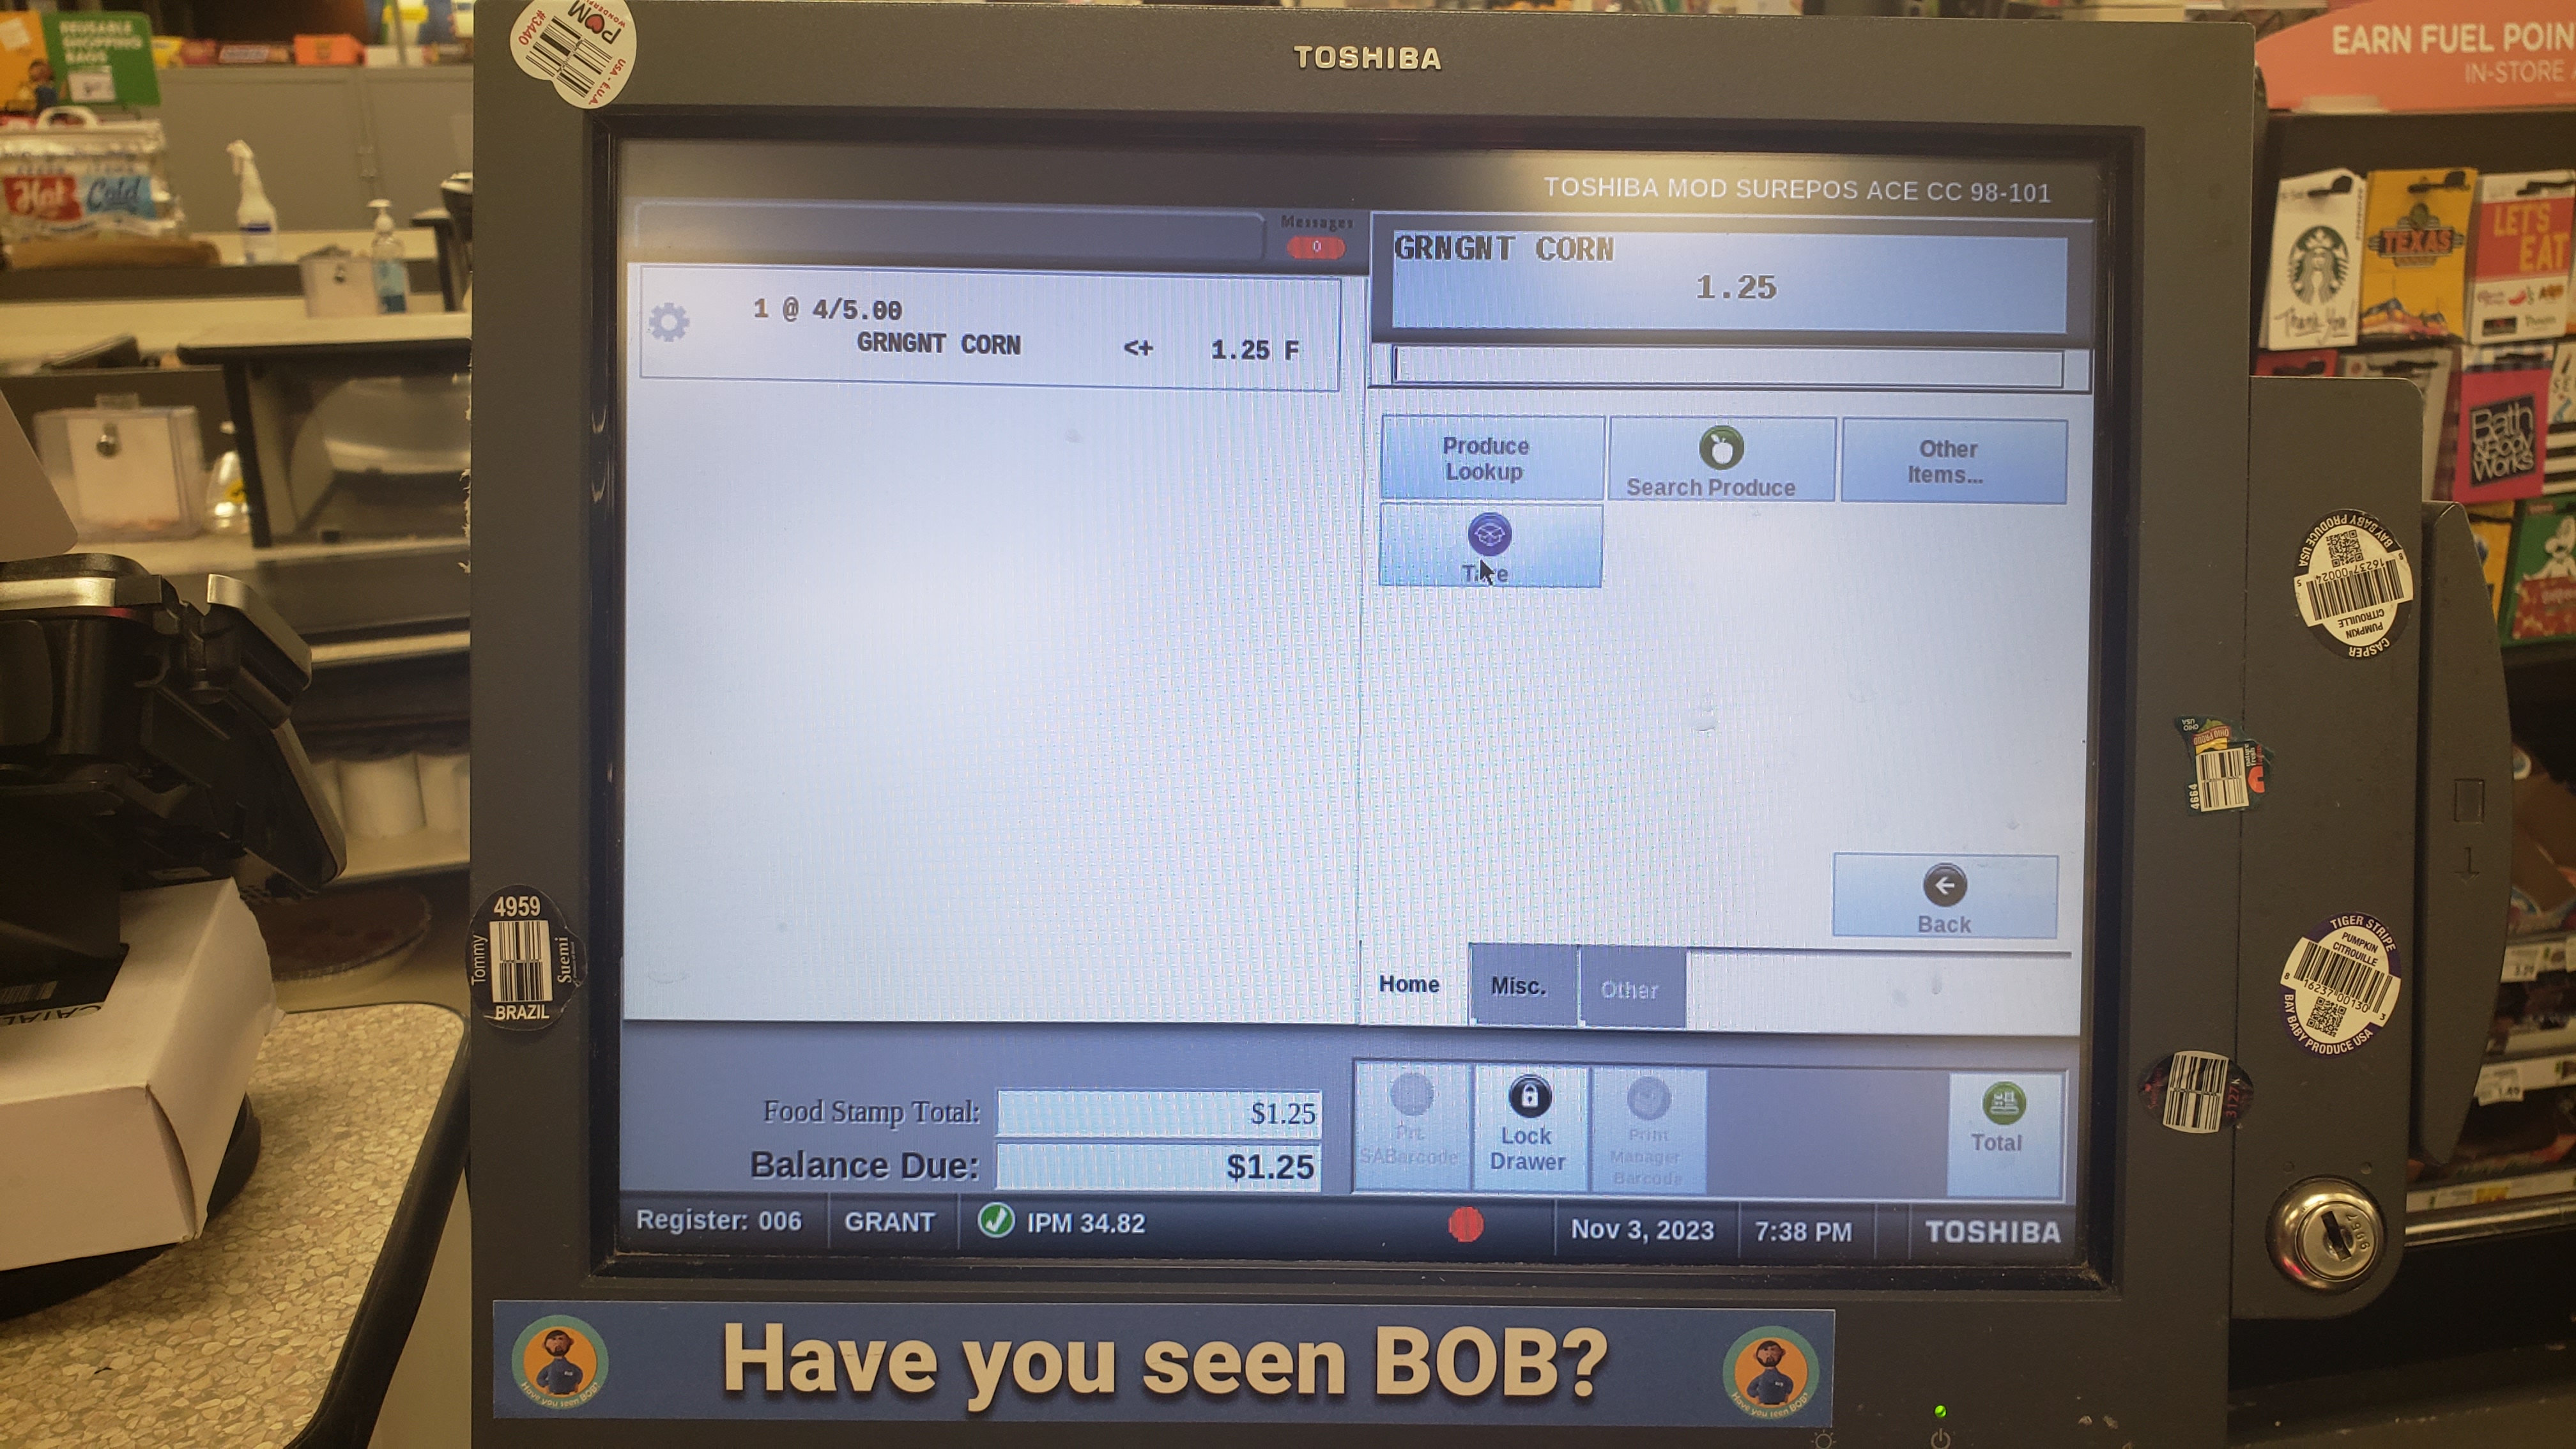
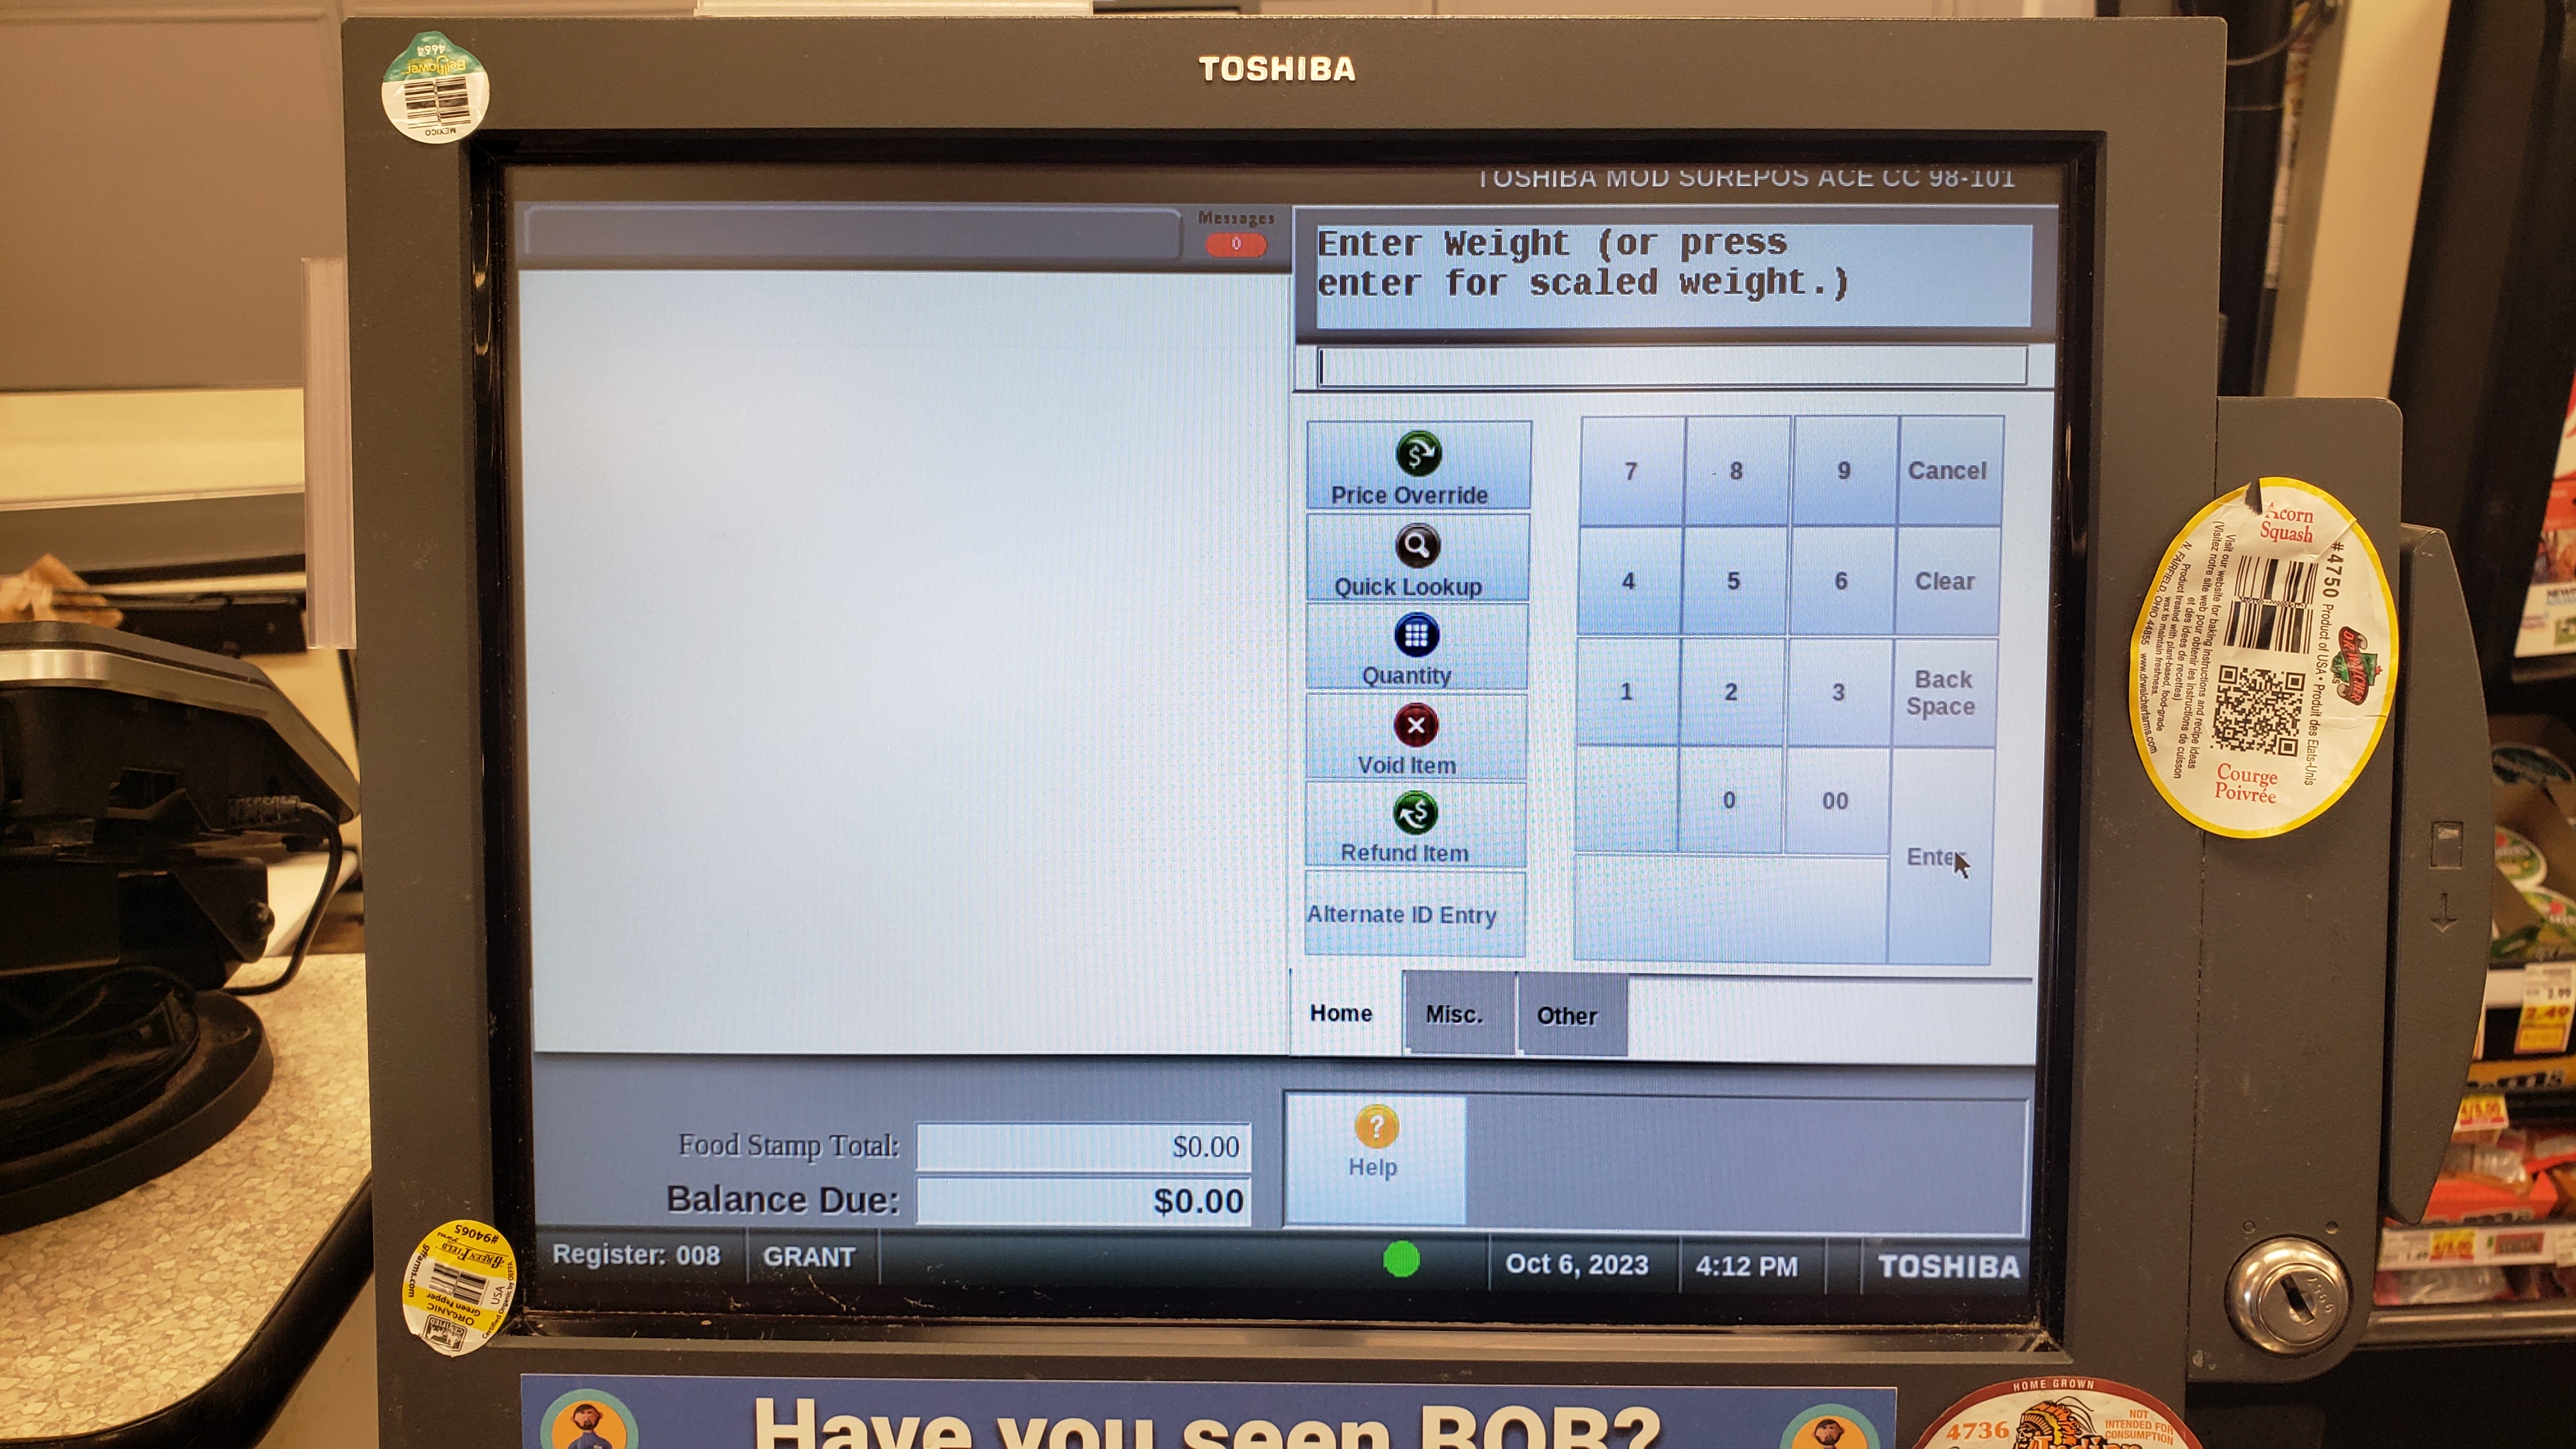
Once the produce has been entered, it will either ask for a quantity or a weight. Quantity is very easy but weighing can be more finicky.
Paying Up
Once all the items are scanned, you can now move on to the final steps of the transaction.
If you haven't already scan the customer's plus card or get their Alternate ID.
Scan any paper coupons the customer provides. This must be done from the total screen.
Lastly, give the final total of the order and watch the customer to see how they are going to pay. Readying for an EFT payment is always a safe bet.
Once they've finished paying, give the customer their receipt and any coupons, thank them for coming in, and invite them back.