 From the Menu Bar, select the Tools menu, Import and Export Settings, Reset All Settings, No, then select
General Development Settings. This should help your User Interface (UI) more closely resembling the screen Images
in this section.
From the Menu Bar, select the Tools menu, Import and Export Settings, Reset All Settings, No, then select
General Development Settings. This should help your User Interface (UI) more closely resembling the screen Images
in this section.
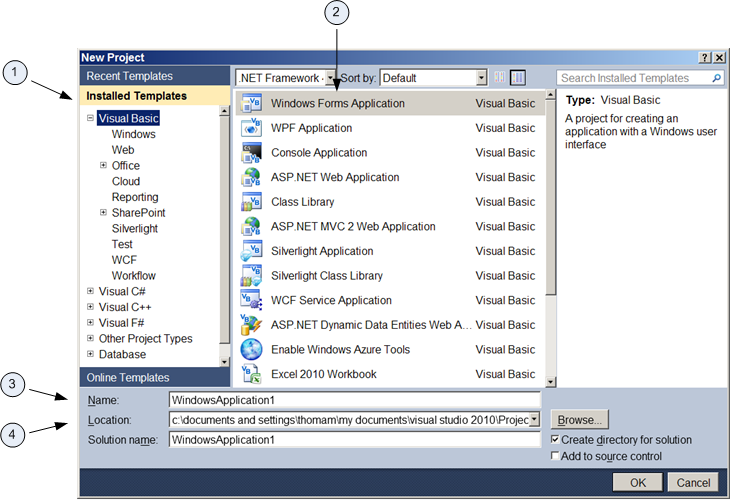
Next, on the Menu Bar, select File ![]() New
New ![]() Project menu
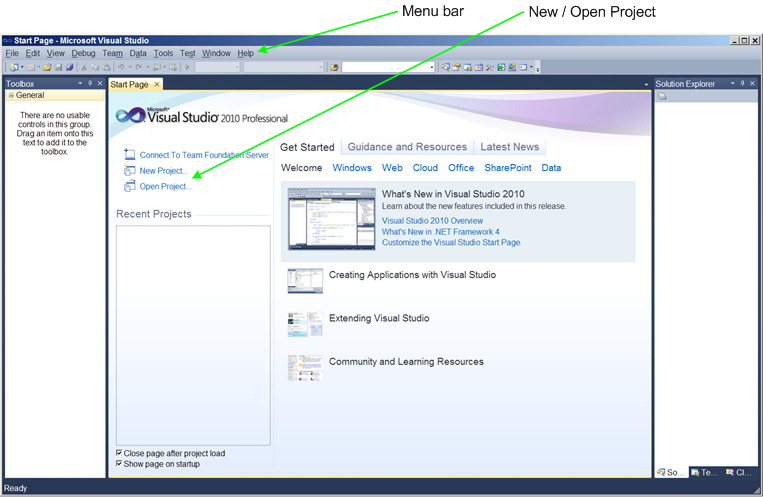
or select New Project from the Start page and you should see a window something like:
Project menu
or select New Project from the Start page and you should see a window something like:
This is the New Project form (see the title bar). This is where selections for the type of New Project will be made. There are several important selections to be made on this form:
I suggest un-checking the "Create directory for solution" checkbox. Checking this will only add another Folder layer in
the file system hierarchy. By unchecking this, the main Folder as well as most of the files will get the name of your
application and reside in the location specified. Once unchecked, the "Solution Name" textbox will be greyed out.
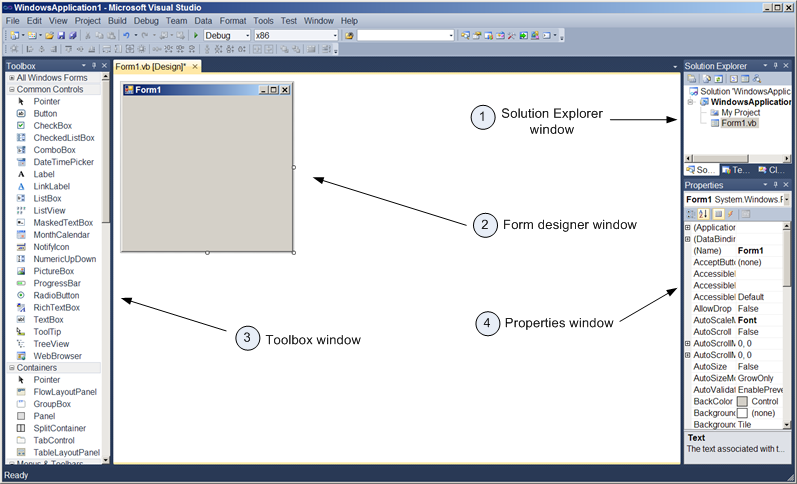
If the IDE you launch does not have a specific window open which is present in the figure above, you can simply add
it by using the View menu on the menu bar. You can also close extraneous windows by clicking on the close icon in the
upper right corner of the window. There are four windows on which to focus in this diagram:
To view a solution in another context, we can picture something we already understand, such as a filing cabinet. Using the analogy of a file cabinet, each Visual Basic solution can be viewed as an individual drawer within the cabinet; each project can be viewed as a file folder within a drawer; and the individual solutions files can be viewed as pages (i.e. documents) within the file folder.
Having stated the above, the most important thing to note is you cannot lose any of the files from the solution. Just as losing pages from a file folder would make that folder incomplete, losing any of the files from a solution will make that solution incomplete, and leave it non-functional!
To be safe, always move the solution as an entire Windows folder, never move the individual files.
Once you have successfully created your solution and have exited the .Net
environment, you can re-open that solution by double-clicking on the .sln file. Windows file associaion
will start up .Net and open the solution.
As we've learned, objects are instantiated from classes. So, where does a button object come from, you ask? A button class! When you retrieve a control from the toolbox, you are actually instantiating an object from the class of that control.
As we've also learned, objects are defined by the attributes that describe them. In the .Net world, these are referred to as properties. Thus, a button object is defined by its properties and a textbox is defined by its properties. Where do you view or set an objects properties? In the properties window described above, when that object is selected. Thus selecting a control object in the form window will populate the properites window with the specific properties for that control.
Each control is given default properties when it is created (instantiated). The specific default properties depend upon the specific control, however there are some consistencies between controls. For example, most controls have a color, font, size, location, and other similar properties. However, there are two important properties that all controls share, specifically the:
The Name property is the name of the control object itself. This value is what the VB developer uses to refer to the object within the programming environment. The user will never see this property value.
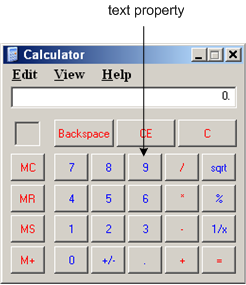
The Text property is the text (for lack of a better word) or label or caption that is displayed for the user. For example, the 9 character is the Text property of the nine button on the Windows calculator (see below).
Controls and their associated properties will be examined in much greater detail when we discuss Windows based .Net applications.
| Next Section: Program Elements | Table of Contents |
©2007, Mark A. Thomas. All Rights Reserved.