Introduction
This tutorial demonstrates how to configure NetBeans to create and
build C++ projects. We use the NetBeans IDE version 6.5, g++ v4.4.1,
and Fedora v11. The operating system runs within Sun Virtual Box
3.0.0 r52128, which does not affect the tutorial in any way save for
the appearance of the figures. Given the nature of Linux in general,
these steps should apply to any modern version of Linux, g++, Gnome,
and NetBeans.
Although NetBeans is commonly associated with Java, the NetBeans
IDE and C Plus Plus are also compatible. NetBeans is actually a
development environment that is extremely flexible. Adapting
NetBeans to work with Cpp programs is time well spent. |
Figure 1
From the Gnome Desktop, click System/ Administration
/ Add/Remove Software:
Step 1: Type netbeans into the Find field.
Step 2: Click the Find button
Step 3: Wait a few minutes while the Find executes. When the
results window populates, check the box adjacent to
Integrated Development Environment (IDE).
Step 4: Click the Apply button |
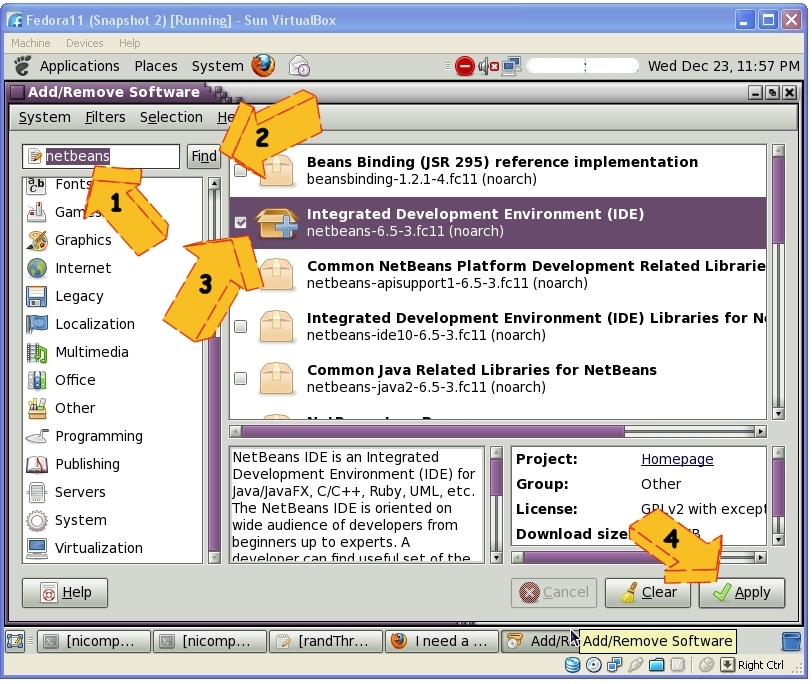 |
Figure 2
Step 5: A window will appear: confirm the installation of several
additional packages by clicking Install. This will
download Netbeans and install the IDE on your system.
|
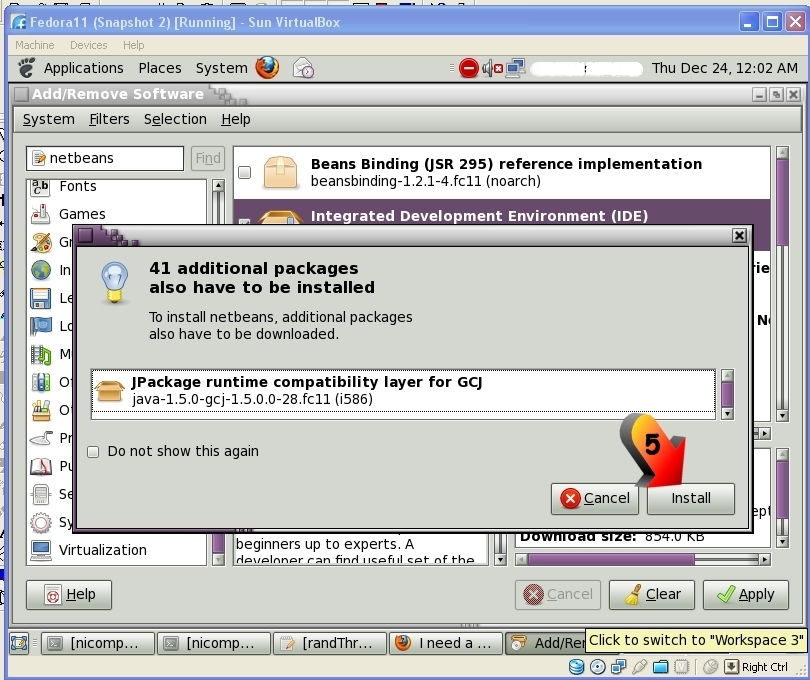 |
Figure 3
Step 6: Wait a few minutes as the installation of NetBeans
completes. From the main menu of Gnome, click Applications
/ Programming / NetBeans 6.5
|
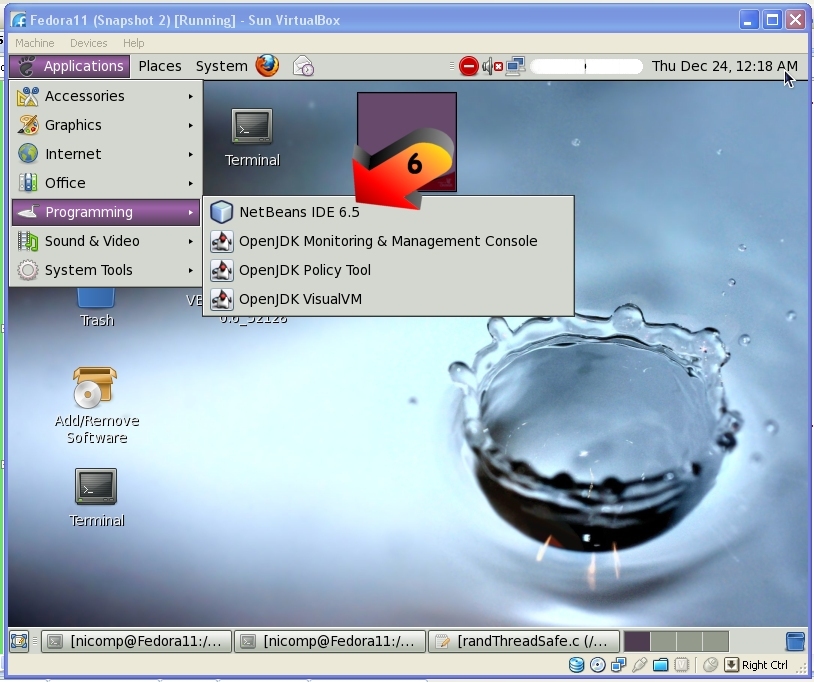 |
Figure 4
Step 7: After NetBeans loads, click Tools /
Plugins.
|
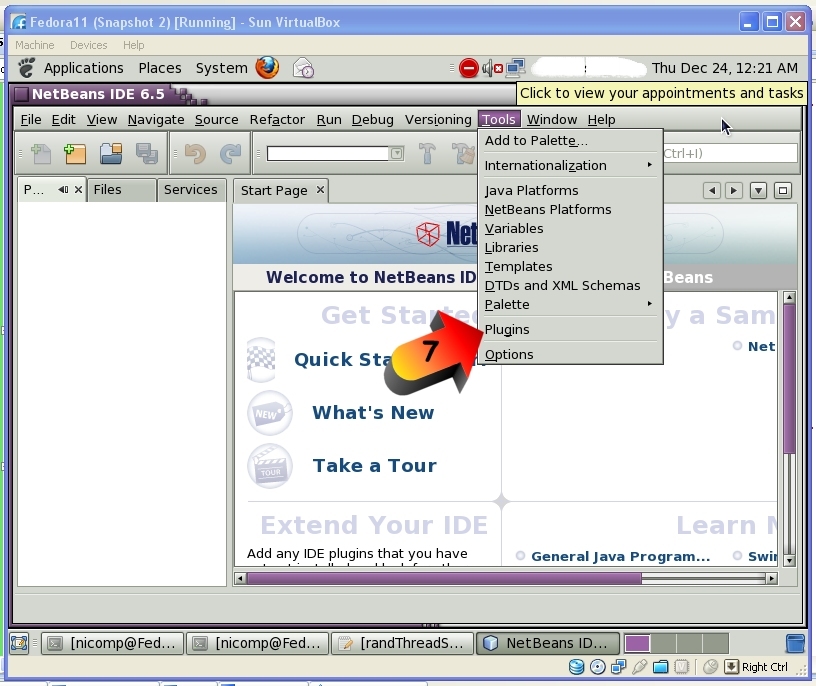 |
Figure 5
Step 8: Click the check box adjacent to the C/C++
plugin Step 9: Click the Install button |
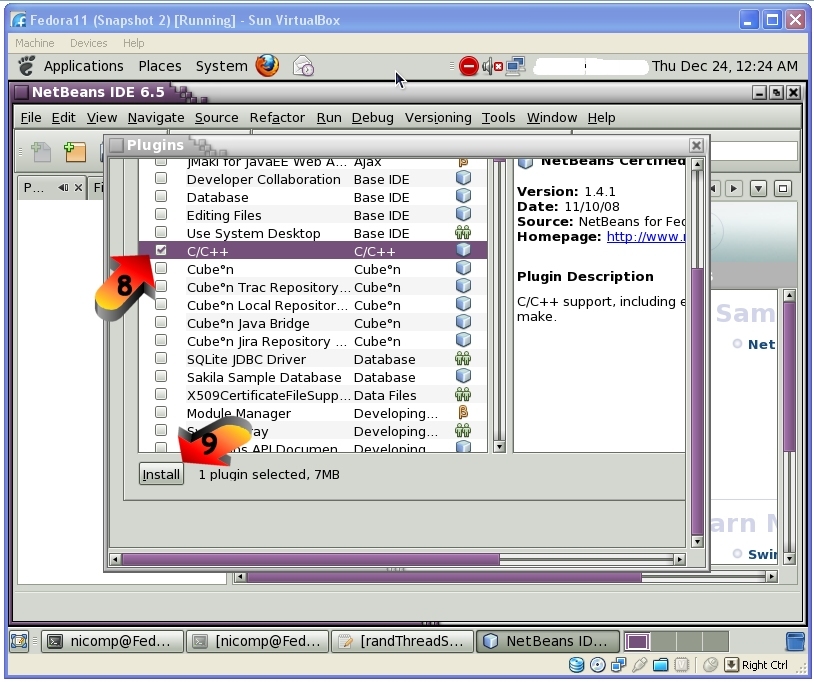 |
Figure 6
Step 10: From the NetBeans Main Menu, click File /
New Project.
|
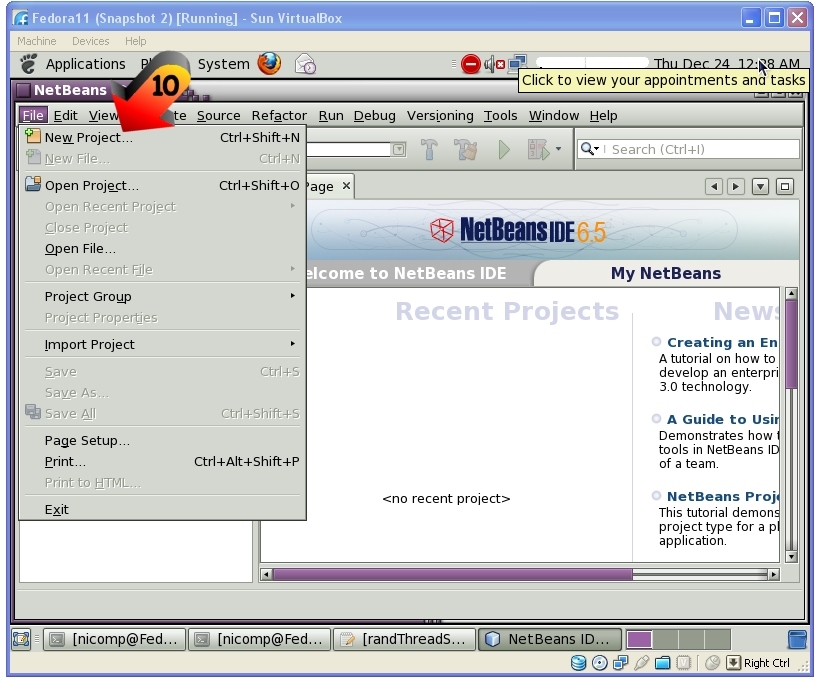 |
Figure 7
Step 11: Under Categories, select C/C++
Step 12: Under Projects, select C/C++ Application
Step 13: Click the Next button |
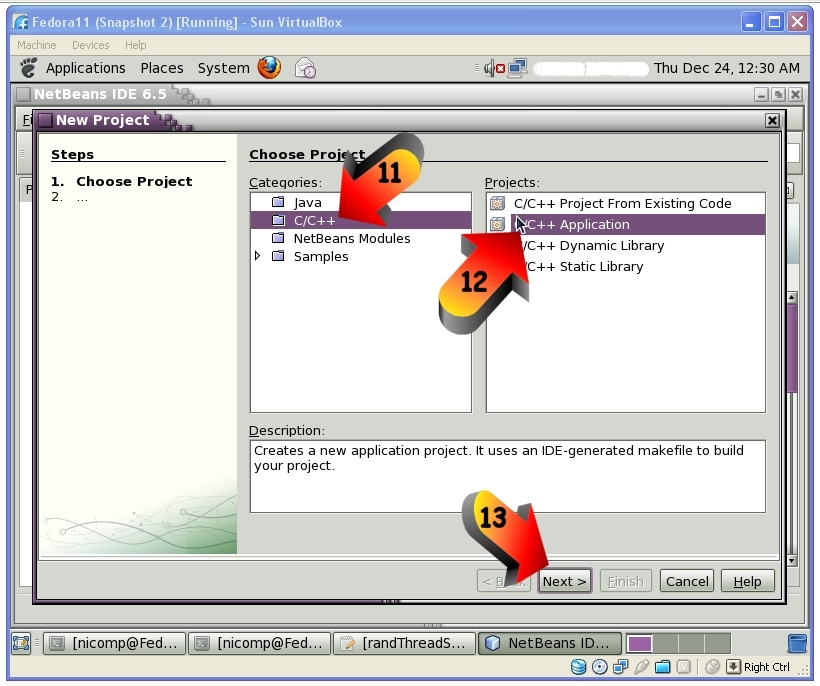 |
Figure 8
Step 14: Type the name of the project. We use HelloWorld.
Remember that this name will be used by NetBeans to create files and
directories; Linux is case-sensitive.
Step 15: Click the Finish button. |
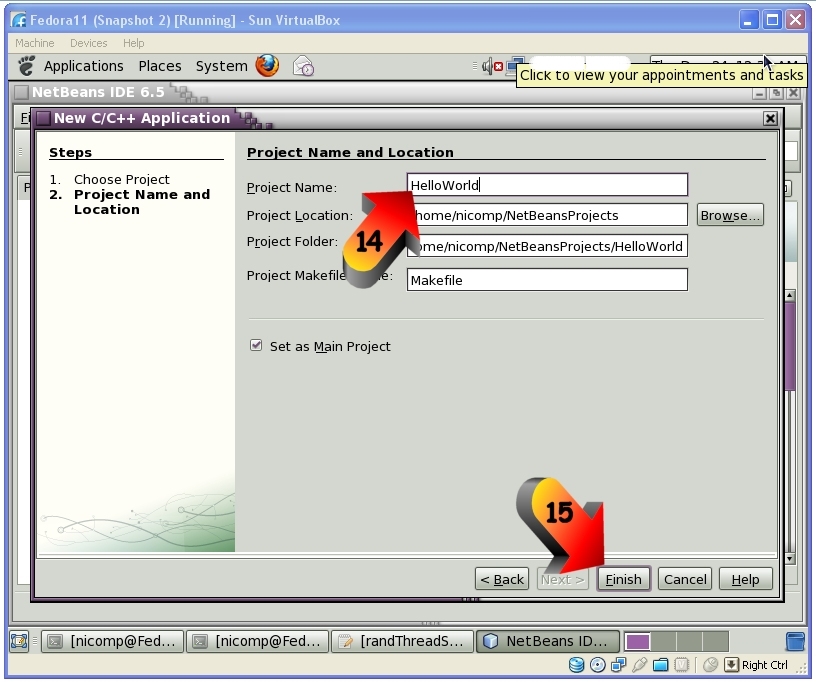 |
Figure 9
Step 16: Right-Click on the Source Files Folder. A
context menu will appear. Step 17: Select New /
Main C File. |
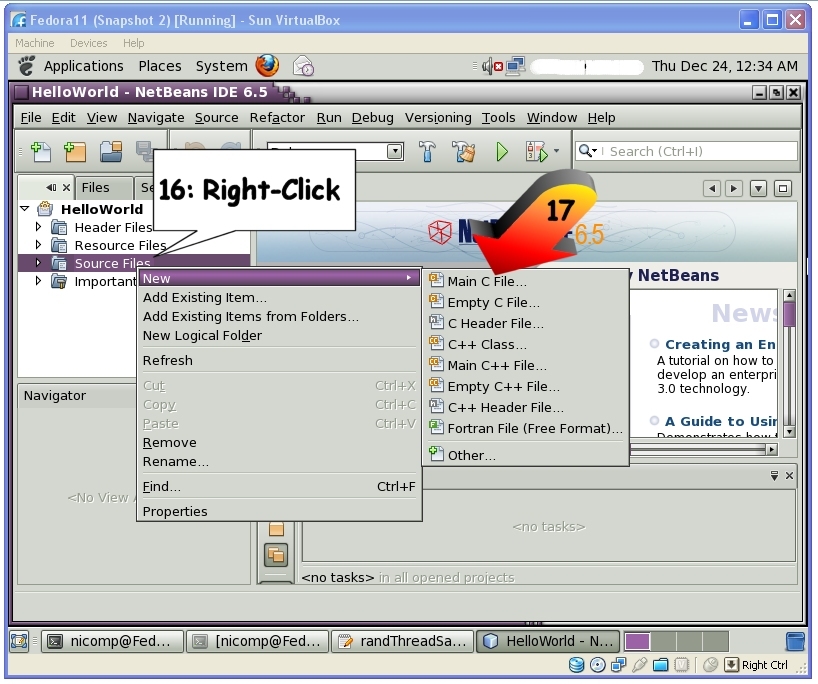 |
Figure 10
Step 18: Enter the file name main.cpp (remember that Linux file
names are case sensitive)
Step 19: Click the Finish button. |
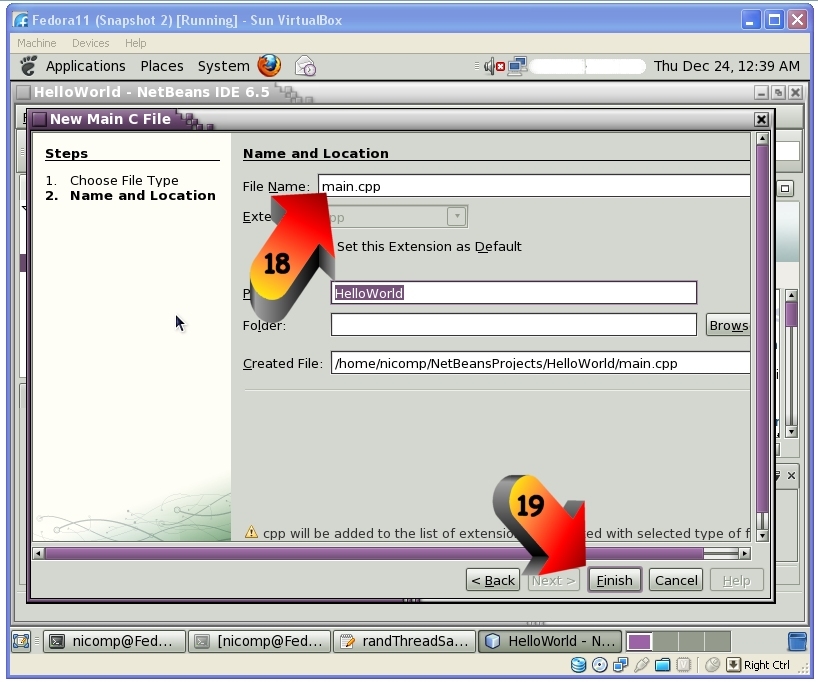 |
Figure 11
Step 20: Right Click on the HelloWorld project. A Context Menu will
appear.
Step 21: Select Properties. |
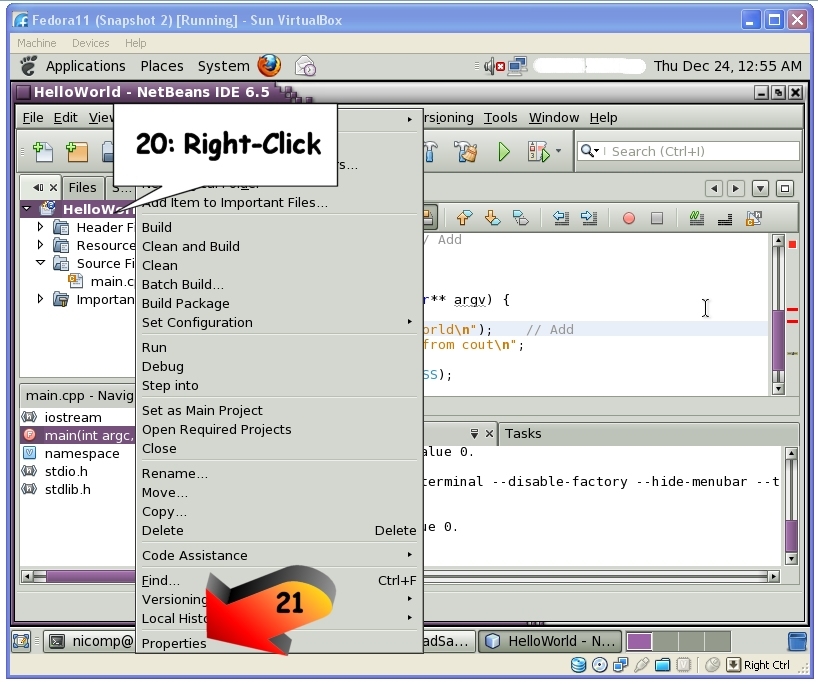 |
Figure 12
Step 22:Under Project Properties, select
C++ Compiler.
Step 23: Under Include Directories, enter the file path for the g++
headers:
/usr/include/c++/4.4.1
Click the OK button. |
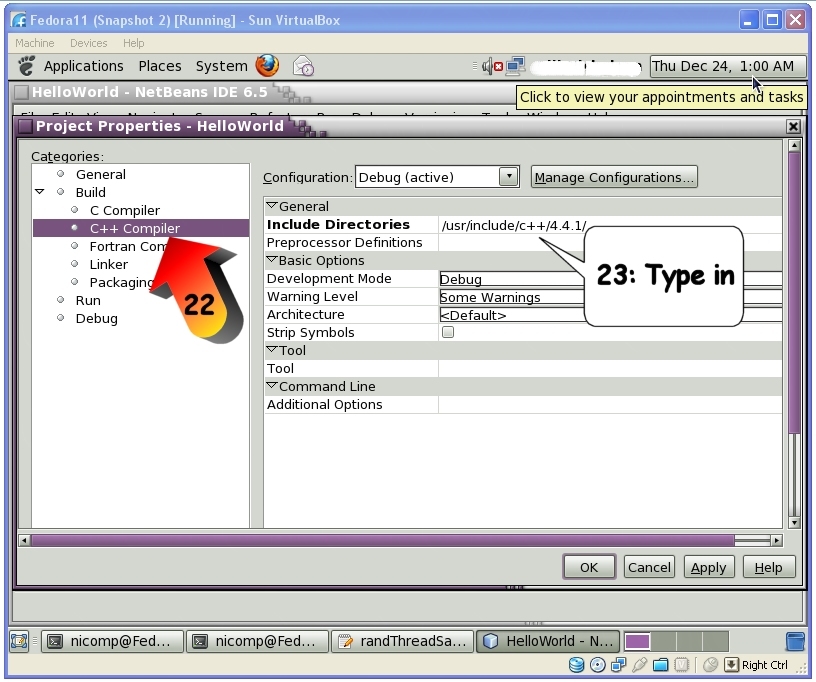 |
Figure 13
Step 24: Under Project Properties, select
Linker.
Step 25: In the Tool text box, enter g++ (case
sensitive)
Step 26: Click the Apply button |
 |
Figure 14
Step 27: Modify the code that was automagically created by NetBeans.
Add the lines that are labeled with the "Add" comment. Ignore
squiggles. The code will still build even though NetBeans doesn't
like it.
|
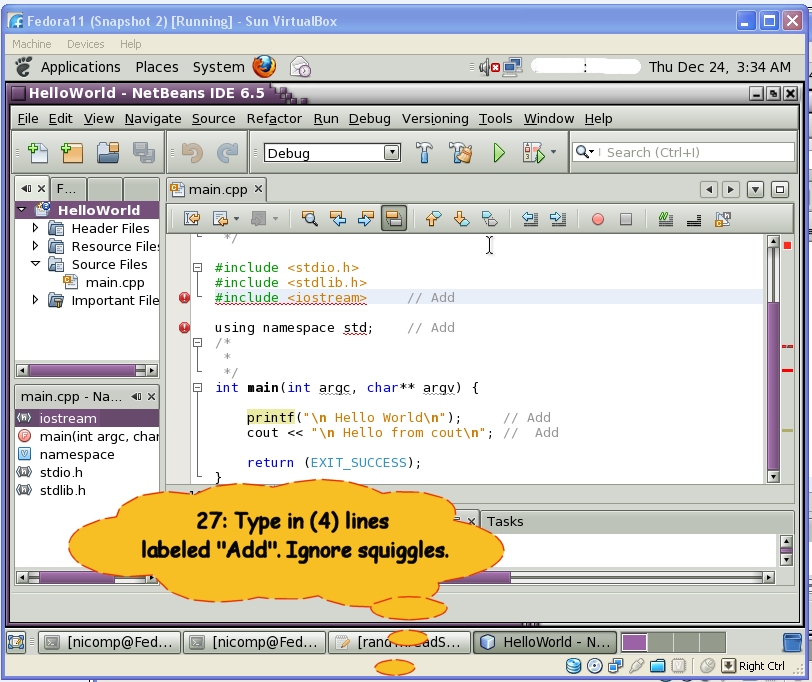 |
Figure 15
Step 28: From the NetBeans Main Menu, click Run /
Run Main Project. The project will build and
execute. Any errors will appear in the tiny window near the bottom
of the screen.
|
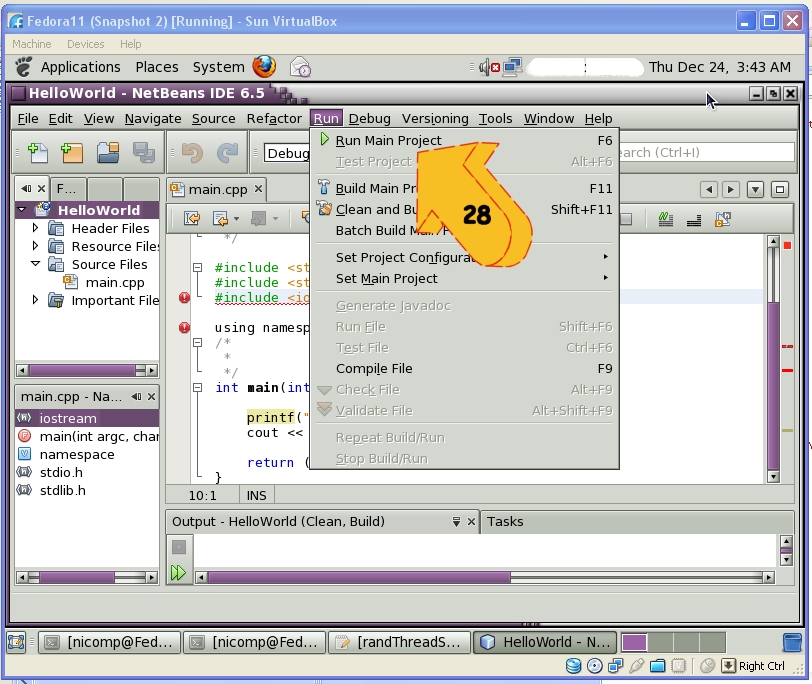 |
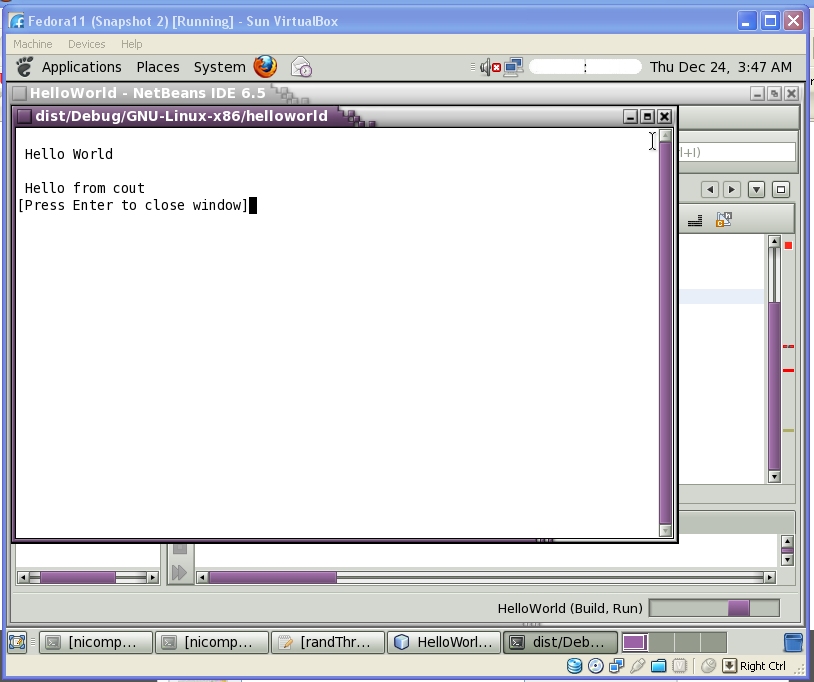
Figure 16
The expected output of the code.
Happy Coding! |
 |
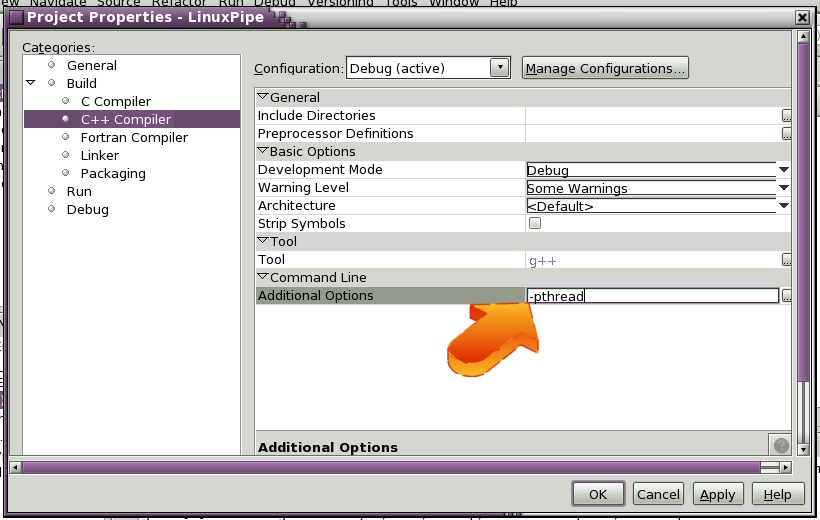
| Addendum #1: Change the linker to g++
(case sensitive)
and add the -pthread command line option.
|
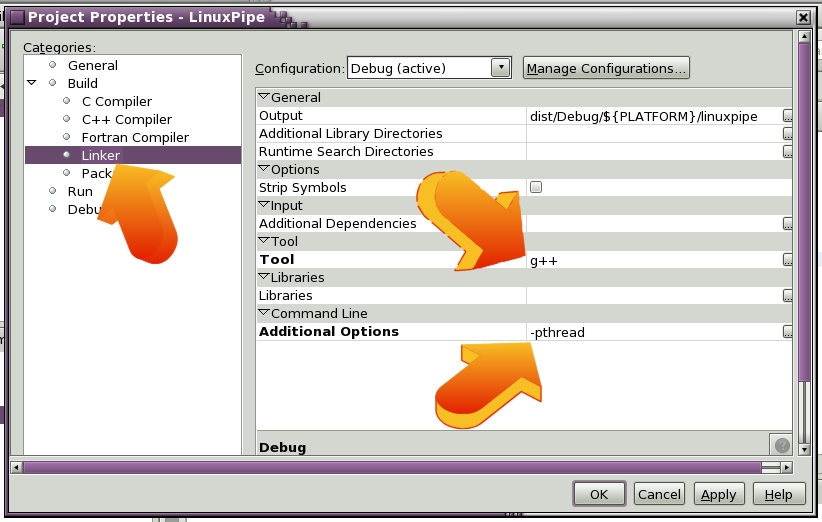 |
| Addendum #2: If your program uses POSIX Threads, add this option to
the g++ command line:
-pthread |
 |
| The working program. |
/*
* File: main.cpp
* Author: nicomp
*
* Created on December 24, 2009, 12:47 AM
*/
#include <stdio.h>
#include <stdlib.h>
#include <iostream> // Add
using namespace std; // Add
/*
*
*/
int main(int argc, char** argv) {
printf("\n Hello World\n"); // Add
cout << "\n Hello from cout\n"; // Add
return (EXIT_SUCCESS);
} |
(c) Bill Nicholson , UC College of Applied Science
 |