Using
an IDE
 |
Your First Project
Consider the components of a good Java program:
- Your custom source code
- External library files
- Images
- Configuration Files
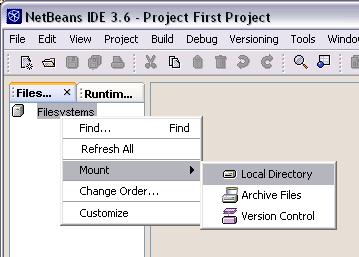
The first step in mounting a directory for our source code is to make a new directory. In Windows Explorer, create a directory for your source code for your first project. Once you've completed that, go back to NetBeans. On the upper-left side of the screen, look for the label "Filesystems". Right-click and choose "Mount-Local Directory".
Choose the directory you created in the window that appears, and then click "Finish"
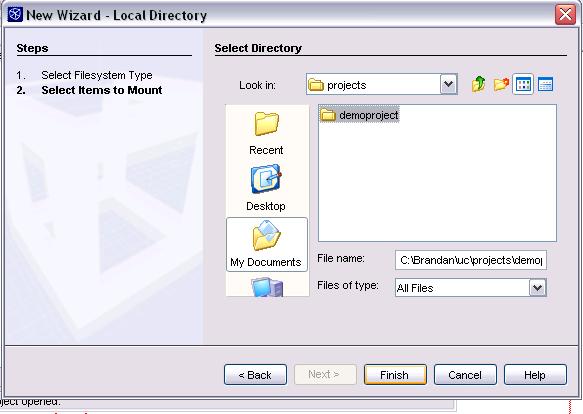
When NetBeans appears again, you'll see that directory under the "Filesystems" label.

Now you're ready to start your first program!
Starting Your First Program