Microphone attenuator for recording with MD
Using advice that people provided on the Yahoo Nature Recordists
group, I built an attenuator “cable” to connect a single
microphone to an MD recorder in such a way that one channel is
attenuated (11 dB) relative to the other.
My MD recorder (a Sony MZ-RH10) has only one volume control for
the two channels and records in stereo even if there is only a mono
input. This arrangement uses the “extra” track to provide
protection from clipping by recording a copy of the signal are
reduced levels.
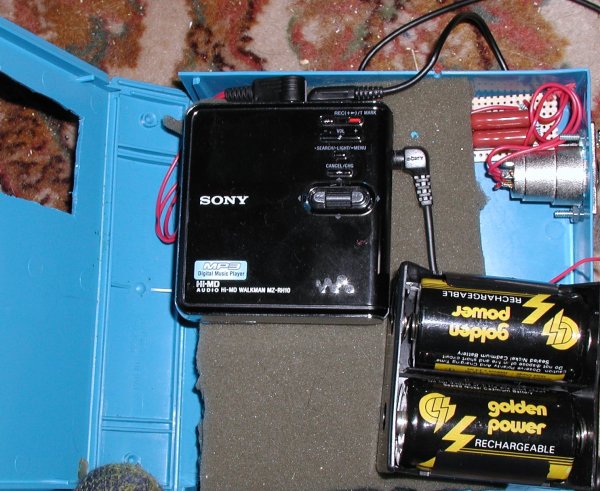
I packaged the whole thing in a small plastic box since I often
have problems with handling noise from the microphone connections
when the line flaps in the breeze as it runs from the microphone to
the input on the MD. The XLR connector on the box is a sturdier
arrangement and the whole box scheme, which reduces the chance of
jiggling the mic connection while in the field, would be worth it
even without the attenuation deal.
There's room in the box for the “AA” battery case that
attaches to the MD and/or a battery made from two “D”
cells in the fashion described here.
There's also enough room in the case to store a plastic
bag large enough for the case and the microphone I use.
By the way, the box is an old storage case for 5 ¼ “
floppy disks that was provided by a freeware/shareware distributor at
some point in the mid 1980's. I'm certain there are better cases
available. This one didn't require power tools to cut so I still have
all my fingers.
What it looks like
-
|
|
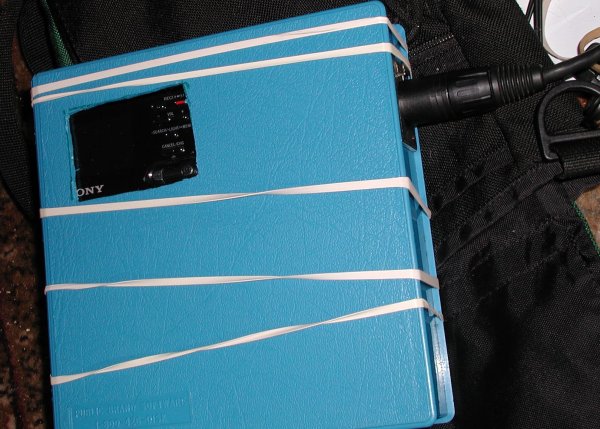
Note
cable and XLR connector from the microphone and the fancy,
high-tech method for holding the case closed. The mail room at
work has an endless supply of elastic bands.
|
|
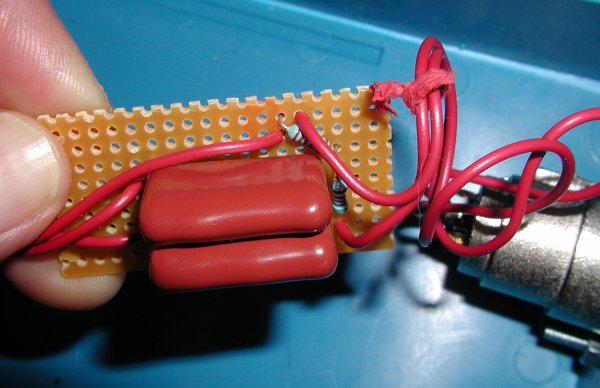
If
I knew what I was doing, I'm sure this whole thing would be
neater and much more compact. This picture shows “version
2” with the 2.25 uF capacitors.
|
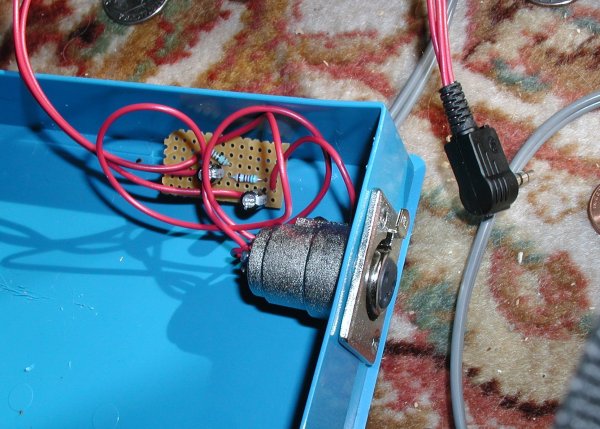
This
picture shows the first version and includes the right angle
stereo jack.
|
How to do it
The parts were easy to obtain and inexpensive. Here's what I used.
2 capacitors (my first version used Electrolytic 1 uF, the
second version used 2.25 uf Polyester non-polarized capacitors)
1 resistor (221 ohm, ¼ watt, 1%)
1 resistor (562 ohm, ¼ watt, 1%)
1 right angle mini stereo jack
1 female XLR panel mount connector
bits of wire, perf board, solder etc.
foam to hold MD recorder in place
A 2-Dcell batter holder
A miniplug clipped from the auto-charger that came with the
MD.
The most expensive item was the XLR connector that I bought at
Radio Shack for under $5.00. I know there are fancier ones but this
one is such a huge improvement over the miniplugs that I don't plan
on exchanging it any time soon. The resistors came mail order in
rolls of 100 for $3.00, which was quite a deal since 4 or them would
have cost $3.00 at Radio Shack. Even without the mail order,
everything could be bought from Radio Shack for about $10.00. The
capacitors in my second version seem to be less generally available.
The instructions for assembling the electrical bits are here
and came originally from
http://www.megalithia.com/elect/mdmicatten.pdf
as posted by stoatwizard (YahooID) to Nature Recordists on
Mar 8, 2007 .
Earlier, I'd posted that I was not certain that the capacitors are
the correct ones, but they seemed to work. Later, I switched
capacitors on the advice of Rich Peet. If you're using polarized (eg.
electrolytic) capacitors and are a real beginner like me, note that
electrolytic capacitors have an intrinsic polarity. In the attenuator
scheme the “+” side of the capacitor goes towards the MD
recorder. The capacitors I got weren't labeled “+” and
“-” but a conspicuous stripe is said to indicate the “-”
connection and the longer of the wires on the capacitor is the “+”
connection.
As always, I'd be grateful for corrections and suggestions for
improvements.
The bottom line
The box and the cable work very well; I used the setup for several
hours this morning recording Northern Cardinal songs. Once I was
saved from bad clipping by having the lower volume channel. It was a
windy day with lots of man-made noise but I couldn't hear any
problems with the recordings that I cold attribute to this set up.
And I especially like the box because it lets me shove the recorder
under my arm while one hand holds the parabola and the other holds
binoculars to let me look at what I'm recording.
The real bottom line is this display from Audacity showing the
first recording made with the mic attenuator:
Improvements
Since first posting this page I've learned that I could have made
a better choice of capacitors.
Another point that I needed help with is what to do with the three
parts of the XLR connector. Originally, I connected XLR pin #2 to to
the 'tip' and 'ring' inputs on the miniplug and connected XLR pin #3
to the ground of the miniplug. Because I was unsure of what to do I
also tried connecting both pints #1 and #3 to the ground and couldn't
detect any difference. Now I've learned that XLR pin #1 is Ground and
pins #2 and #3# are the two elements of the balanced line, so they
both carry signal, but they're out of phase. My understanding is
that XLR pin #2 gets connected to the thing leading to the 'tip' and
'ring' of the miniplug, XLR pin #1 gets connected to the ground, and
XLR pin #3 gets connected to the ground as well (or to pin #1, which
amounts to the same thing).